Pioneer VSX-D509S Owner's Manual - Page 6
Introductory Information - remote
 |
View all Pioneer VSX-D509S manuals
Add to My Manuals
Save this manual to your list of manuals |
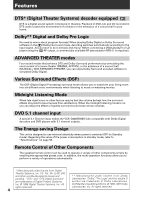
Page 6 highlights
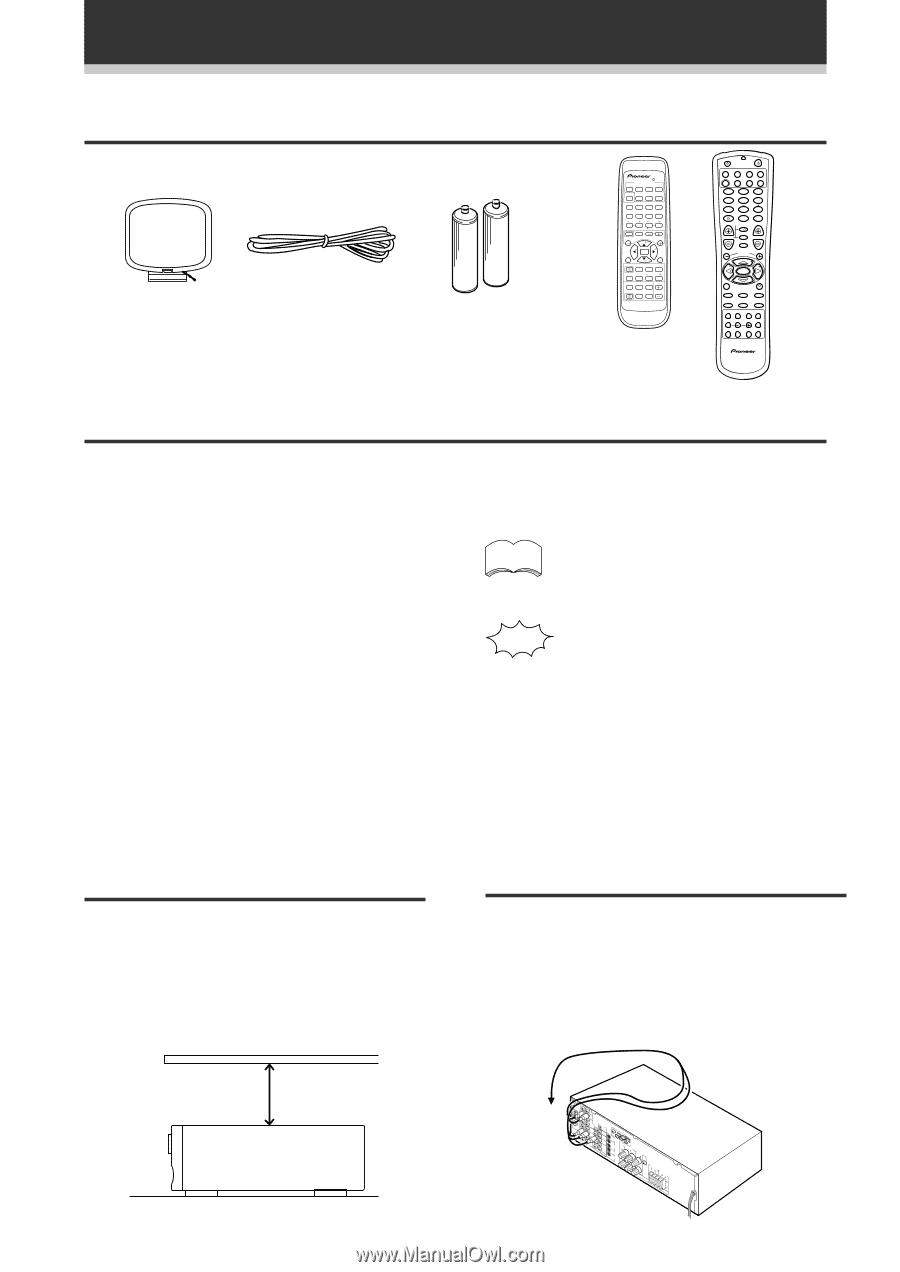
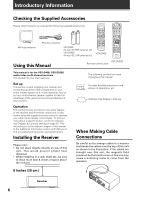
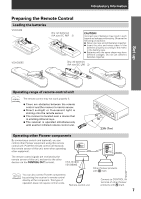
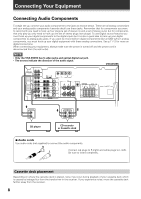
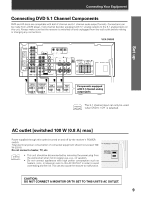
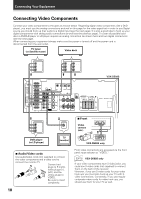
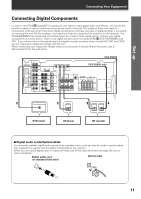
Introductory Information Checking the Supplied Accessories Please check that you've received the following supplied accessories: AM loop antenna FM wire antenna VSX-D409: AA size IEC R6P batteries (x2) VSX-D509S: AA size IEC LR6 batteries (x2) Î MULTI CONTROL DVD/LD TV/SAT VCR/DVR CD RECEIVER TUNER CD-R/ TAPE/MD TV CONT 2 DSP MODE MIDNIGHT 5.1CH 1 2 3 4 CHANNEL TEST SELECT TONE 5 6 SIGNAL ATT SELECT 7 8 CHANNEL LEVEL 9 0 EFFECT ‡ ENTER FUNC 10 DISC CH VOL TV CONTROL VOL FQ ST MENU ST ENTER TOP MENU FQ SOUCE CLASS MPX BAND 7 8 3 D.ACCESS 1¡ CHANNEL 4¢ LOUDNESS FUNCTION MUTING RECEIVER FL DIMMER REMOTE SETUP MASTER VOLUME AUDIO/VIDEO PRE-PROGRAMMED REMOTE CONTROL UNIT VSX-D409 SOURCE RECEIVER DVD RCV TV VCR MULTI CONTROL CD TUN CD-R TVC 1 2 3 MIDNIGHT 5.1CH ATT 4 5 6 SIGNAL SELECT 7 EFFECT 8 9 +10 DISC 0 ENTER TV CONTROL TV TV VOL TVFUNC MASTERVOLUME MENU CHANNEL FQ ST ST ENTER FQ 8 D.ACCESS 3 BAND 1 CLASS ¡ MPX DTV ON / OFF DTV MENU 7 4 ¢ 2 DSP TEST TONE CH SELECT CH LEVEL FL DIMMER LOUDNESS FUNCTION MUTING SETUP Î AV PRE-PROGRAMMED AND LEARNING REMOTE CONTROL UNIT Using this Manual VSX-D509S Remote control units This manual is for the VSX-D409/ VSX-D509S audio/video multi-channel receivers. It is divided into two main sections: Set up This section covers installing your receiver and connecting up all the other components in your home theater system to it. It also describes how to set up a multi-channel speaker system to take full advantage of the great surround sound features of your receiver. Operation This section shows you how to use every feature of the receiver and its remote control unit. It also covers using the supplied remote control to operate your other home theater components. To find out more about a specific button, control or indicator, see Displays & Controls starting on page 30. This will point you to the relevant chapter in the manual. In the Additional Information section (p.51-58) you'll find a troubleshooting section and specifications. Installing the Receiver Please note: • Do not place objects directly on top of this unit. This would prevent proper heat dispersal. • When installing in a rack, shelf, etc., be sure to leave more than 8 inches of space above the receiver. The following symbols are used throughout this manual: memo Provides detailed precautions and advice on operations, etc. Indicates that display is blinking. When Making Cable Connections Be careful not to arrange cables in a manner that bends the cables over the top of this unit as shown in the illustration. If the cables are brought over this unit, the magnetic field produced by the transformers in this unit may cause a humming noise to come from the speakers. 8 inches (20 cm.) Receiver 6
-
 1
1 -
 2
2 -
 3
3 -
 4
4 -
 5
5 -
 6
6 -
 7
7 -
 8
8 -
 9
9 -
 10
10 -
 11
11 -
 12
12 -
13
-
14
-
15
-
16
-
17
-
18
-
19
-
20
-
21
-
22
-
23
-
24
-
25
-
26
-
27
-
28
-
29
-
30
-
31
-
32
-
33
-
34
-
35
-
36
-
37
-
38
-
39
-
40
-
41
-
42
-
43
-
44
-
45
-
46
-
47
-
48
-
49
-
50
-
51
-
52
-
53
-
54
-
55
-
56
-
57
-
58
-
59
-
60
 |
 |