RCA HD56W66 User Manual
RCA HD56W66 Manual
 |
View all RCA HD56W66 manuals
Add to My Manuals
Save this manual to your list of manuals |
RCA HD56W66 manual content summary:
- RCA HD56W66 | User Manual - Page 1
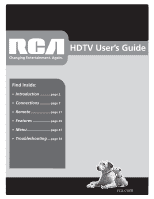
HDTV User's Guide Changing Entertainment. Again. Find Inside: • Introduction ...........page 2 • Connections ...........page 7 • Remote page 21 • Features page 29 • Menu page 41 • Troubleshooting ...page 54 rc arc.ca.ocmom - RCA HD56W66 | User Manual - Page 2
on the picture tube (or projection TV picture tubes). rca.com/productregistration. Registering this product allows us to contact you if needed. Product Information Keep your sales receipt to obtain warranty parts and service and for proof of purchase. Attach it here and record the serial and model - RCA HD56W66 | User Manual - Page 3
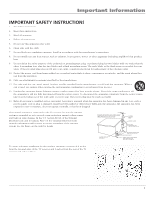
, such as power-supply cord or plug is damaged, liquid has been spilled or objects have fallen into the apparatus, the apparatus has been exposed to rain or moisture, does not operate normally, or has been dropped. If an outside antenna is connected to the TV receiver, be sure the antenna system is - RCA HD56W66 | User Manual - Page 4
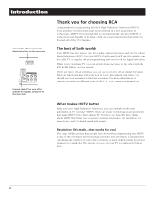
advanced HDTV, it is the most user-friendly of its kind-with on-screen instructions that guide you through all of the TV's features. The best of both worlds Your HDTV has two tuners: one for regular, analog television and one for off-air digital television (ATSC). On your HDTV's back panel - RCA HD56W66 | User Manual - Page 5
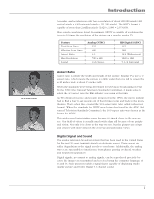
ratio is simply the width and height of the picture. Regular TVs use a 4:3 aspect ratio, which means the picture is a little wider than it is tall (a screen that is 20 inches wide is about 15 inches tall). When the standards were being developed for television broadcasting in 1941 by the NTSC (the - RCA HD56W66 | User Manual - Page 6
an uncompressed, digital video interface developed for high-bandwidth digital connection. It supports the overlay of high-resolution graphics needed by some electronic program guide navigation and other interactive services. DVI, when combined with HDCP (High bandwidth Digital Content Protection - RCA HD56W66 | User Manual - Page 7
How to Use the Remote Control to Complete the Initial Setup 18 Turn on the TV...18 Complete the Initial Setup 19 Set the Menu Language 19 Welcome Screen and Connection Confirmation 19 Complete the Auto Channel Search 19 Changing Lists and Labels 20 Automatic Convergence 20 Chapter 2: Using the - RCA HD56W66 | User Manual - Page 8
Controls 40 Front Panel Block...40 Chapter 4: Using the TV's Menu System 41 Sound Menu ...42 Picture Menu ...44 Channel Guide Menu ...46 Time Menu...47 Parental Control Menu 47 Setup Menu ...48 Chapter 5: Other Information 53 Troubleshooting ...54 Care and Cleaning...57 FCC Information ...57 - RCA HD56W66 | User Manual - Page 9
Choose Your Connection • Explanation of Jacks • Connection Instructions • Front Panel Buttons and Jacks • Plug in the TV • Put Batteries in the Remote • How to Use the Remote Control to Complete the Initial Setup • Turn on the TV • Complete the Initial Setup Changing Entertainment. Again. Graphics - RCA HD56W66 | User Manual - Page 10
before you plug any of their power cords into the wall outlet. • Turn off the TV and/or component before you connect or disconnect any cables. • Make sure all antennas and cables are properly grounded. Refer to the Important Safety Instructions on page 1. Protect Components from Overheating - RCA HD56W66 | User Manual - Page 11
to install your electronic entertainment system and to instruct you in its operation. For details about this service, call 1-888-206-3359. Components Video Connections DVD VCR TV TV Satellite VCR DVI Connection TV comDpVoInent Audio Connection TV reAc/eViver Cables Needed Connection - RCA HD56W66 | User Manual - Page 12
are controlled by the volume controls on the TV and remote control. • SUBWOOFER Provides lower bass audio frequencies from the TV to a subwoofer. Note: If you've connected a subwoofer, make sure you set the External Subwoofer option in the Sound menu. Go to page 42 for instructions. 10 Chapter 1 - RCA HD56W66 | User Manual - Page 13
better picture quality than the video jacks (VID1 and 2 Video) because the color part of the picture is separated from the black and white part of the picture. When supports the overlay of highresolution graphics needed by some electronic program guide navigation and other interactive services - RCA HD56W66 | User Manual - Page 14
Connections & Setup POWER VOL + VOL - CH MENU CH DVD TV Y PB PR DVD PLAYER AUDIO OUT L R S-VIDEO OFF-AIR ANTENNA 4 1B 1A ANTENNA DIGITAL INPUT HDTV DVI-HDTV L R COMPONENT INPUTS CMP1 CMP2 Y Y COMPOSITE INPUTS S-VIDEO V L / - RCA HD56W66 | User Manual - Page 15
three video grade cables to the CMP1 Y PB PR jacks on the back of the TV and to the Y PB PR jacks on the DVD player. Notes: If your DVD does have an S-Video jack, connect the player to the VID1 S-VIDEO jack on the TV using an S-Video cable. If your DVD player does not have an S-Video jack, connect - RCA HD56W66 | User Manual - Page 16
Connections & Setup Satellite TV S-VIDEO VIDEO L AUDIO R SATELLITE RECEIVER OFF-AIR ANTENNA 4 3C 3B 3A ANTENNA DIGITAL INPUT HDTV DVI-HDTV L R COMPONENT INPUTS CMP1 CMP2 Y Y COMPOSITE INPUTS S-VIDEO V L /MONO R - RCA HD56W66 | User Manual - Page 17
cables to the VID1 L/MONO and R audio jacks on the back of the TV and to the audio output jacks on the satellite receiver. B. Connect the video cable (instead of the video cable in step B) to the S-VIDEO jack on the TV and to the S-VIDEO output jack on the satellite receiver. 4. Connect the coaxial - RCA HD56W66 | User Manual - Page 18
• FIXED provides fixed-level audio output from the TV. This audio output is ideal for connecting to an A/V receiver that has its own volume control. • VARIABLE provides variable-level audio output. Volume levels can be controlled by the volume controls on the TV and TV remote control. 16 Chapter 1 - RCA HD56W66 | User Manual - Page 19
. VOL Decreases the volume. In the menu system, acts like left arrow button on the remote control and adjusts menu controls. VOL Increases the volume. In the menu system, acts like right arrow button on the remote control and adjusts menu controls. POWER Turns the TV on and off. Chapter 1 17 - RCA HD56W66 | User Manual - Page 20
that the menu item stands out from other menu items on the list (appears darker, brighter, or a different color). Turn on the TV Press TV on the remote, or press the Power button on the TV's front panel. Note: Pressing the TV button turns on the TV and puts the remote into TV mode. "TV mode" means - RCA HD56W66 | User Manual - Page 21
setup menus manually, press MENU and choose SETUP. English Français Español Connections & Setup Complete the Initial Setup The menu system in your TV allows the TV's features to work properly. The first time you turn on your TV, the setup screens appear. Set the Menu Language The first part of the - RCA HD56W66 | User Manual - Page 22
channels cannot be changed-they come from the signal sent by the broadcaster. If you're on a digital channel and you want to switch to an analog channel, press the ANT•CAB button on your remote . 3. The Blue center convergence menu appears with a cyan cross in the middle of the screen. If it is not, - RCA HD56W66 | User Manual - Page 23
Control Chapter Overview: • The Buttons on the Remote Control • Programming the Remote to Operate Other Components • How To Use the Remote After You've Programmed It • Volume Punchthrough Feature • Using the INPUT Button • Remote Code List Changing Entertainment. Again. Graphics contained within - RCA HD56W66 | User Manual - Page 24
reverse buttons with some DVD players. CLEAR Removes any menu or display from the screen and returns you to normal viewing. DVD Puts the remote in DVD mode and, if Autotuning is enabled, will turn on the TV and tune to the correct input channel. This button lights when you press a valid button in - RCA HD56W66 | User Manual - Page 25
to work with an audio component, follow the instructions in the Volume Punchthrough Feature section on page 26. OK When in the menu system, selects highlighted items. When watching TV, freezes the picture until you press any button on the remote to resume normal TV viewing. Please note that when you - RCA HD56W66 | User Manual - Page 26
VCR device by programming it with direct entry method. By default, the AUX•HD button is programmed for an RCA HDTV Tuner receiver. The following instructions can be used to program the remote to operate each of your components. If you want to stop the automatic code search without programming any of - RCA HD56W66 | User Manual - Page 27
component button (DVD, TV, VCR, SAT•CABLE, AUDIO, AUX•HD) to set the remote to control the component. 2. Press ON•OFF to turn the component ON or OFF. 3. Use the remote buttons that apply to that component. Notes: The remote control may not be compatible with all brands and models of components. If - RCA HD56W66 | User Manual - Page 28
the sound will be coming from the audio/video receiver. Release the VOL- button. 4. Now, test it by turning on your audio receiver or amplifier. 5. Turn on the component that is connected to the audio/video receiver or amplifier (a DVD player, for example). 6. Put the TV's remote in DVD mode by - RCA HD56W66 | User Manual - Page 29
Note for professional installers: This is a discrete input code. Remote Code List Audio Codes Programmable for the AUDIO and AUX•HD buttons. AUX/Dimensia/Lyra Wireless RCA 4004 Audio Cassette GE 4006 RCA 4006 Phono GE 4005 RCA 4005 Receiver/Tuner/AMP Aiwa 4008. 4009, 4010, 4011, 4012, 4021 - RCA HD56W66 | User Manual - Page 30
Using the Remote Control DVD codes Programmable for DVD and AUX•HD buttons. DVD Aiwa use VCR codes DVD VCR Broksonic 3075 2075 Emerson 3076 2076 Go Video 3077 2077 JVC 3078 2078 RCA 3079 2079 Samsung 3080, 3081 ........ 2080, 2081 Sanyo 3082 2082 Sony 3083 2083 Zenith 3084 2084 - RCA HD56W66 | User Manual - Page 31
Chapter 3 Using the TV's Features Chapter Overview: • Channel Banner • Digital and Analog Tuners • Autotuning • Parental Controls and V-Chip Changing Entertainment. Again. Graphics contained within this publication are for representation only. 29 - RCA HD56W66 | User Manual - Page 32
the TV or INFO button on the remote. What you see depends on the tuner you're watching (digital or analog) and the information available for the current program. This display is called the Channel Banner. The list at the bottom of this page describes the items on the Channel Banner screen (left - RCA HD56W66 | User Manual - Page 33
tuner, while an 'A' appears next to channel numbers on the analog tuner. Digital and Analog Tuners Your TV has two tuners: one for regular, analog TV channels and one for digital channels. You can switch between the two by pressing the ANT•CAB button on your remote control when the remote is in TV - RCA HD56W66 | User Manual - Page 34
... Closed caption ... Autotuning ... Convergence ... Autotuning The autotuning feature automatically tunes the TV to the correct channel/input for different components you have connected to your TV (like a VCR, DVD player, etc.) When you set up autotuning in the menu system you don't have to - RCA HD56W66 | User Manual - Page 35
is connected to the CABLE/ANTENNA jack on the back of the TV, and you want the TV to tune to channel 3 when you press the corresponding button on the remote. Reminder: make sure the component's Channel 3/4 switch is set to channel 3. VID1 or VID2 (Video Input) Component is connected to a VIDEO or - RCA HD56W66 | User Manual - Page 36
by entering a password. By default, the software inside your TV is turned "off." For instructions to turn on V-Chip, go to page 40. Note: Parental Control showing the TV age-based ratings and content themes for the US and Canada. Parental Control MAIN MENU Exit Sound Picture Channel Guide Time - RCA HD56W66 | User Manual - Page 37
the Rating Limit screen. Rating Status Field Lets you select whether the status of the age-based rating limit to the left is View or Block. Rating Field Lets you select from a list of age-based ratings you can block or view. Go back TV-MA TV-14 TV-PG TV-G TV-Y7 TV-Y Status D L S V FV View - RCA HD56W66 | User Manual - Page 38
4. Select Lock Parental Controls from the Parental Control menu for rating limits to take effect. Viewing Age-Based D, L, S, V and FV on your screen.) When you block a content theme for you block the language (L) corresponding with TV-14. The language for TV-MA is blocked as well.) Notes: - RCA HD56W66 | User Manual - Page 39
TV-MA language, do not change. Canada V-Chip Ratings Canadian TV V-Chip supports two different Canadian rating systems: English and French. Rating Canadian English V-Chip Rating System younger viewers may be part of the audience. which they may see on television. Any realistic depictions of violence - RCA HD56W66 | User Manual - Page 40
TV's Features Rating 18 ans + 16 ans + 13 ans + 8 ans + G Canadian French V-Chip Rating System dangerous acts which they may see on television. Any realistic depictions of violence will be 1. Select Canada V-Chip from the Parental Control menu. 2. Highlight English ratings or French ratings and - RCA HD56W66 | User Manual - Page 41
: 1. Press MENU on the remote control (the TV's MAIN MENU appears). 2. Select Parental Control. 3. Select US V-Chip. 4. Select V-Chip movie rating. Go back US V-Chip Canada V-Chip Front panel block Channel block Unrated/Exempt Prog. Lock parental controls ... ... ... View... ... Press < or > to - RCA HD56W66 | User Manual - Page 42
this option lets you block (disable) or unblock (enable) the TV's front panel. The remote still tunes to any channel. When using this as a Parental Control method, remove access to any remote that is capable of operating the television while you have the front panel blocked. Don't forget to lock - RCA HD56W66 | User Manual - Page 43
Chapter 4 Using the TV's Menu System Chapter Overview: • Sound Menu • Picture Menu • Channel Guide Menu • Time Menu • Parental Control Menu • Setup Menu Changing Entertainment. Again. Graphics contained within this publication are for representation only. 41 - RCA HD56W66 | User Manual - Page 44
Using the TV's Menu System Sound Go back Sound settings Sound type Sound mode SAP Sound logic Dynamic bass Headphone settings Graphic equalizer ... Stereo... Normal... Medium... ... ... The Sound menu for the regular (analog) tuner and all video inputs Sound Go back Sound settings Default Dig. - RCA HD56W66 | User Manual - Page 45
arrow to choose from the audio languages available for the program you're watching. The language you choose becomes your preferred audio language for all channels on the digital tuner until you turn the TV off. If the language you choose here is not being broadcast with a program, then the - RCA HD56W66 | User Manual - Page 46
Using the TV's Menu System PICTURE Go back Advanced picture settings Picture preset Black level Color Contrast Sharpness Color warmth Tint ... Sports... Cool... Picture Menu The Picture menu contains menus and controls to configure the following video settings: Advanced picture settings, Picture - RCA HD56W66 | User Manual - Page 47
Using the TV's Menu System PICTURE Go back Advanced picture settings Picture preset Black level Color Contrast Sharpness Color warmth Tint ... Sports... Cool... Tip: You can select a different picture preset (or set up a different personal preset) for each input. Each ANTENNA jack counts as a - RCA HD56W66 | User Manual - Page 48
Using the TV's Menu System Channel Guide Menu The Channel Guide lets you view the entire list of channel numbers and labels for the tuner you're on. Press the GUIDE button to bring up the Channel Guide menu. There are two different kinds of channel guides-the one you see depends on the tuner you're - RCA HD56W66 | User Manual - Page 49
back Sleep timer Time Wake up timer Wake up time Wake up duration Channel number Daily 00:15 12:34 pm 06:00 am 01:00 04 ABC Using the TV's Menu System Time Menu Sleep Timer Lets you set the TV to turn off after a given amount of time. Time Lets you enter the current time - RCA HD56W66 | User Manual - Page 50
Using the TV's Menu System Go back Channel setup ... Preferences ... Closed caption ... Autotuning ... Convergence ... Setup Menu The Setup menu lets you configure the TV to fit its surroundings and your preferences. To access the Setup menu, press MENU on the remote, and then select Setup - RCA HD56W66 | User Manual - Page 51
the closed caption setting. Using the TV's Menu System Closed Caption Many programs are encoded with closed-captioning information, which lets you display the audio portion of a program as text on the TV screen. Some programs on digital channels offer digital captioning information, which gives - RCA HD56W66 | User Manual - Page 52
TV's Menu System CC Dig. CC Style Go back Closed Caption Setting Analog CC Type Digital CC Type Digital CC Preset Digital CC Style On... CC1... Service digital closed captioning appears on the screen. Default Uses the settings sent by all captioning on digital channels is digital captioning-it - RCA HD56W66 | User Manual - Page 53
Closed caption ... Autotuning ... Convergence ... Using the TV's Menu System Autotuning Displays a choice list that lets you set up the TV to automatically tune to the correct input channel when you press a component button (VCR, DVD, AUX•HD or SAT•CABLE) on the remote. Go to Chapter 3 for - RCA HD56W66 | User Manual - Page 54
This page left blank intentionally. - RCA HD56W66 | User Manual - Page 55
Chapter 5 Other Information Chapter Overview: • Troubleshooting • Care and Cleaning • FCC Information • Limited Warranty • Accessory Information Changing Entertainment. Again. Graphics contained within this publication are for representation only. 53 - RCA HD56W66 | User Manual - Page 56
troubleshooting list. Note for U.S. customers: If you prefer, we can provide you with the name of an Authorized Service Representative who will visit your home for a fee to install your electronic entertainment system and to instruct you in its operation. TV Problems TV won't turn on • Press the TV - RCA HD56W66 | User Manual - Page 57
Caption in the Setup menu. Go to page 49 for more instructions. Freeze not working • The freeze feature is not available for Component video (CMP1 or CMP2) or DVI inputs. Low battery warning appears on screen • Place new batteries in remote. TV picture keeps switching between screen formats abruptly - RCA HD56W66 | User Manual - Page 58
least 60 seconds. Release the 1 button, replace the batteries, and (if necessary) program the remote again. Problems with V-Chip/Parental Controls The rating limits don't work • You must lock the settings. Go to the MAIN MENU (press MENU on your remote), select Parental Control, select Lock Parental - RCA HD56W66 | User Manual - Page 59
Other Information Care and Cleaning CAUTION: Turn OFF your TV before cleaning. You can clean the TV as required, using a soft lint-free cloth. Be sure to occasionally dust the ventilation slots in the cabinet to help assure adequate ventilation. The TV's screen may be cleaned with a soft, lint-free - RCA HD56W66 | User Manual - Page 60
, or at our option, refurbished replacement parts and picture tubes required to repair your unit. How you get service: • Call 1-877-RCA-HDTV and have your unit's date of purchase and model/serial number ready. • A representative will troubleshoot your problem over the phone. • If the representative - RCA HD56W66 | User Manual - Page 61
OR IN ANY WAY INCREASE THE SCOPE OF THIS WARRANTY. • REPAIR OR REPLACEMENT AS PROVIDED UNDER THIS WARRANTY IS THE EXCLUSIVE REMEDY OF THE CONSUMER apply. Contact your dealer for warranty information. Service calls which do not involve defective materials or workmanship are not covered by - RCA HD56W66 | User Manual - Page 62
Splitter helps you connect to a second TV or VCR. Amplified VHF/UHF/FM Antenna allows you to easily switch from the antenna signal to cable or satellite easily without disconnecting antenna. ANT200, price: $49.95 Remote Control This is the remote control that came packed with your TV. Replacements or - RCA HD56W66 | User Manual - Page 63
channel guide 46 language 19, 48 parental control 47 picture 44 setup 19, 51 sound 43 time 47 Modes, remote control 25 Mute 23, 30 O OK button 23 ON•OFF button 22 Optimized still picture 44 P Parental control lock/unlock 40 menu 34, 47 problems 56 Password 56 Picture menu 44 Picture presets 45 POWER - RCA HD56W66 | User Manual - Page 64
send any products to the Indianapolis address listed in this manual or on the carton. This will only add delays in service for your product. TTE Technology, Inc. 10330 North Meridian Street Indianapolis, IN 46290 ©2005 TTE Technology, Inc. RCA and associated marks are trademarks of THOMSON S.A. used
-
 1
1 -
 2
2 -
 3
3 -
 4
4 -
 5
5 -
 6
6 -
 7
7 -
8
-
9
-
10
-
11
-
12
-
13
-
14
-
15
-
16
-
17
-
18
-
19
-
20
-
21
-
22
-
23
-
24
-
25
-
26
-
27
-
28
-
29
-
30
-
31
-
32
-
33
-
34
-
35
-
36
-
37
-
38
-
39
-
40
-
41
-
42
-
43
-
44
-
45
-
46
-
47
-
48
-
49
-
50
-
51
-
52
-
53
-
54
-
55
-
56
-
57
-
58
-
59
-
60
-
61
-
62
-
63
-
64
 |
 |

rca.com
Find Inside:
•
Introduction
...........
page 2
•
Connections
...........
page 7
•
Remote
....................
page 21
•
Features
..................
page 29
•
Menu
........................
page 41
•
Troubleshooting
...
page 54
HDTV User’s Guide
Changing Entertainment. Again.
rca.com