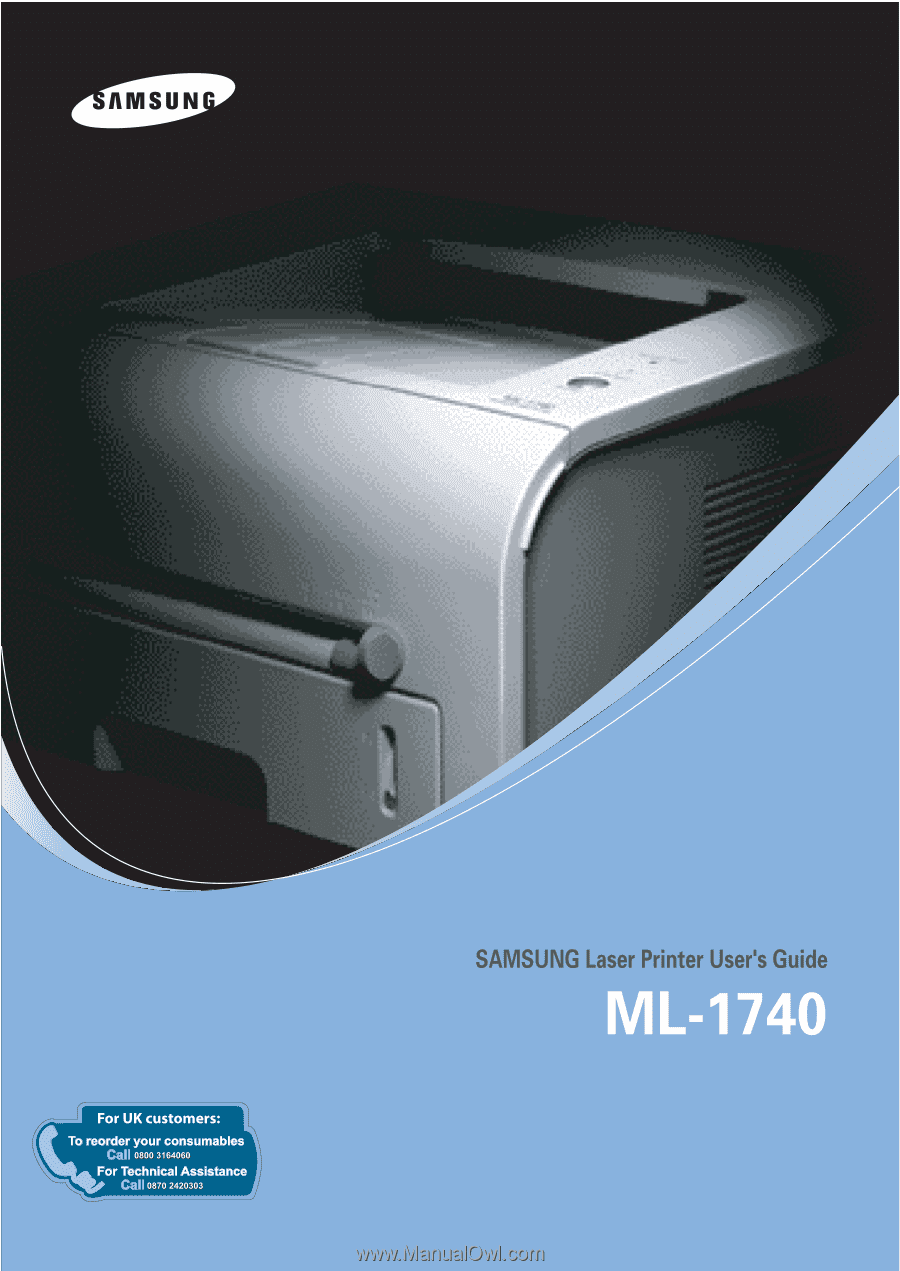
Samsung ML-1740 User Manual (ENGLISH)
Samsung ML-1740 - ML 1740 B/W Laser Printer Manual
 |
View all Samsung ML-1740 manuals
Add to My Manuals
Save this manual to your list of manuals |
Samsung ML-1740 manual content summary:
- Samsung ML-1740 | User Manual (ENGLISH) - Page 1
- Samsung ML-1740 | User Manual (ENGLISH) - Page 2
use of this manual. © 2004 Samsung Electronics Co., Ltd. All rights reserved. • ML-1740 Series and Samsung logo are trademarks of Samsung Electronics Co., Ltd Computer, Inc. • Microsoft, Windows, Windows 9x, Windows Me, Windows 2000, Windows NT and Windows XP are registered trademarks of Micorsoft - Samsung ML-1740 | User Manual (ENGLISH) - Page 3
2.3 Installing the Toner Cartridge 2.4 Loading Paper 2.6 Changing the Paper Size in the Tray 2.8 Connecting a Printer Cable 2.9 Turning the Printer on 2.11 Printing a Demo Page 2.12 Installing Printer Software 2.13 Printer Driver Features 2.14 Installing Printer software in Windows 2.15 - Samsung ML-1740 | User Manual (ENGLISH) - Page 4
3.6 Loading Paper 3.7 Using the Tray 3.7 Using the Manual Feeder 3.8 Printing on Envelopes 3.10 Printing on Labels 3. Using Help 4.5 Setting Paper Properties 4.6 Using the Toner Save Mode 4.8 Printing Multiple Pages on One Sheet Printer 4.28 Windows 9x/Me 4.28 Windows NT/2000/XP 4.29 iii - Samsung ML-1740 | User Manual (ENGLISH) - Page 5
5: MAINTAINING YOUR PRINTER Maintaining the Toner Cartridge 5.2 Redistributing Toner 5.3 Replacing the Toner Cartridge 5.4 Cleaning the Printer 5.5 Cleaning the Outside 5.5 Cleaning the Inside 5.5 Consumables and Replacement Parts 5.8 Chapter 6: SOLVING PROBLEMS Troubleshooting Checklist - Samsung ML-1740 | User Manual (ENGLISH) - Page 6
Chapter 7: APPENDIX Using Your Printer in Macintosh 7.2 Installing Software in Macintosh 7.2 Printing a Document 7.7 Using Advanced Printing Features 7.9 Using Your Printer in Linux 7.14 Installing the Printer Driver 7.14 Using the Configuration Tool 7.20 Changing LLPR Properties 7.22 - Samsung ML-1740 | User Manual (ENGLISH) - Page 7
above a Class I level during normal operation, user maintenance, or prescribed service condition. WARNING Never operate or service the printer with the protective cover removed from Laser/ Scanner assembly. The reflected beam, although invisible, can damage your eyes. When using this product - Samsung ML-1740 | User Manual (ENGLISH) - Page 8
please contact your nearest Samsung dealer. Power Saver This printer contains advanced energy conservation printer does not receive data for an extended period of time, power consumption is automatically lowered. The energy star emblem does not represent EPA endorsement of any product or service - Samsung ML-1740 | User Manual (ENGLISH) - Page 9
installation. This equipment generates, uses and can radiate radio frequency energy and, if not installed and used in accordance with the instructions dictée par l'Industrie et Sciences Canada. WARNING • Do not disassemble the printer. Doing so may give you an electric shock. • If you continuously - Samsung ML-1740 | User Manual (ENGLISH) - Page 10
1 INTRODUCTION Congratulations on the purchase of your Printer! This chapter includes: • Special Features • Printer Components • Understanding the Control Panel - Samsung ML-1740 | User Manual (ENGLISH) - Page 11
Special Features Your new printer is equipped with special features that improve the 16 pages-per-minute(A4 size). Handle paper flexibly • Standard 250-sheet tray and a 1-sheet Manual Feeder support various sizes and types of paper. • Two output trays; select either the top output tray (facedown - Samsung ML-1740 | User Manual (ENGLISH) - Page 12
save toner. See page 4.8. 1 • Allows you to print multiple pages on one single sheet of paper to save paper (N-Up printing). See page 4.10. • This printer meets Energy Star guidelines for energy efficiency. Print in various environments • You can print in Windows 95/98/Me/NT 4.0/2000/XP. • Your - Samsung ML-1740 | User Manual (ENGLISH) - Page 13
Printer Components Front View Output Support Top output tray (Face down) Control Panel Front Cover Manual Feeder guide Manual Feeder Tray Power switch Paper level indicator 1.4 INTRODUCTION - Samsung ML-1740 | User Manual (ENGLISH) - Page 14
Inside View 1 Toner cartridge Front Cover Rear View Rear output tray (Face up) Power receptacle Parallel port USB port INTRODUCTION 1.5 - Samsung ML-1740 | User Manual (ENGLISH) - Page 15
an error, such as jammed paper, the open cover or the empty toner cartridge. See "Troubleshooting Error Messages" on page 6.18. If you press the Cancel button while the printer is receiving data, the On Line/Error LED blinks red to cancel printing. In Manual Feed mode, if there is no paper in the - Samsung ML-1740 | User Manual (ENGLISH) - Page 16
and Toner Save LEDs blink, your 1 system has some problems. To solve the problem, see "Troubleshooting Error Messages manual feeder, when you select Manual Feed for Source from your software application. For detailed information, see "Using the Manual Feeder" on page 3.8. Cleaning inside printer - Samsung ML-1740 | User Manual (ENGLISH) - Page 17
NOTE 1.8 INTRODUCTION - Samsung ML-1740 | User Manual (ENGLISH) - Page 18
2 Setting Up Your Printer This chapter provides step by step information on setting up your printer. This chapter includes: • Unpacking • Installing the Toner Cartridge • Loading Paper • Connecting a Printer Cable • Turning the Printer on • Printing a Demo Page • Installing Printer Software - Samsung ML-1740 | User Manual (ENGLISH) - Page 19
packed with the following items: Toner Cartridge Power Cord CD-ROM Setup Guide Notes: • If any items are missing or damaged, notify your dealer immediately. • Components may differ from one country to another. • The CD-ROM contains the printer driver, the User's Guide, and the Adobe Acrobat - Samsung ML-1740 | User Manual (ENGLISH) - Page 20
well-ventilated and away from direct sunlight or sources of heat, cold, and humidity. See the image below for clearance space. Do not place the printer close to the edge of your desk or table! 2 Clearance Space 100 mm (3.9 in.) 100 mm (3.9 in.) 100 mm (3.9 in.) 954.6 mm(37.5 in.) 482 - Samsung ML-1740 | User Manual (ENGLISH) - Page 21
the tray or installing/ removing the toner cartridge. Be careful not to move the printer. 2 Remove the toner cartridge from its bag and remove the paper covering the cartridge. 3 Gently shake the cartridge from side to side to distribute the toner evenly inside the cartridge. CAUTION: • To prevent - Samsung ML-1740 | User Manual (ENGLISH) - Page 22
securely closed. If the cover is not firmly closed, printing errors may occur when you print. Note: When printing text at 5% coverage, you can expect a toner cartridge life of approximately 3,000 pages (1,000 pages for the toner cartridge that is shipped with the printer). SETTING UP YOUR - Samsung ML-1740 | User Manual (ENGLISH) - Page 23
is very light, it may be moved when you use it; for example, when opening/closing the tray or installing/ removing the toner cartridge. Be careful not to move the printer. 2 Push down the pressure plate until it locks in position. 3 Prepare a stack of paper for loading by flexing or fanning them - Samsung ML-1740 | User Manual (ENGLISH) - Page 24
want to change the paper size in the tray, see "Changing the Paper Size in the Tray" on page 2.8. 6 Slide the tray back into the printer. SETTING UP YOUR - Samsung ML-1740 | User Manual (ENGLISH) - Page 25
to adjust for the paper length. 2 Pinch the side guide as shown and slide it to the left flush against the paper. Notes: • Do not push the width guide far enough to cause the material to warp. • If you do not adjust the width guide, it may cause paper jam. 2.8 SETTING UP YOUR PRINTER - Samsung ML-1740 | User Manual (ENGLISH) - Page 26
Note: To connect the printer to the parallel port printer. Push the metal clips down to fit inside the notches on the cable plug. To the parallel port on your 3 Connect the other end of the cable to the parallel interface port on your computer, and tighten the screws. See your computer User's Guide - Samsung ML-1740 | User Manual (ENGLISH) - Page 27
on the back of the printer. To the USB port on your computer 3 Connect the other end of the cable to the USB port on your computer. See your computer User's Guide if you need help. Note: For using a USB cable, you must be running Windows 98/ Me/2000/XP, or Macintosh with OS - Samsung ML-1740 | User Manual (ENGLISH) - Page 28
. To the AC outlet CAUTION: • The fusing area at the rear portion of the inside of your printer is hot when powered. Be careful not to be burned when accessing this area. • Do not disassemble the printer when it is powered. Doing so may give you an electric shock. SETTING UP YOUR - Samsung ML-1740 | User Manual (ENGLISH) - Page 29
Printing a Demo Page Print a demo page to make sure that the printer is operating correctly. 1 Hold down the Cancel button for about 2 seconds to print a demo page. 2 The Demo page shows the printer's current configuration. ML-1740 Series 2.12 SETTING UP YOUR PRINTER - Samsung ML-1740 | User Manual (ENGLISH) - Page 30
Windows printing software, Macintosh printing software, Linux printing software, on-line User's Guide and Acrobat Reader to view the User's Guide. 2 If you are printing from Windows You can install the following printer software using the CD-ROM. • Printer driver for windows. Use this driver - Samsung ML-1740 | User Manual (ENGLISH) - Page 31
general overview of features supported by your printer drivers. Feature Toner Save Print quality option Printer Driver Win9x/Me Win2000/XP NT4.0 Y Y Y Y Y Y Y Y Y Y Y Y Y Y Y Y Y Y Y Y Y Y Y Y Macintosh N Y N Y N Y Y N NOTES: • Some of feature are not supported on Mac - Samsung ML-1740 | User Manual (ENGLISH) - Page 32
You have one of the following operating systems: Windows 95, Windows 98, Windows Me, Windows NT 4.0, Windows 2000 or Windows XP. • Internet Explorer 5.0 or later. Installing Printer Software 1 Place the CD-ROM in the CD-ROM drive. Installation will start automatically. If the CD-ROM drive does - Samsung ML-1740 | User Manual (ENGLISH) - Page 33
printer driver, and User's Guide. This is recommeded for most users. •Custom Install: Allows you to choose the language of the software and the components you want to install. After selecting the language and the component(s), click Next. •View User's Guide: Opens Samsung ML-1740 Series User's Guide - Samsung ML-1740 | User Manual (ENGLISH) - Page 34
Finish. 2 NOTES: • When you want to use your printer with the parallel cable, remove the USB cable and connect the parallel cable. Then repair the printer driver; select Start → Programs → Samsung ML-1740 Series → Printer Maintenance → Repair → Printer. If you have replaced the parallel cable with - Samsung ML-1740 | User Manual (ENGLISH) - Page 35
Printer software Repair is required if your installation fails. 1 From the Start menu, select Programs. 2 Select Samsung ML-1740 Series and then Printer Maintenance. 3 Select Repair and then click Next. NOTE: If your printer is not connected to the computer, the Connect Samsung ML-1740 Series window - Samsung ML-1740 | User Manual (ENGLISH) - Page 36
of the software, you can change the display language. If you installed the Status Monitor, the selected language is applied to it. 1 From the Start menu, select Programs. 2 Select Samsung ML-1740 Series and Language Selection. 3 Select the language you want from the language selection window and - Samsung ML-1740 | User Manual (ENGLISH) - Page 37
the User's Guide After installing the printer software, you can view User's Guide in PDF format at any time from your Windows desktop. 1 From the Start menu, select Programs. 2 Select Samsung ML-1740 Series and View User's Guide. Adobe Acrobat automatically runs and then the User's Guide opens. NOTE - Samsung ML-1740 | User Manual (ENGLISH) - Page 38
3 Using Print Materials This chapter will help you understand types of paper you can use with this printer and how to properly load paper in the tray for the best print quality. This chapter includes: • Choosing Paper and Other Materials • Selecting the Output - Samsung ML-1740 | User Manual (ENGLISH) - Page 39
adjusters of the paper feeder. • Weight: Your printer supports paper weight as follows: • 16~24 lbs (60~90 g/ 16~43 lbs (60~163 g/m2) bond for the manual feeder • Brightness: Some papers are whiter than others and problems that may require service. This service is not covered by the warranty or - Samsung ML-1740 | User Manual (ENGLISH) - Page 40
Sizes and Capacities Size Input Source/Capacitya Tray Manual Feeder Plain Paper Letter (8.5 x 11 in.) 250 Legal (8.5 x 14 in.) 250 Executive (7.25 x 10.5 be reduced. b. If you are experiencing excessive jamming, feed one sheet at a time through the manual feeder. USING PRINT MATERIALS 3.3 - Samsung ML-1740 | User Manual (ENGLISH) - Page 41
that is too smooth or too rough. • Colored paper should be of the same high quality as white photocopy paper. The pigments must withstand the printer's fusing temperature of 400°F (205°C) for 0.1 second without deterioration. Do not use paper with a colored coating that was added after the paper was - Samsung ML-1740 | User Manual (ENGLISH) - Page 42
open it. Notes: • If paper coming out of the top output tray has problems, such as excessive curl, try printing to the rear output tray. • To avoid paper jams, do not open or close the rear output tray while the printer is printing. Printing to the Top Output Tray (Face down) The top output - Samsung ML-1740 | User Manual (ENGLISH) - Page 43
prints to the rear output tray if it is open. Paper comes out of the printer face-up, and each time a sheet of paper comes out, it falls down from the printer. Printing from the Manual Feeder to the rear output tray provides the straight paper path. Opening the rear output tray might - Samsung ML-1740 | User Manual (ENGLISH) - Page 44
tray then close the tray. The pages will stack on the top output tray. 3 Loading Paper Proper paper loading helps prevent paper jams and ensure trouble-free printing. Do not remove the tray while a job is printing. Doing so may cause a paper jam. See "Sizes and Capacities" on page 3.3 for acceptable - Samsung ML-1740 | User Manual (ENGLISH) - Page 45
the paper guide against the print material without bending the paper. 2 When you print a document, you must select Manual Feed for Source from the software application, and then select the correct paper size and type. For details, see page 4.6. 3 Press the Cancel button on the printer to start - Samsung ML-1740 | User Manual (ENGLISH) - Page 46
Feed mode, you can't cancel a print job by pressing the Cancel button. To cancel a print job in Manual Feed mode: 1 Turn the printer off. 2 Double-click the icon at right bottom of the window. Double-click this icon to view the queue of the print jobs. 3 3 Select a job you want to cancel. 4 For - Samsung ML-1740 | User Manual (ENGLISH) - Page 47
Guidelines • Only use envelopes recommended for laser printers. Before loading envelopes in the manual feeder, make sure that they are undamaged and are not stuck together. • Do not feed stamped envelopes. • Never use envelopes with clasps, snaps, windows, coated lining, or self-stick adhesives - Samsung ML-1740 | User Manual (ENGLISH) - Page 48
, you must select Manual Feed for Source from the software application, and then select the correct paper size and type. For details, see page 4.6. 4 Press the Cancel button to start feeding. Note: Please be careful when you open the rear cover. The inside of the printer maybe hot. 5 Printing - Samsung ML-1740 | User Manual (ENGLISH) - Page 49
• Only use labels recommended for laser printers. • Verify that the labels' printer. • Do not use labels that are separating from the backing sheet or are wrinkled, bubbled, or otherwise damaged. 1 Open the rear output tray. Load labels in the manual feeder with print side up. 2 Adjust the guide - Samsung ML-1740 | User Manual (ENGLISH) - Page 50
Manual Feed for Source from the software application, and then select the correct paper size and type. For details, see page 4.6. Note: Please be careful when you open the rear cover. The inside of the printer use transparencies recommended for use in laser printers. • Ensure that transparencies are - Samsung ML-1740 | User Manual (ENGLISH) - Page 51
When you print on transparencies, you must select Manual Feed for Source from the software application, and then select the correct paper size and type. For details, see page 4.6. Note: Please be careful when you open the rear cover. The inside of the printer maybe hot. 4 Press the Cancel button to - Samsung ML-1740 | User Manual (ENGLISH) - Page 52
and other custom-sized materials can be printed with this printer. The minimum size is 76 by 127mm(3.0 by 5.0 the Manual Feeder first. If you want to print in landscape mode, make this selection through your software. Inserting guide to fit the width of the material. USING PRINT MATERIALS 3.15 - Samsung ML-1740 | User Manual (ENGLISH) - Page 53
Manual Feed for Source from the software application, and then select the correct paper size and type. For details, see page 4.6. Note: If the size of your print material is not listed in the Size box in the Paper tab of the printer driver the printer a mechanical trouble. 3.16 USING PRINT MATERIALS - Samsung ML-1740 | User Manual (ENGLISH) - Page 54
below. Adjust the guides to fit the width of the paper stack. Load with the design face down, bottom edge towards the printer. 3 Load with the design face up, top edge towards the printer. 2 When you print, configure the paper source, type and size properly in the software application. For - Samsung ML-1740 | User Manual (ENGLISH) - Page 55
NOTE 3.18 USING PRINT MATERIALS - Samsung ML-1740 | User Manual (ENGLISH) - Page 56
printing tasks. This chapter includes: • Printing a Document • Setting Paper Properties • Using the Toner Save Mode • Printing Multiple Pages on One Sheet of Paper (N- Up Printing) • Scaling Your • Printing Watermarks • Printing Overlays • Using the Status Monitor • Setting Up Locally Shared Printer - Samsung ML-1740 | User Manual (ENGLISH) - Page 57
on the application program you are using. Refer to the User's Guide of your software application for the exact printing procedure. 1 Open the document you want to print. 2 Select Print from the File menu. The Print window is displayed (It may look slightly different depending on your application - Samsung ML-1740 | User Manual (ENGLISH) - Page 58
4 Now you see the Samsung ML-1740 series Properties window, which allows you to access all the information you will need when using your printer. The Layout tab is first displayed. The preview image shows the sample page with the settings you currently specified. 4 If necessary, select the - Samsung ML-1740 | User Manual (ENGLISH) - Page 59
Settings, and then Printers. For Windows XP, select Printers and Faxes. 3 Select the Samsung ML-1740 Series printer. 4 Click the right mouse button on the printer icon and: • In Windows 9x/Me, select Properties. • In Windows 2000/XP, select Printing Preferences. • In Windows NT, select Document - Samsung ML-1740 | User Manual (ENGLISH) - Page 60
print job from the Printers folder 1 From the windows Start menu, select Settings. 2 Select Printers to open the Printers window, and double- click the Samsung ML-1740 Series icon. 3 From the Document menu, select Cancel Printing (Windows 9x/Me) or Cancel (Windows NT 4.0/2000/XP). 4 Using a Favorite - Samsung ML-1740 | User Manual (ENGLISH) - Page 61
paper handling needs when you access the printer properties. See page 4.2 for more information on accessing printer properties. Click the Paper tab to listed in the Size box, click Add Custom. When the Custom Page Size window appears, set the paper and click OK. The size setting appears in the - Samsung ML-1740 | User Manual (ENGLISH) - Page 62
. see page 3.8. If the paper source is set to Auto Select, the printer automatically selects paper from the Manual Feeder first and then from the Tray. Make sure the Type is set to Printer Default. If you load a different type of print materials, select the corresponding paper type. For further - Samsung ML-1740 | User Manual (ENGLISH) - Page 63
Using the Toner Save Mode Toner Save mode allows the printer to use less toner on each page. Selecting this option will extend the life of your toner cartridge and reduce your cost per page, but will reduce print quality. There are two ways to enable the Toner Save mode: From the Control Panel Press - Samsung ML-1740 | User Manual (ENGLISH) - Page 64
application 1 To change the print settings from your software application, access the printer properties. See page 4.2. 2 Click the Graphics tab, and select the Toner Save option. You can select from: •Printer Setting: If you select this option, this feature is determined by the setting you - Samsung ML-1740 | User Manual (ENGLISH) - Page 65
in size and arranged on the sheet. You can print up to 16 pages on one sheet. 1 To change the print settings from your software application, access the printer properties. See page 4.2. 2 From the Layout tab, choose Multiple Pages per Side in the Type drop-down list. 3 Select the number of pages - Samsung ML-1740 | User Manual (ENGLISH) - Page 66
4 Select the page order, if necessary. 12 13 21 34 Right then Down 24 Down then Right 43 Left then Down 31 42 Down then Left 5 Click the Paper tab, select the paper source, size and type. 6 Click OK and print the document. 4 PRINTING TASKS 4.11 - Samsung ML-1740 | User Manual (ENGLISH) - Page 67
Scaling Your Document You can scale your print job on a page. 1 To change the print settings from your software application, access the printer properties. See page 4.2. 2 From the Layout tab, select Reduce/Enlarge in the Type drop-down list. 3 Enter the desired scaling rate in the Percentage input - Samsung ML-1740 | User Manual (ENGLISH) - Page 68
size. This A can be useful when you want to check fine details on a small document. 1 To change the print settings from your software application, access the printer properties. See page 4.2. 2 From the Layout tab, select Fit to Page in the Type drop- down list. 4 3 Select the correct size - Samsung ML-1740 | User Manual (ENGLISH) - Page 69
paper, for the purpose of pasting the sheets together to form one poster-size document. 1 To change the print settings from your software application, access the printer properties. See page 4.2. 2 Click the Layout tab, select Poster in the Type drop-down list. 3 Configure the poster option: You can - Samsung ML-1740 | User Manual (ENGLISH) - Page 70
Specify an overlap in millimeter or inch to make it easier to reconstruct the resulting poster. 4 Click the Paper tab, select the paper source, size and type. 5 Click OK and print the document. You can complete the poster by reconstructing the results. 4 PRINTING TASKS 4.15 - Samsung ML-1740 | User Manual (ENGLISH) - Page 71
on accessing printer properties. Click the Graphics tab to display the properties shown below. ➀ ➁ ➂ Property ➀ Resolution ➁ Toner Save Description a document. Selecting this option will extend the life of your toner cartridge and reduce your cost per page without a significant reduction in print - Samsung ML-1740 | User Manual (ENGLISH) - Page 72
Property ➂ Advanced Options Description You can set advanced settings by clicking the Advanced Options button. Darkness 4 Use this option to lighten or darken the image appearance in your print. • Normal: This setting is for normal documents. • Light: This setting is for bolder line widths or - Samsung ML-1740 | User Manual (ENGLISH) - Page 73
-Type Options This option determines what the driver tells the printer about how to image the text in your document. Select the appropriate setting according to the status of your document. • Download as Bit Image: When this option is selected, the driver will download the font data as bitmap images - Samsung ML-1740 | User Manual (ENGLISH) - Page 74
be modified or you can add new ones to the list. Using an existing Watermark 1 To change the print settings from your software application, 4 access the printer properties. See page 4.2. 2 Click the Extras tab, and select the desired watermark in the Watermark drop-down list. You will see the - Samsung ML-1740 | User Manual (ENGLISH) - Page 75
Creating a Watermark 1 To change the print settings from your software application, access the printer properties. See page 4.2. 2 Click the Extras tab, and click the Edit button in the Watermark section. The Watermarks window appears. 3 You can enter the desired text message in the Watermark - Samsung ML-1740 | User Manual (ENGLISH) - Page 76
Editing a Watermark 1 To change the print settings from your software application, access the printer properties. See page 4.2. 2 Click the Extras tab, and click the Edit button in the Watermark section. The Watermarks window appears. 3 Select the watermark you want to edit in the Current - Samsung ML-1740 | User Manual (ENGLISH) - Page 77
you wish them to appear when printed as an overlay. If needed, save the file for later use. 2 To change the print settings from your software application, access the printer properties. See page 4.2. 3 Click the Extras tab, and click Edit button in the Overlay section. 4.22 PRINTING TASKS - Samsung ML-1740 | User Manual (ENGLISH) - Page 78
, click Create Overlay. 5 In the Create Overlay window, type a name of up to eight characters in the File name box. Select the destination 4 path, if necessary. (The default is C:\Formover). 6 Click Save. You - Samsung ML-1740 | User Manual (ENGLISH) - Page 79
you want to print. 2 To change the print settings from your software application, access the printer properties. See page 4.2. 3 Click the Extras tab. 4 Select the , you can also load the file when you access the Load Overlay window. After you select the file, click Open. The file is now shown - Samsung ML-1740 | User Manual (ENGLISH) - Page 80
downloaded with your print job and printed on your document. Note: The resolution of the overlay document must be the same 4 as that of the document you will print with the overlay. Deleting a Page Overlay You can delete page overlays that are no longer used. 1 In the printer properties window - Samsung ML-1740 | User Manual (ENGLISH) - Page 81
Monitor 1 Double click the Status monitor icon on the Windows task bar. Double click this icon. Or, select Programs from Start, Samsung ML-1740 Series , and Samsung Printer Status Monitor. 2 The Samsung ML-1740 Series Status monitor window appears. You can change the Status Monitor program setting - Samsung ML-1740 | User Manual (ENGLISH) - Page 82
which indicates an error occurs in your printer. Note: When the Status monitor window appears to indicate an error, you can see the corresponding solution. Click this icon to cancel the current print job. Error message is displayed. To solve the problem - Samsung ML-1740 | User Manual (ENGLISH) - Page 83
computer, which is called "host computer", on the network. The printer can be shared by other users on the network through a Windows 9x, Me, 2000, XP or NT 4.0 network printer connection. Windows 9x/Me Setting Up Host Computer 1 Start Windows. 2 From the Start menu, select Control Panel, and double - Samsung ML-1740 | User Manual (ENGLISH) - Page 84
column. 3 Click the shared name. 4 From the Start menu, select Settings and Printers. (Windows NT/2000) From the Start menu, select Printers and Faxes. (Windows XP) 5 Double-click your printer icon. 6 From the Printer menu, select Properties. 7 Press the Ports tab, and click Add Port. PRINTING TASKS - Samsung ML-1740 | User Manual (ENGLISH) - Page 85
8 Select Local Port, and click New Port. 9 Fill in the Enter a port name field, and enter the shared name. 10 Click OK, and click Close. 11 Click OK. (Windows NT) Click Apply, and click OK. (Windows 2000/XP) 4.30 PRINTING TASKS - Samsung ML-1740 | User Manual (ENGLISH) - Page 86
5 Maintaining Your Printer This chapter provides suggestions for maintaining the toner cartridge and the printer. This chapter includes: • Maintaining the Toner Cartridge • Cleaning the Printer • Consumables and Replacement Parts - Samsung ML-1740 | User Manual (ENGLISH) - Page 87
its package until ready for use. • Do not refill the toner cartridge. The printer warranty does not cover damage caused by using a refilled cartridge. • Store toner cartridges in the same environment as the printer. • To prevent damage to the toner cartridge, do not expose it to light for more than - Samsung ML-1740 | User Manual (ENGLISH) - Page 88
1 Grasp the front cover and pull it toward you to open. 5 2 Push the toner cartridge down and remove it from the printer. Cautions: • Avoid reaching too far into the printer. The fusing area may be hot. • To prevent damage to the toner cartridge, do not expose it to light for more than a few minutes - Samsung ML-1740 | User Manual (ENGLISH) - Page 89
errors may occur when you print. Replacing the Toner Cartridge If the print remains light after redistributing toner (see page 5.3), replace the toner cartridge. Remove the old cartridge and install a new toner cartridge. See "Installing the Toner Cartridge" on page 2.4. 5.4 MAINTAINING YOUR PRINTER - Samsung ML-1740 | User Manual (ENGLISH) - Page 90
, follow the cleaning procedures below each time the toner cartridge is replaced or if print quality problems occur. Note: While cleaning the inside of the printer, be careful not to touch the transfer roller (located underneath the toner cartridge). Oil from your fingers can cause print quality - Samsung ML-1740 | User Manual (ENGLISH) - Page 91
for more than a few minute. Cover it with a piece of paper, if necessary. Also, do not touch the black transfer roller inside the printer. 4 Reinsert the toner cartridge and close the cover. Make sure that the cover is securely closed. If it is not firmly closed, printing errors may occur when you - Samsung ML-1740 | User Manual (ENGLISH) - Page 92
experiencing blurred, faded or smeared printouts. Printing a cleaning sheet cleans the drum inside the toner cartridge. This process will produce a page with toner debris, which should be discarded. 1 Ensure that the printer is turned on and in the Ready mode with paper loaded in the tray. 2 Press - Samsung ML-1740 | User Manual (ENGLISH) - Page 93
to maintain top performance and avoid print quality problems and paper feed problems resulting from worn parts. The following items Samsung dealer or the place where you bought your product. We strongly recommend that items be installed by a trained service personnel. 5.8 MAINTAINING YOUR PRINTER - Samsung ML-1740 | User Manual (ENGLISH) - Page 94
do if you encounter an error while using your printer. This chapter includes: • Troubleshooting Checklist • Solving General Printing Problems • Clearing Paper Jams • Solving Print Quality Problems • Troubleshooting Error Messages • Common Windows Problems • Common Macintosh Problems • Common Linux - Samsung ML-1740 | User Manual (ENGLISH) - Page 95
the software application to ensure you are using the proper printer driver and communication port. If the page is interrupted during printing, go to "Solving General Printing Problems" on page 6.3. If completing the checklist does not resolve the printer problem, check the following troubleshooting - Samsung ML-1740 | User Manual (ENGLISH) - Page 96
. Select Samsung ML-1740 Series in the Printer folder in Windows as your default printer. Check the printer for the following: • The printer cover is not closed. • Paper is jammed. • No paper is loaded. • The toner cartridge is not installed. If a printer system error occurs, contact your service - Samsung ML-1740 | User Manual (ENGLISH) - Page 97
is 16(A4) or 17(Letter) pages per minute. If using Windows 9x/ Me, the Spooling Setting may be set incorrectly. From the Start menu, choose Settings and Printers. Right-click the Samsung ML-1740 Serise printer icon, choose Properties, click the Details tab, and then choose the Spool Settings - Samsung ML-1740 | User Manual (ENGLISH) - Page 98
. The wrong printer driver was selected. Check the application's printer selection menu to ensure that your printer is 6 selected. The software application is malfunctioning. Try printing a job from another application. The operating system is malfunctioning. If printing from Windows (any - Samsung ML-1740 | User Manual (ENGLISH) - Page 99
, may be defective. Contact a service representative. The setting in the software application is wrong. Print the document with selecting Download as Bit Image in the Advanced options of the Graphic properties. ATTENTION: If you have any printing problem after your printer prints about 60,000 - Samsung ML-1740 | User Manual (ENGLISH) - Page 100
See "Paper Specifications" on page 7.25. • Paper that is outside of the supported size range has been used. See "Paper Specifications" on page 7.25. If a the printer. In the Paper Exit Area Note: Paper jams in this area may result in loose toner on the 6 page. If you get any toner on PROBLEMS 6.7 - Samsung ML-1740 | User Manual (ENGLISH) - Page 101
caught in the feed rollers. Then pull the paper gently out. Note: Please be careful when you open the rear cover. The inside of the printer is still hot. 4 Close the rear output tray. 5 Open and close the front cover. Printing can be resumed. 6.8 SOLVING - Samsung ML-1740 | User Manual (ENGLISH) - Page 102
the visible edge from the tray. Make sure that all of the paper is properly aligned in the tray. 6 3 Slide the tray back into the printer. 4 Open and close the front cover. Printing can be resumed. SOLVING - Samsung ML-1740 | User Manual (ENGLISH) - Page 103
Toner Cartridge 1 Open the front cover. 2 Push the toner cartridge down and remove it from the printer. 3 Gently pull the paper toward you. 4 Check that there is no other paper in the printer. 5 Reinstall the toner cartridge, and then close the cover. Printing can be resumed. 6.10 SOLVING PROBLEMS - Samsung ML-1740 | User Manual (ENGLISH) - Page 104
occur when you print on the A5-sized paper: 1 Open the input tray and load paper into the tray as shown below. 2 Open the Samsung ML-1740 Series Properties window, set the paper size to A5(5.8x8.3 in./148x210mm) from the Paper tab. 3 From the Orientation option of the Layout tab, set the Rotate - Samsung ML-1740 | User Manual (ENGLISH) - Page 105
2.6. Ensure that the adjustable guides are positioned correctly. • printer (see page 5.5). • Adjust the print resolution from the printer properties (see page 4.16). • Ensure that Toner Save Mode is off (see page 4.8). • Clear general printing problems (see page 6.3). • Install a new toner cartridge - Samsung ML-1740 | User Manual (ENGLISH) - Page 106
Problem Solution Light or faded print If a vertical white streak or faded area appears on the page: • The toner supply is low. You may be able to temporarily extend the toner cartridge life. See "Redistributing Toner" on page 5.3. If this does not improve the print quality, install a new toner - Samsung ML-1740 | User Manual (ENGLISH) - Page 107
, install a new toner cartridge. See "Installing the Toner Cartridge" on page 2.4. • Parts of the printer may have toner on them. If the defects occur on the back of the page, the problem will likely correct itself after a few more pages. • The fusing assembly may be damaged. Contact a service - Samsung ML-1740 | User Manual (ENGLISH) - Page 108
seams on the reverse side. Printing on seams can cause problems. • If background scatter covers the entire surface area of a printed page, adjust the print resolution through your software application or the printer properties. • If characters are improperly formed and producing hollow images - Samsung ML-1740 | User Manual (ENGLISH) - Page 109
. Install a new toner cartridge. • The printer may require repair. Contact a service representative. Loose toner Clean the inside of the printer. • Check the paper type and quality. See "Paper Specifications" on page 7.25. • Install a new toner cartridge. • If the problem persists, the printer may - Samsung ML-1740 | User Manual (ENGLISH) - Page 110
: • The toner cartridge may be installed improperly. Remove the cartridge and reinsert. • The toner cartridge may be defective. Install a new toner cartridge. See "Installing the Toner Cartridge" on page 2.4. • If the problem persists, the printer may require repair. Contact a service representative - Samsung ML-1740 | User Manual (ENGLISH) - Page 111
The front cover is open. Close the front cover. • The toner cartridge is empty. Remove the old toner cartridge and install a new one. See "Installing the Toner Cartridge" on page 2.4. • You pressed the Cancel button while the printer is receiving data. • In Manual Feed mode, there is no paper in the - Samsung ML-1740 | User Manual (ENGLISH) - Page 112
on in the driver, it will also cause this message. Close all other applications, reboot Windows, and try printing again. Note: Refer to Microsoft Windows 9x, Me, NT 4.0, 2000 or XP User's Guide that came with your PC for further information on Windows error messages. 6 SOLVING PROBLEMS 6.19 - Samsung ML-1740 | User Manual (ENGLISH) - Page 113
Common Macintosh Problems Problems in the Chooser Problem Possible Cause and Solution The printer driver icon does not appear in Chooser. Software is not installed correctly. • Install the printer driver. See page 7.3. • Make sure that you are using a high-quality cable. The printer name does - Samsung ML-1740 | User Manual (ENGLISH) - Page 114
Problems Problem install them manually. Refer to your distribution's installation manual for more details about installing additional packages. I just installed in /etc/printcap, therefore it is not possible for the Samsung Printer Package to change the default when some queues have otherwise - Samsung ML-1740 | User Manual (ENGLISH) - Page 115
the PostScript data conforms to the Adobe Document Structing Conventions. Problems may arise when using N-up and other features relying on (Windows) printer. To be able to configure and use SMB-shared printers (such as printers shared on a Windows machine), you need to have a correct installation of - Samsung ML-1740 | User Manual (ENGLISH) - Page 116
Unix applications may generate noncompliant PostScript output that may not be supported by Ghostscript, or even the printer itself in PostScript mode. You can try to capture the the application is at probably fault, contact your software vendor to inform them of the issue. SOLVING PROBLEMS 6.23 - Samsung ML-1740 | User Manual (ENGLISH) - Page 117
NOTE 6.24 SOLVING PROBLEMS - Samsung ML-1740 | User Manual (ENGLISH) - Page 118
7 APPENDIX This chapter includes: • Using Your Printer in Macintosh • Using Your Printer in Linux • Printer Specifications • Paper Specifications - Samsung ML-1740 | User Manual (ENGLISH) - Page 119
- iBook series • USB interface Macintosh System Requirement: Mac OS 8.6 or later NOTE: • Mac OS 10.0 version is not supported. • Your printer must be connected directiv to your Macintosh using a USB cable. • The ML-1740 Series does not support Postscript printing. Ensure that the application you are - Samsung ML-1740 | User Manual (ENGLISH) - Page 120
Installing Software Mac OS 8.6 ~ 9.x 1 Turn the machine and computer off and plug the supplied Double-click the Classic folder. 6 Double-click the West folder. 7 Double-click the Samsung Laser Printer installer icon next to each language to select the correct one. 8 Click Continue and then click - Samsung ML-1740 | User Manual (ENGLISH) - Page 121
9 The Samsung Laser Printer installer window opens. Select the installation type. The window provides the following two options for software installation: • Easy Install (recommended method): This option installs the SPL driver. • Custom Install : This option allows you to choose which components - Samsung ML-1740 | User Manual (ENGLISH) - Page 122
OS 10.1, double-click the Installer for 10.1 icon. For Mac OS 10.2.X, double-click the Installer for 10.2 or later icon. 7 Click Continue, and then click Continue. 8 When the Easy Install window appears, click Install. If you already installed the Samsung SPL II printer driver, click Update. 9 Click - Samsung ML-1740 | User Manual (ENGLISH) - Page 123
of the Chooser window. 3 Click Samsung ML-1740 and close the Chooser window. 4 The message window indicating that you have changed your current printer appears. Click OK. A SAMSUNG SPL II printer icon is created on your desktop. Mac OS 10.x 1 Click Printer Center. 2 Select Samsung ML-1740 and then - Samsung ML-1740 | User Manual (ENGLISH) - Page 124
Printing a Document When you print with a Macintosh computer, you need to check the printer software setting in each application you use. Follow these steps to print from a Macintosh: 1 7 options, see page 4.19. NOTE: • The Watermark feature is not supported on Mac OS 9.1 or higher. APPENDIX 7.7 - Samsung ML-1740 | User Manual (ENGLISH) - Page 125
OS 10.x, select Samsung ML-1740 in the Format for option. œ¤Mac OS 10.1 4 Open the File menu and click Print. The SAMSUNG SPL II Printer window appears. 5 Choose the number of copies and indicate which pages you want to print. For advanced printing features, select an option. For details, see page - Samsung ML-1740 | User Manual (ENGLISH) - Page 126
OS 10.2 œ 6 Click Print when you finish setting the options. Using Advanced Printing Features Mac OS 8.6 ~ 9.x 7 The SAMSUNG SPL II Printer window contains five categories of advanced properties. Listed below is the name of each property. - Darkness/Quality - Layout - Color - Background - Samsung ML-1740 | User Manual (ENGLISH) - Page 127
Darkness/Quality Select the print darkness. Layout Color 7.10 APPENDIX Select the print resolution. Select the number of pages you want to print on one sheet of paper. The pages are smaller and arranged on the sheet. To print the border of each page, check this box. Select the grayscale mode. œ - Samsung ML-1740 | User Manual (ENGLISH) - Page 128
the corresponding paper source. If Auto Select is set, the machine automatically selects the print material from the paper tray, in the following order: the manual feeder and the paper tray. 7 APPENDIX 7.11 - Samsung ML-1740 | User Manual (ENGLISH) - Page 129
OS 10.x The Samsung SPL II Print window contains three categories of advanced properties. Listed below is the name of each property. - Layout - Output Option - Print Quality - Paper Source - Summary NOTE: Some of feature are not supported on Mac OS 10.X such as Paper Type, Grayscale and Back & White - Samsung ML-1740 | User Manual (ENGLISH) - Page 130
the corresponding paper source. If Auto Select is set, the machine automatically selects the print material from the paper tray, in the following order: the manual feeder and the paper tray. Summary 7 Shows the summary of your print settings. APPENDIX 7.13 - Samsung ML-1740 | User Manual (ENGLISH) - Page 131
or higher • HDD 20 MB or higher Softwares • Glibc 2.1 or higher • GTK+ 1.2 or higher • GhostScript Installing the Printer Driver 1 Make sure that you connect the printer to your computer. Turn both the computer and the printer on. 2 When the Administrator Login window appears, type in "root" in the - Samsung ML-1740 | User Manual (ENGLISH) - Page 132
not automatically run, click the icon at the bottom of the window. When the Terminal screen appears, type in: [root@local /root]# cd /mnt/cdrom (the CD-ROM directory) [root@local cdrom]# ./setup.sh 4 Select the installation type, either Recommended or Expert, and then click Continue. Recommended is - Samsung ML-1740 | User Manual (ENGLISH) - Page 133
6 The printer driver installation begins. When the installation is completed, click Start. 7 The Linux Printer Configuration window opens. Click the Add Printer icon on the tool bar at the top of the window. NOTE: Depending on the printing system in use, the Administrator Login window may appear. - Samsung ML-1740 | User Manual (ENGLISH) - Page 134
on the printing system in use. 11 To exit, click OK. 12 When the window prompts that the new printer is successfully configured, click OK. 13 The Linux Printer Configuration window reappears. You can 7 view the information about your printer from the Info tab. If necessary, you can change the - Samsung ML-1740 | User Manual (ENGLISH) - Page 135
to your computer. Turn both the computer and the printer on. 2 When the Administrator Login window appears, type in "root" in the Login field and enter the system password. NOTE: You must log in as a super user (root) to install a new printer to the printing system. If you are not the super user - Samsung ML-1740 | User Manual (ENGLISH) - Page 136
Uninstalling the Printer Driver 1 From the Startup Menu icon at the bottom of the desktop, select Other and then Configuration Tool. You can also access the Linux Printer Configuration window by typing "linux-config" in the Terminal screen. 2 In the Linux Printer Configuration window, select the - Samsung ML-1740 | User Manual (ENGLISH) - Page 137
of the screen, select Linux Printer and then Configuration Tool. The Linux Printer Configuration window appears. You can also open this window from the Terminal screen by typing in "linux-config." 2 The Linux Printer Configuration window shows a list of installed printers in the left pane. The - Samsung ML-1740 | User Manual (ENGLISH) - Page 138
job(s) in the queue. If you drag a specific job(s), you can drop it into the print queue of another printer. The Properties tab allows you to change the default printer settings. NOTE: Regular users are able to override the system-wide default settings defined by the administrator. When a regular - Samsung ML-1740 | User Manual (ENGLISH) - Page 139
opens, click Properties. Click Properties. You can also open the LLPR window: • Click the Startup Menu icon at the bottom of the screen and select Linux Printer and then Linux LPR. • If the Linux Printer Configuration window is currently open, select Test Print from the Print menu. 7.22 APPENDIX - Samsung ML-1740 | User Manual (ENGLISH) - Page 140
the HP-GL/2 format, which is used by some plotters. • Advanced - allows you to override the default settings for the printer. If you click the Save button at the bottom of the window, the options are kept between LLPR sessions. Use the Help button to view details about the options in the - Samsung ML-1740 | User Manual (ENGLISH) - Page 141
Printer Less than 50 dB Sleep mode: Background noise Toner Supply Single cartridge Toner Cartridge Life 3,000 pages (for starter, 1,000 pages Memory (RAM) 8 MB (nonexpandable) Fonts Windows font Interface • IEEE 1284 Bidirectional Parallel - Modes supported: Compatible, Nibble, Byte, ECP • - Samsung ML-1740 | User Manual (ENGLISH) - Page 142
large quantities of paper, ensure the paper meets the requirements specified in this User's Guide. CAUTION: Using paper that does not meet these specifications 7 may cause problems, requiring repairs. These repairs are not covered by the Samsung warranty or service agreements. APPENDIX 7.25 - Samsung ML-1740 | User Manual (ENGLISH) - Page 143
of 75 g/m2 bond (20 lb) paper for the tray • 1 sheet of paper for the manual feeder Folio 216 X 330 mm (8.5 X 13 in.) Minimum size (custom) 76 x 127 0055 in.) 1 sheet of paper for the manual feeder up to 90 g/m2 bond (16 to 24 lb) a.The printer supports a wide range of media sizes. See " - Samsung ML-1740 | User Manual (ENGLISH) - Page 144
or recycled), check the label on the package. The following problems may cause print quality deviations, jamming or even damage to the printer. Symptom Problem with Paper Solution Poor print quality or toner adhesion, problems with feeding Too moist, too rough, too smooth or embossed; faulty - Samsung ML-1740 | User Manual (ENGLISH) - Page 145
Paper Specifications Category Acid Content Caliper Curl in Ream Cut Edge Conditions Fusing Compatibility Grain Moisture Content Smoothness Specifications 5.5 ~ 8.0 pH 0.094 ~ 0.18 mm (3.0 ~ 7.0 mils) Flat within 5 mm (0.02 in.) Cut with sharp blades with no visible fray. Must not scorch, melt, - Samsung ML-1740 | User Manual (ENGLISH) - Page 146
. The paper storage environment should be properly maintained to ensure optimum printer performance. The required condition 7 is 20° to 24°C (68 paper is to rewrap it tightly in its moisture-proof wrapping. If the printer environment is subject to extremes, unwrap only the amount of paper to be - Samsung ML-1740 | User Manual (ENGLISH) - Page 147
NOTE 7.30 APPENDIX - Samsung ML-1740 | User Manual (ENGLISH) - Page 148
4.4 clean, printer 5.5 cleaning sheet, print 5.7 connect parallel cable 2.9 power cord 2.11 USB cable 2.10 control panel,use 1.6 D demo page, print 2.12 document, print 4.2 E error, solve 6.18 I install software 2.15 SPL driver for Linux 7.14 toner 2.4 installing Macintosh software 7.2 L language - Samsung ML-1740 | User Manual (ENGLISH) - Page 149
7.10, 7.13 printer cable, connect 2.9 printer driver, install Macintosh 7.2 printer properties Macintosh 7.9 printer software install in Linux 7.14 uninstall in Linux 7.19 printer, clean 5.5 printer, sharing 4.28 printing from Macintosh 7.7 problem Linux 6.21 Macintosh 6.20 windows 6.19 R reduced - Samsung ML-1740 | User Manual (ENGLISH) - Page 150
Visit us at: Home www.samsungprinter.com Rev.1.00
-
 1
1 -
 2
2 -
 3
3 -
 4
4 -
 5
5 -
 6
6 -
 7
7 -
8
-
9
-
10
-
11
-
12
-
13
-
14
-
15
-
16
-
17
-
18
-
19
-
20
-
21
-
22
-
23
-
24
-
25
-
26
-
27
-
28
-
29
-
30
-
31
-
32
-
33
-
34
-
35
-
36
-
37
-
38
-
39
-
40
-
41
-
42
-
43
-
44
-
45
-
46
-
47
-
48
-
49
-
50
-
51
-
52
-
53
-
54
-
55
-
56
-
57
-
58
-
59
-
60
-
61
-
62
-
63
-
64
-
65
-
66
-
67
-
68
-
69
-
70
-
71
-
72
-
73
-
74
-
75
-
76
-
77
-
78
-
79
-
80
-
81
-
82
-
83
-
84
-
85
-
86
-
87
-
88
-
89
-
90
-
91
-
92
-
93
-
94
-
95
-
96
-
97
-
98
-
99
-
100
-
101
-
102
-
103
-
104
-
105
-
106
-
107
-
108
-
109
-
110
-
111
-
112
-
113
-
114
-
115
-
116
-
117
-
118
-
119
-
120
-
121
-
122
-
123
-
124
-
125
-
126
-
127
-
128
-
129
-
130
-
131
-
132
-
133
-
134
-
135
-
136
-
137
-
138
-
139
-
140
-
141
-
142
-
143
-
144
-
145
-
146
-
147
-
148
-
149
-
150
 |
 |