Samsung PL170 User Manual (user Manual) (ver.1.0) (English) - Page 8
Basic troubleshooting
 |
UPC - 044701015550
View all Samsung PL170 manuals
Add to My Manuals
Save this manual to your list of manuals |
Page 8 highlights
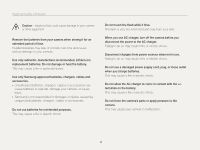
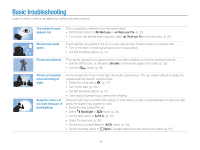
Basic troubleshooting Learn to solve common problems by setting shooting options. The subject's eyes appear red. This is caused by a reflection from the camera flash. • Set the flash option to Red-eye or Red-eye Fix. (p. 50) • If the photo has already been captured, select Red-eye Fix in the edit menu. (p. 81) Photos have dust spots. If dust particles are present in the air, you may capture them in photos when you use the flash. • Turn off the flash or avoid capturing photos in a dusty place. • Set ISO sensitivity options. (p. 51) Photos are blurred. This may be caused if you capture photos in low light conditions or hold the camera incorrectly. • Use the OIS function or half-press [Shutter] to ensure the subject is focused. (p. 29) • Use the d mode. (p. 38) Photos are blurred when shooting at night. Subjects come out too dark because of backlighting. As the camera tries to let in more light, the shutter speed slows. This can make it difficult to steady the camera and may result in camera shake. • Rotate the mode dial to N. (p. 37) • Turn on the flash. (p. 50) • Set ISO sensitivity options. (p. 51) • Use a tripod to prevent your camera from shaking. When the light source is behind the subject or when there is a high contrast between the light and dark areas, the subject may appear too dark. • Avoid shooting toward the sun. • Select Backlight in s mode. (p. 33) • Set the flash option to Fill in. (p. 50) • Adjust the exposure. (p. 59) • Set the Auto Contrast Balance (ACB) option. (p. 60) • Set the metering option to Spot if a bright subject is in the center of the frame. (p. 60) 7
-
 1
1 -
2
-
 3
3 -
 4
4 -
 5
5 -
 6
6 -
 7
7 -
 8
8 -
 9
9 -
 10
10 -
 11
11 -
 12
12 -
 13
13 -
14
-
15
-
16
-
17
-
18
-
19
-
20
-
21
-
22
-
23
-
24
-
25
-
26
-
27
-
28
-
29
-
30
-
31
-
32
-
33
-
34
-
35
-
36
-
37
-
38
-
39
-
40
-
41
-
42
-
43
-
44
-
45
-
46
-
47
-
48
-
49
-
50
-
51
-
52
-
53
-
54
-
55
-
56
-
57
-
58
-
59
-
60
-
61
-
62
-
63
-
64
-
65
-
66
-
67
-
68
-
69
-
70
-
71
-
72
-
73
-
74
-
75
-
76
-
77
-
78
-
79
-
80
-
81
-
82
-
83
-
84
-
85
-
86
-
87
-
88
-
89
-
90
-
91
-
92
-
93
-
94
-
95
-
96
-
97
-
98
-
99
-
100
-
101
-
102
-
103
-
104
-
105
-
106
-
107
-
108
-
109
-
110
-
111
-
112
-
113
-
114
-
115
-
116
-
117
-
118
-
119
-
120
-
121
-
122
-
123
-
124
-
125
-
126
-
127
 |
 |
