Samsung SCX 6322DN User Manual (ENGLISH) - Page 65
E-mail setup, Setting Up Your E-mail System, Setting Authorized Users
 |
UPC - 635753620658
View all Samsung SCX 6322DN manuals
Add to My Manuals
Save this manual to your list of manuals |
Page 65 highlights
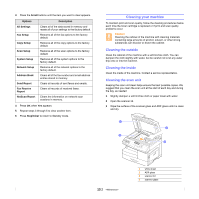
11 E-mail setup The E-mail function on your machine allows you to send your documents as an e-mail message without going to a PC. The document is sent to the recipient's e-mail box as an attachment. This chapter includes: • Setting Up Your E-mail System • Setting Authorized Users • Setting Up E-mail Options Setting Up Your E-mail System To send an e-mail with your machine, your system administrator needs to configure the network settings, such as the IP address, subnet mask, and gateway IP. See User's Guide supplied with this manual. Then the system administrator needs to configure the e-mail settings as follows: 1 Press Menu until Admin Setup appears on the bottom line of the display and press OK. 2 Press the Scroll buttons until Email Setup appears and press OK. 3 Press the Scroll buttons until SMTP Server appears and press OK. 4 Press the Scroll buttons to select the following e-mail configuration items, and select the settings or enter the correct values: - SMTP Server IP- This is the IP address or host name of the ESMTP server. This can be given in dotted decimal notation or as a host name. (E.g. 123.456.789.123 or smtp.xyz.com). - Max Mail Size- This value (1MB - 4 MB) denotes the maximum size of the mail which can be sent. The default is 4MB. Setting Authorized Users If authorized user is enabled, then only authorized users can send emails using the machine. Enabling, adding, deleting, editing authorized users will be done by the System Administrator. Adding Authorized Users Alphabets can be entered using the alphabet keyboard, and numbers using the number keypad for user's names, login IDs, passwords and email addresses. 1 Press Menu until Admin Setup appears on the bottom line of the display and press OK. 2 Press the Scroll buttons until Auth User appears and press OK. 3 Press the Scroll buttons until Add Users appears and press OK. 4 Enter a user's name using the alphabet keyboard and then press OK. 5 Enter the user's Login ID and then press OK. 6 Enter the user's password and then press OK. 7 Enter the confirm password and then press OK. 8 Enter the user's e-mail address and then press OK. 9 When the display prompts Add Another? for adding another authorized user, select Yes or No usingthe scroll buttons and then press OK. 10 The maximum number of authorized users you can enter is 50. If you want to enter another user, repeat steps 5 through 9. 11 When you finish, press Stop/Clear to return to Standby mode. Deleting Authorized Users 1 Press Menu until Admin Setup appears on the bottom line of the display and press OK. 2 Press the Scroll buttons until Auth User appears and press OK. 3 Press the Scroll buttons until Delete Users appears and press OK. 4 Press the Scroll buttons to select the user you want to delete from the list of authorized users and then press OK. 5 Press the Scroll buttons to select Yes and then press OK. 6 If you want to delete another user from the list, repeat steps 5 through 6. 7 When you finish, press Stop/Clear to return to Standby mode. Enabling Authorized Users 1 Press Menu until Admin Setup appears on the bottom line of the display and press OK. 2 Press the Scroll buttons until Auth User appears and press OK. 3 Press the Scroll buttons until User Auth appears and press OK. 4 Press the Scroll buttons to select Enable or Disable and then press OK. The default value for user authentication is disabled. 5 If you select Enable, the display shows Logoff Reminder on the top line. 6 Press the scroll buttons to select On or Off and then press OK. 7 Press Stop/Clear to return to Standby mode. 11.1
-
 1
1 -
2
-
3
-
4
-
5
-
6
-
7
-
8
-
9
-
10
-
11
-
12
-
13
-
14
-
15
-
16
-
17
-
18
-
19
-
20
-
21
-
22
-
23
-
24
-
25
-
26
-
27
-
28
-
29
-
30
-
31
-
32
-
33
-
34
-
35
-
36
-
37
-
38
-
39
-
40
-
41
-
42
-
43
-
44
-
45
-
46
-
47
-
48
-
49
-
50
-
51
-
52
-
53
-
54
-
55
-
56
-
57
-
58
-
59
-
 60
60 -
 61
61 -
 62
62 -
 63
63 -
 64
64 -
 65
65 -
 66
66 -
 67
67 -
 68
68 -
 69
69 -
 70
70 -
71
-
72
-
73
-
74
-
75
-
76
-
77
-
78
-
79
-
80
-
81
-
82
-
83
-
84
-
85
-
86
-
87
-
88
-
89
-
90
-
91
-
92
-
93
-
94
-
95
-
96
-
97
-
98
-
99
-
100
-
101
-
102
-
103
-
104
-
105
-
106
-
107
-
108
-
109
-
110
-
111
-
112
-
113
-
114
-
115
-
116
-
117
-
118
-
119
-
120
-
121
-
122
-
123
-
124
-
125
-
126
-
127
-
128
-
129
-
130
-
131
-
132
-
133
-
134
-
135
-
136
-
137
-
138
-
139
-
140
-
141
-
142
-
143
-
144
-
145
-
146
-
147
-
148
 |
 |
