Samsung SGH C417 User Manual (ENGLISH) - Page 71
Camera Options - reviews
 |
View all Samsung SGH C417 manuals
Add to My Manuals
Save this manual to your list of manuals |
Page 71 highlights
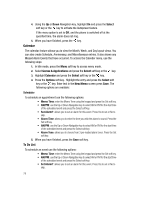
Alternatively, in Idle mode, press the Menu soft key to access Menu mode. Use the Navigation keys to highlight Games & Applications and press the Select soft key or the key. Use the Up or Down Navigation key to highlight Camera and press the Select soft key or the key. 2. Highlight Take Photos and press the Select soft key or the key. Adjust the image by aiming the camera at the subject. 3. Press the key to take the photo. Note: Your camera produces photos in JPEG format. 4. Or before taking the photo, press the Options soft key to access camera options. Camera Options • Shooting Mode: allows you to take a photo in various modes. Once you change the mode, the corresponding indicator appears at the top right of the display. • Take and Review: allows you to take a photo and view it before returning to the shooting mode. Press the Options soft key to view the following options: • Take Another: launches the viewfinder and allows you to take another photo. • Send: allows you to send the photo in an MMS message. • Set as Wallpaper: allows you to set the photo as your wallpaper. • Set as Caller ID: allows you to set the photo as a Caller ID for a contact. • Delete: allows you to delete the photo you have taken. • Rename: allows you to rename the photo. • Go to My Photos: allows you to view photos you have previously taken. • Lock: allows you to lock the photo to prevent deletion. • Properties: allows you to view the properties for this photo. • Take and Return: allows you to take a photo and return to the viewfinder to take another photo. • Effects: allows you to choose a custom color tone for your photo. Choose from the following Effects Mode. • Off: automatically adjust the picture for the best quality available. • Gray: removes all color and display the picture as black and white. • Negative: changes the image to a negative image display. • Sepia: adds a sepia tint to the picture. This is the common orange tint that was popular in early photography. • Emboss: changes to reflect raised images. • Sketch: changes the image to appear like a sketch drawing. Section 9: Personal Assistant 73
-
 1
1 -
2
-
3
-
4
-
5
-
6
-
7
-
8
-
9
-
10
-
11
-
12
-
13
-
14
-
15
-
16
-
17
-
18
-
19
-
20
-
21
-
22
-
23
-
24
-
25
-
26
-
27
-
28
-
29
-
30
-
31
-
32
-
33
-
34
-
35
-
36
-
37
-
38
-
39
-
40
-
41
-
42
-
43
-
44
-
45
-
46
-
47
-
48
-
49
-
50
-
51
-
52
-
53
-
54
-
55
-
56
-
57
-
58
-
59
-
60
-
61
-
62
-
63
-
64
-
65
-
 66
66 -
 67
67 -
 68
68 -
 69
69 -
 70
70 -
 71
71 -
 72
72 -
 73
73 -
 74
74 -
 75
75 -
 76
76 -
77
-
78
-
79
-
80
-
81
-
82
-
83
-
84
-
85
-
86
-
87
-
88
-
89
-
90
-
91
-
92
-
93
-
94
-
95
-
96
-
97
-
98
-
99
-
100
-
101
-
102
-
103
-
104
-
105
-
106
-
107
-
108
-
109
 |
 |