Sanyo PLV Z700 Owners Manual - Page 27
Image, Image Mode Selection - 3d
 |
UPC - 086483072420
View all Sanyo PLV Z700 manuals
Add to My Manuals
Save this manual to your list of manuals |
Page 27 highlights
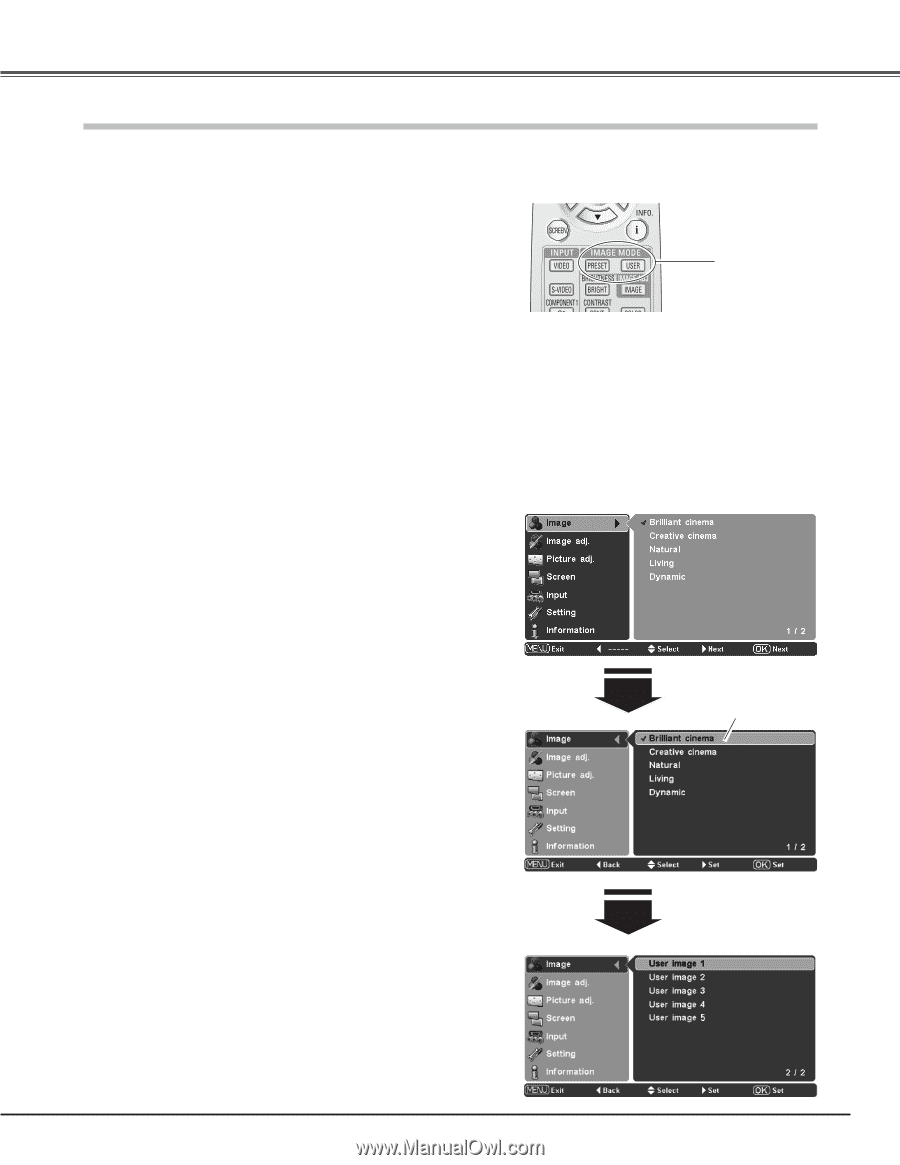
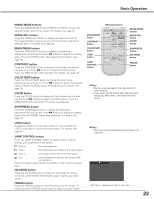
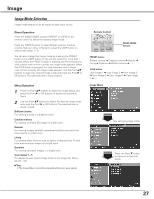
Image Image Mode Selection Image mode selection can be made for each input source. Direct Operation Press the IMAGE MODE buttons (PRESET or USER) on the remote control to select the desired image mode. Press the PRESET button to select Brilliant cinema, Creative cinema, Natural, Living, or Dynamic; press the USER button to select User image 1 - 5. You can also change the Image mode by pressing the PRESET button or the USER button on the remote control for more than 1 second. When the PRESET button is pressed, the Preset submenu with a check mark on the currently set image mode appears. When the USER button is pressed, the User submenu with a check mark on the currently set image mode appears. Use the Point ed buttons to select the desired image mode and press the Point 8 or OK buttons. The selected item is check marked. Menu Operation 1 Press the Point ed buttons to select the Image Menu and press the Point 8 or OK buttons to access the submenu items. 2 Use the Point ed buttons to select the desired image mode and press the Point 8 or OK buttons. The selected item is check marked. Brilliant cinema For viewing movies in a brightish room. Creative cinema For viewing contrasty 3D images in a dark room. Natural For viewing images faithfully reproduced without any control by the projector in a dark room. Living For viewing video sources such as sports or dramas from TV with clear and contrasty images in a bright room. Dynamic For viewing contrasty images in a bright room. User image 1 - 5 For displaying user preset image mode in the Image adj. Menu (pp.28 - 33). ✔Note: • The Image Menu cannot be operated without an input signal. Remote Control IMAGE MODE buttons PRESET button Brilliant cinema ➜ Creative cinema ➜ Natural ➜ Living ➜ Dynamic ➜ Brilliant cinema USER button User image 1 ➜ User image 2 ➜ User image 3 ➜ User image 4 ➜ User image 5 ➜ User image 1 Image Menu The selected image mode. Press the Point d button to move on to the next items. 27
-
 1
1 -
2
-
3
-
4
-
5
-
6
-
7
-
8
-
9
-
10
-
11
-
12
-
13
-
14
-
15
-
16
-
17
-
18
-
19
-
20
-
21
-
 22
22 -
 23
23 -
 24
24 -
 25
25 -
 26
26 -
 27
27 -
 28
28 -
 29
29 -
 30
30 -
 31
31 -
 32
32 -
33
-
34
-
35
-
36
-
37
-
38
-
39
-
40
-
41
-
42
-
43
-
44
-
45
-
46
-
47
-
48
-
49
-
50
-
51
-
52
-
53
-
54
-
55
-
56
-
57
-
58
-
59
-
60
 |
 |