Sanyo PLV Z700 Owners Manual - Page 29
Sharpness, Lamp control, Gamma, Progressive, Noise reduction, White balance Red
 |
UPC - 086483072420
View all Sanyo PLV Z700 manuals
Add to My Manuals
Save this manual to your list of manuals |
Page 29 highlights
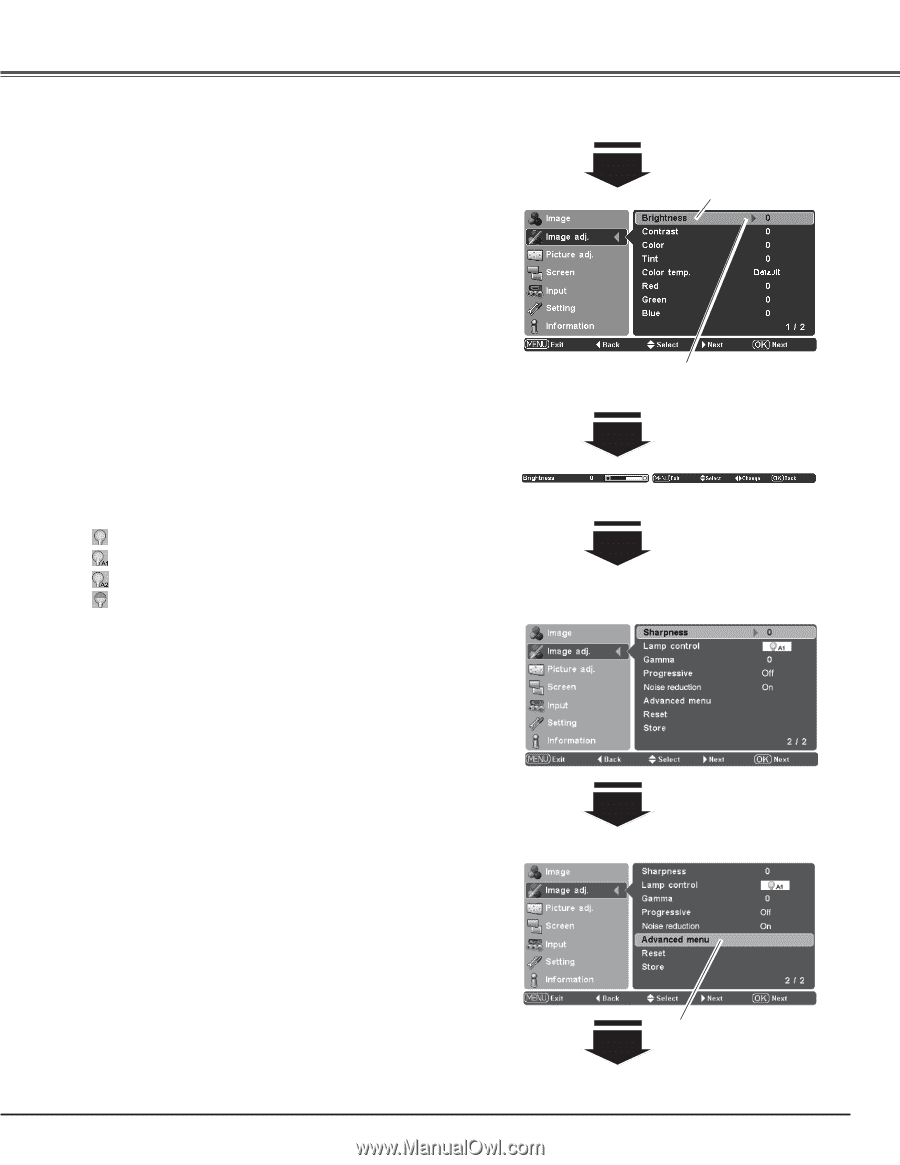
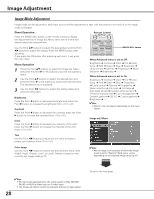
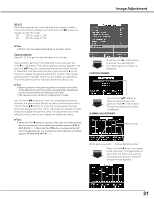
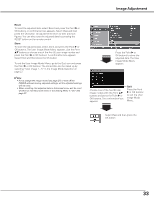
Image Adjustment White balance (Red) Press the Point 7 button to lighten red tone; press the Point 8 button to deepen red tone (from -31 to +31). White balance (Green) Press the Point 7 button to lighten green tone; press the Point 8 button to deepen green tone (from -31 to +31). White balance (Blue) Press the Point 7 button to lighten blue tone; press the Point 8 button to deepen blue tone (from -31 to +31). Sharpness Press the Point 7 button to decrease the sharpness of the image; press the Point 8 button to increase the sharpness of the image (from -7 to +7). Lamp control This function allows you to change the brightness of the screen. Use the Point 7 8 buttons to select the desired lamp mode. You can also select the lamp mode by pressing the LAMP CONTROL button on the remote control. Normal Normal brightness. Auto 1 The brightness according to the input signal. Auto 2 Less bright and lower-sound than Auto 1. Eco Lower brightness reduces the lamp power consumption. The lamp mode is automatically switched to "Eco" under no signal input. Gamma Use the Point 7 8 buttons to adjust the gamma value to obtain a better balance of contrast (from -7 to +7). Progressive An interlaced video signal can be displayed in progressive. Use the Point 7 8 buttons to select the desired options. Off Disabled. Video For moving pictures. Auto Auto adjustment according to the video signal or film signal (3-2 and 2-2 pulldown video sources.) Noise reduction Noise interference on the screen can be reduced. Press the Point 7 8 buttons to change the noise reduction mode. Off Noise reduction mode is "Off" On Noise reduction mode is "On" ✔Note: • If any one of the White balance (Red, Green, or Blue) are adjusted, the Color temp. level changes to "User." • Progressive cannot be selected with the computer input and when the video signal format is 480p, 575p, 720p, or 1080p. • Noise reduction cannot be selected with the computer input and when the video signal format is 1080p. The selected item. Press the Point 8 or OK buttons to access the selected item. The adjustment bar is displayed. Use the Point 7 8 buttons to adjust the setting values and press the OK button. If you press the Point d button, the next item can be selected. Press the Point 8 or OK buttons to display the Advanced menu. Go on to the next page.... 29
-
 1
1 -
2
-
3
-
4
-
5
-
6
-
7
-
8
-
9
-
10
-
11
-
12
-
13
-
14
-
15
-
16
-
17
-
18
-
19
-
20
-
21
-
22
-
23
-
 24
24 -
 25
25 -
 26
26 -
 27
27 -
 28
28 -
 29
29 -
 30
30 -
 31
31 -
 32
32 -
 33
33 -
 34
34 -
35
-
36
-
37
-
38
-
39
-
40
-
41
-
42
-
43
-
44
-
45
-
46
-
47
-
48
-
49
-
50
-
51
-
52
-
53
-
54
-
55
-
56
-
57
-
58
-
59
-
60
 |
 |