Sharp AL 1551CS Interactive Manual for the AL-1530CS AL-1540CS AL-1551CS - Page 20
Scanning an Image from - operating manual
 |
UPC - 074000074507
View all Sharp AL 1551CS manuals
Add to My Manuals
Save this manual to your list of manuals |
Page 20 highlights
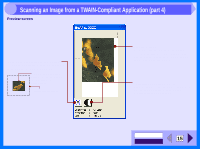
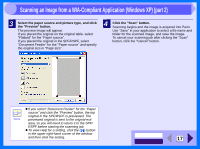
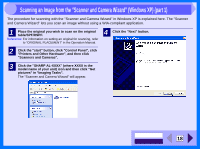
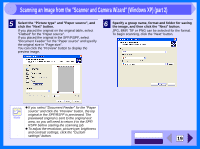
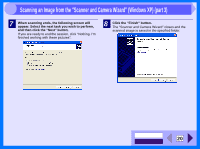
3 Scanning an Image from the "Scanner and Camera Wizard" (Windows XP) (part 1) The procedure for scanning with the "Scanner and Camera Wizard" in Windows XP is explained here. The "Scanner and Camera Wizard" lets you scan an image without using a WIA-compliant application. 1 Place the original you wish to scan on the original table/SPF/RSPF. Reference: For information on setting an original for scanning, refer to "ORIGINAL PLACEMENT" in the Operation Manual. 4 Click the "Next" button. 2 Click the "start" button, click "Control Panel", click "Printers and Other Hardware", and then click "Scanners and Cameras". 3 Click the "SHARP AL-XXXX" (where XXXX is the model name of your unit) icon and then click "Get pictures" in "Imaging Tasks". The "Scanner and Camera Wizard" will appear. CONTENTS INDEX 18
-
 1
1 -
2
-
3
-
4
-
5
-
6
-
7
-
8
-
9
-
10
-
11
-
12
-
13
-
14
-
 15
15 -
 16
16 -
 17
17 -
 18
18 -
 19
19 -
 20
20 -
 21
21 -
 22
22 -
 23
23 -
 24
24 -
 25
25 -
26
-
27
-
28
-
29
-
30
-
31
-
32
-
33
-
34
-
35
-
36
-
37
 |
 |
