Sharp XR-32SL XR-32S XR-32X Operation Manual - Page 25
Connections, Connecting the Projector to Other Equipment, Terminals on the Projector - specifications
 |
UPC - 074000365582
View all Sharp XR-32SL manuals
Add to My Manuals
Save this manual to your list of manuals |
Page 25 highlights
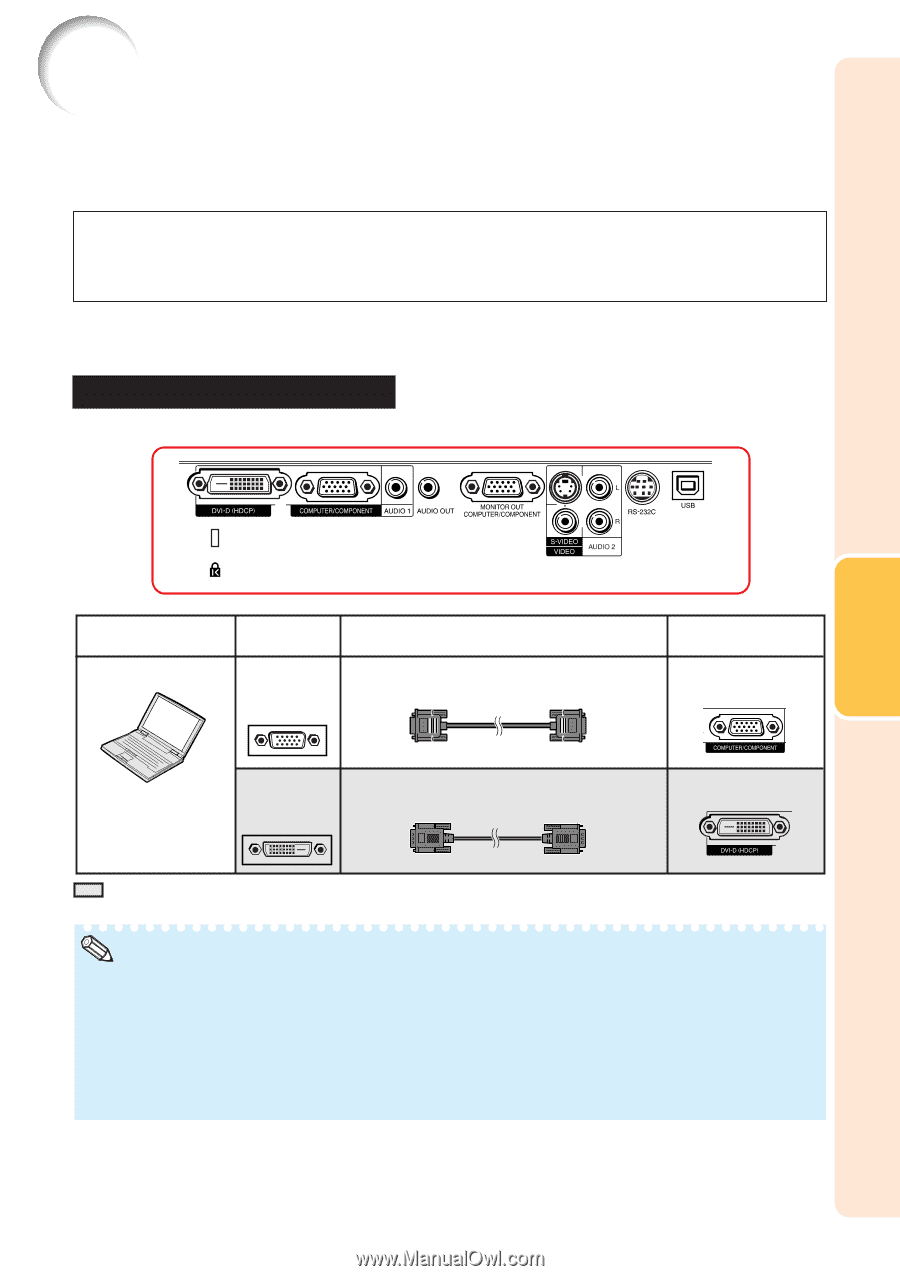
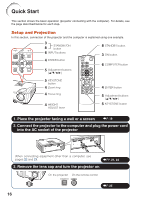
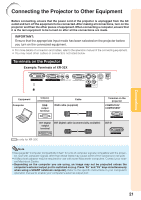
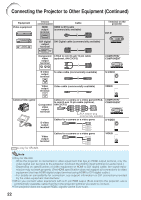
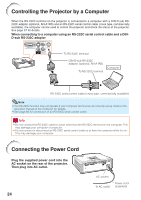
Connecting the Projector to Other Equipment Before connecting, ensure that the power cord of the projector is unplugged from the AC outlet and turn off the equipment to be connected. After making all connections, turn on the projector and then the other pieces of equipment. When connecting a computer, ensure that it is the last equipment to be turned on after all the connections are made. IMPORTANT: Ensure that the appropriate input mode has been selected on the projector before you turn on the connected equipment. • For more details of connection and cables, refer to the operation manual of the connecting equipment. • You may need other cables or connectors not listed below. Terminals on the Projector Example: Terminals of XR-32X Connections Equipment Computer Terminal on connected equipment Cable RGB output terminal RGB cable (supplied) Terminal on the projector COMPUTER/ COMPONENT DVI digital output terminal DVI Digital cable (commercially available) DVI-D is only for XR-32X. Note • See page 62 "Computer Compatibility Chart" for a list of computer signals compatible with the projec- tor. Use with computer signals other than those listed may cause some of the functions to not work. • A Macintosh adaptor may be required for use with some Macintosh computers. Contact your near- est Macintosh Dealer. • Depending on the computer you are using, an image may not be projected unless the computer's external output port is switched on (e.g. Press "Fn" and "F5" keys simultaneously when using a SHARP notebook computer). Refer to the specific instructions in your computer's operation manual to enable your computer's external output port. 21
-
 1
1 -
2
-
3
-
4
-
5
-
6
-
7
-
8
-
9
-
10
-
11
-
12
-
13
-
14
-
15
-
16
-
17
-
18
-
19
-
 20
20 -
 21
21 -
 22
22 -
 23
23 -
 24
24 -
 25
25 -
 26
26 -
 27
27 -
 28
28 -
 29
29 -
 30
30 -
31
-
32
-
33
-
34
-
35
-
36
-
37
-
38
-
39
-
40
-
41
-
42
-
43
-
44
-
45
-
46
-
47
-
48
-
49
-
50
-
51
-
52
-
53
-
54
-
55
-
56
-
57
-
58
-
59
-
60
-
61
-
62
-
63
-
64
-
65
-
66
-
67
-
68
-
69
-
70
-
71
-
72
-
73
 |
 |