Singer H74 Instruction Manual 2 - Page 25
Changing The Presser Foot - quilting foot
 |
View all Singer H74 manuals
Add to My Manuals
Save this manual to your list of manuals |
Page 25 highlights
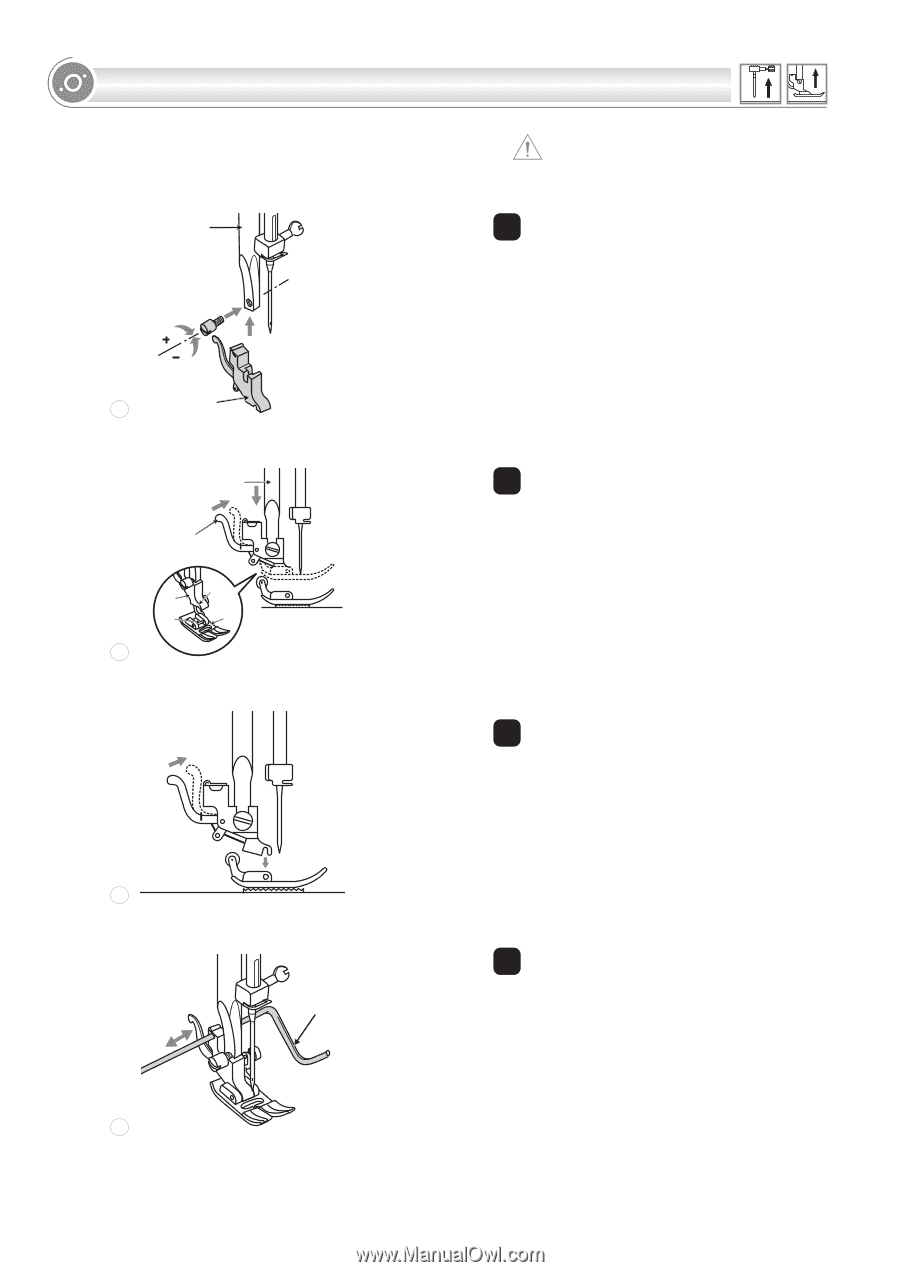
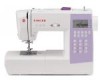
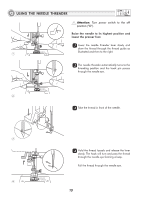
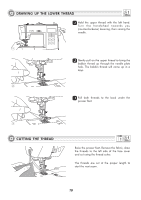
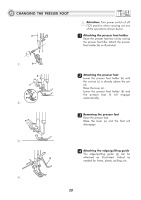
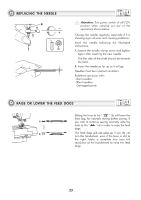
CHANGING THE PRESSER FOOT a Attention: Turn power switch of off ("O") position when carrying out any of the operations shown below. 1 Attaching the presser foot holder Raise the presser foot bar (a) by raising the presser foot lifter. Attach the presser foot holder (b) as illustrated. 1 b a e bc d f 2 e 3 g 4 2 Attaching the presser foot Lower the presser foot holder (b) until the cut-out (c) is directly above the pin (d). Raise the lever (e). Lower the presser foot holder (b) and the presser foot (f) will engage automatically. 3 Removing the presser foot Raise the presser foot. Raise the lever (e) and the foot will disengage. 4 Attaching the edge/guilting guide The edge/quilting guide (g) can be attached as illustrated. Adjust as needed for hems, pleats, quilting, etc. 20
-
 1
1 -
2
-
3
-
4
-
5
-
6
-
7
-
8
-
9
-
10
-
11
-
12
-
13
-
14
-
15
-
16
-
17
-
18
-
19
-
 20
20 -
 21
21 -
 22
22 -
 23
23 -
 24
24 -
 25
25 -
 26
26 -
 27
27 -
 28
28 -
 29
29 -
 30
30 -
31
-
32
-
33
-
34
-
35
-
36
-
37
-
38
-
39
-
40
-
41
-
42
-
43
-
44
-
45
-
46
-
47
-
48
-
49
-
50
-
51
-
52
-
53
-
54
-
55
-
56
-
57
-
58
-
59
-
60
-
61
-
62
-
63
-
64
-
65
-
66
-
67
-
68
-
69
-
70
-
71
-
72
-
73
-
74
-
75
-
76
-
77
-
78
-
79
-
80
-
81
-
82
-
83
-
84
-
85
-
86
 |
 |