Singer H74 Instruction Manual 2 - Page 73
MEMORY, Editing patterns, Clearing patterns or letters
 |
View all Singer H74 manuals
Add to My Manuals
Save this manual to your list of manuals |
Page 73 highlights
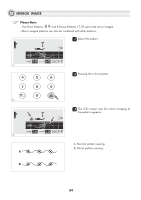
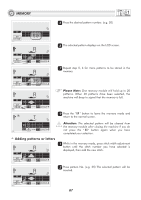
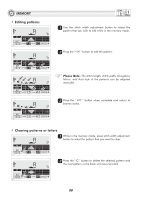
MEMORY Editing patterns M 1 M EDIT 2 M EDIT 11 Use the stitch width adjustment button to select the pattern that you wish to edit while in the memory mode. 22 Press the " " button to edit the pattern. Please Note: The stitch length, stitch width, Elongation, Mirror, and Auto-lock of the patterns can be adjusted manually. 3 Press the " " button when complete and return to browse status. M 3 Clearing patterns or letters 11 While in the memory mode, press stitch width adjustment button to select the pattern that you want to clear. M 1 22 Press the " " button to delete the selected pattern and the next pattern in the back will move forward. M 2 68
-
 1
1 -
2
-
3
-
4
-
5
-
6
-
7
-
8
-
9
-
10
-
11
-
12
-
13
-
14
-
15
-
16
-
17
-
18
-
19
-
20
-
21
-
22
-
23
-
24
-
25
-
26
-
27
-
28
-
29
-
30
-
31
-
32
-
33
-
34
-
35
-
36
-
37
-
38
-
39
-
40
-
41
-
42
-
43
-
44
-
45
-
46
-
47
-
48
-
49
-
50
-
51
-
52
-
53
-
54
-
55
-
56
-
57
-
58
-
59
-
60
-
61
-
62
-
63
-
64
-
65
-
66
-
67
-
 68
68 -
 69
69 -
 70
70 -
 71
71 -
 72
72 -
 73
73 -
 74
74 -
 75
75 -
 76
76 -
 77
77 -
 78
78 -
79
-
80
-
81
-
82
-
83
-
84
-
85
-
86
 |
 |
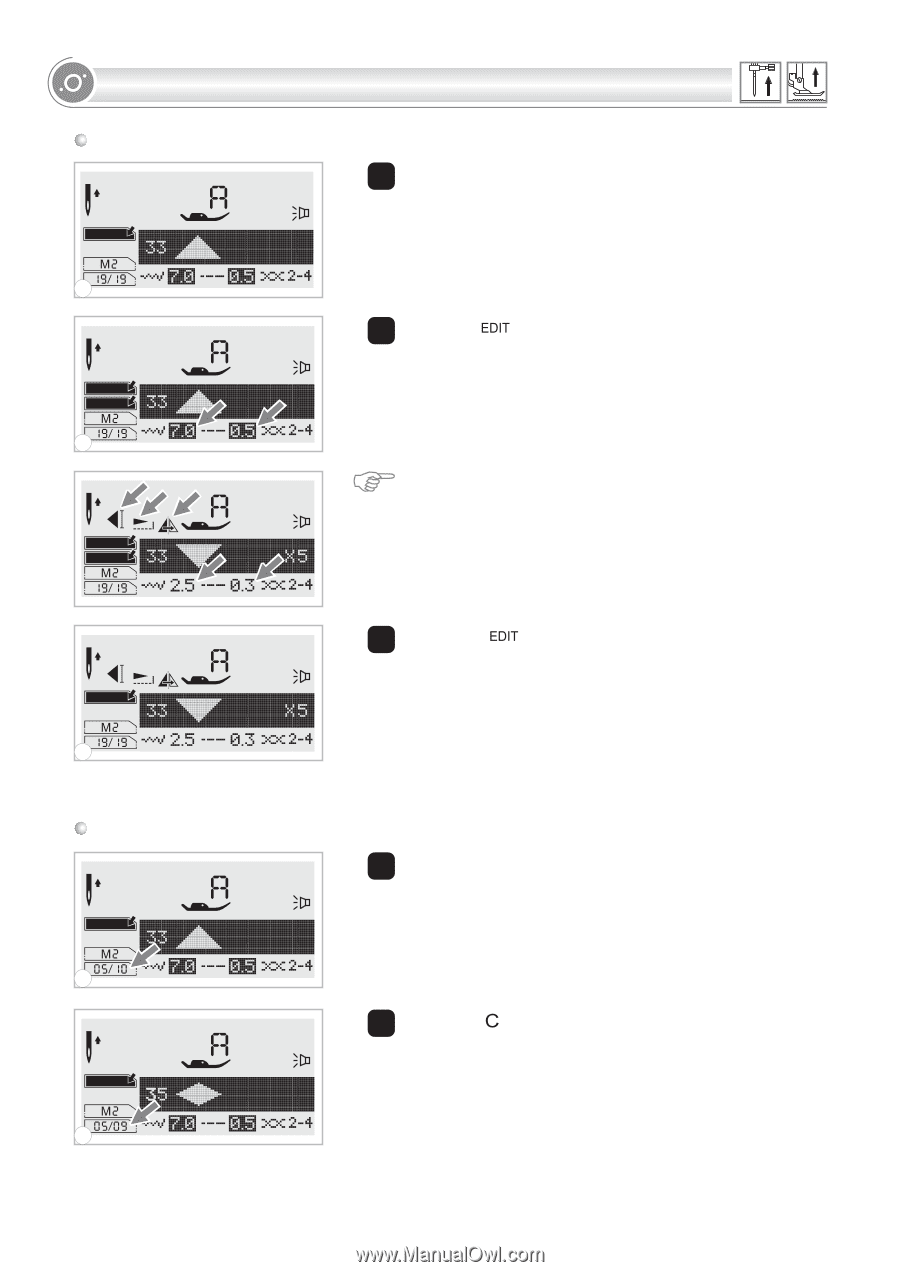
Press the "
" button when complete and return to
browse status.
3
MEMORY
Editing patterns
1 Use the stitch width adjustment button to select the
pattern that you wish to edit while in the memory mode.
2 Press the "
" button to edit the pattern.
Please Note:
The stitch length, stitch width, Elongation,
Mirror, and Auto-lock of the patterns can be adjusted
manually.
1
stitch width adjustment
button to select the pattern that you want to clear.
While in the memory mode, press
Clearing patterns or letters
2
1
1
M
M
EDIT
2 Press the "
" button to delete the selected pattern and
the next pattern in the back will move forward.
2
M
M
EDIT
M
M
1
2
1
2
68
3