Singer H74 Instruction Manual 2 - Page 51
Please Note, Please
 |
View all Singer H74 manuals
Add to My Manuals
Save this manual to your list of manuals |
Page 51 highlights
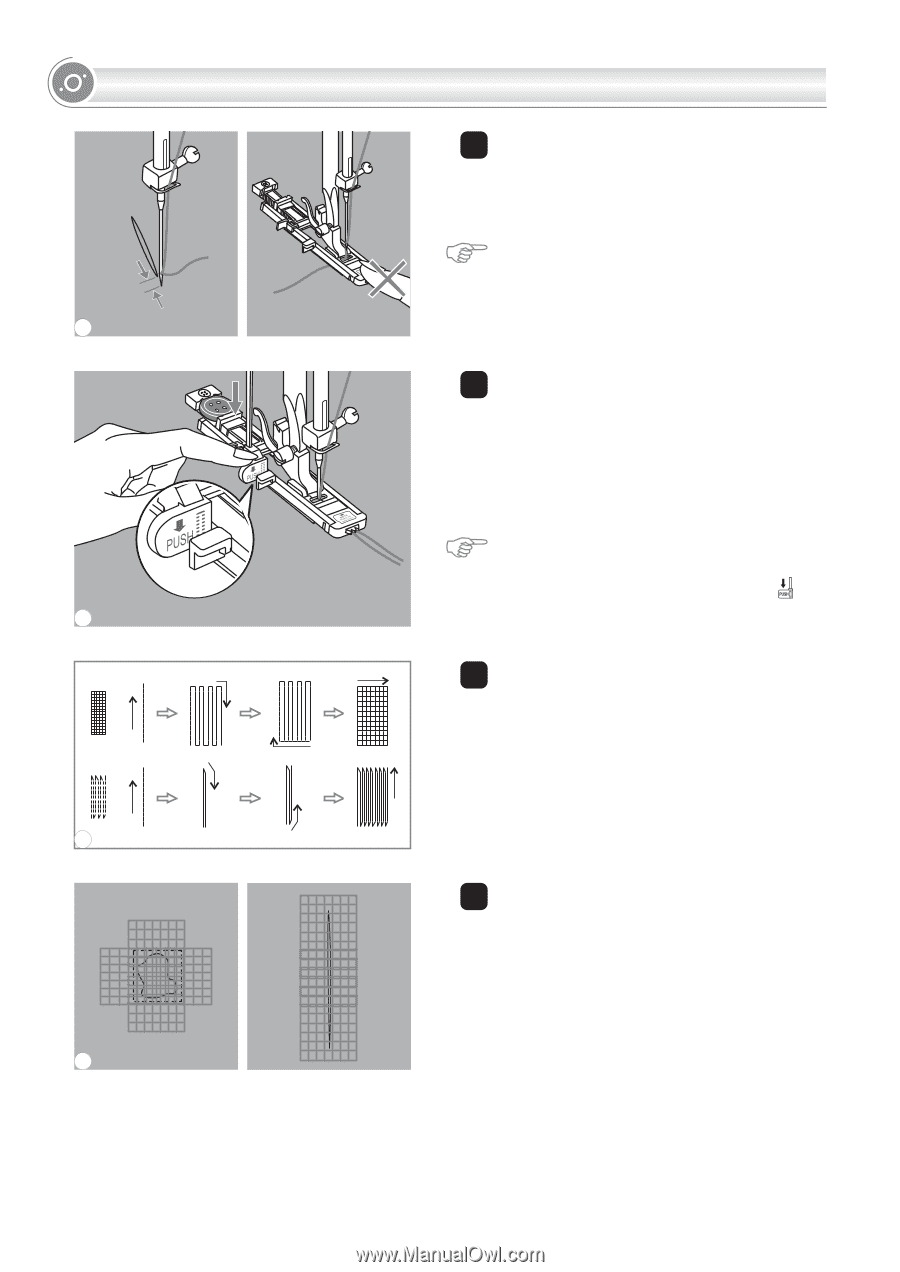
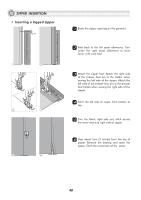
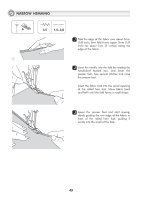
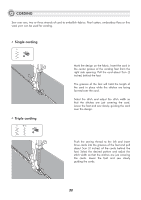
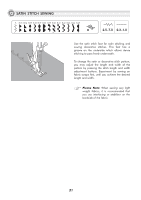
DARNING STITCH 2mm 5 6 7 8 55 Position the fabric so that the needle is 2mm (1/16 inch) in front of the area to be darned, and then lower the presser foot lever. Please Note: When lowering the presser foot, do not push in the front of the presser foot, otherwise the darning will not be sewn with the correct size. 66 Pass the upper thread down through the hole in the presser foot. Pull down the buttonhole lever. The buttonhole lever is positioned behind the bracket on the buttonhole foot. Gently hold the end of the upper thread in your left hand, and then start sewing. Please Note: When you select any buttonhole pattern or darning pattern, the LCD screen will display the figure " " to remind you to lower the buttonhole lever. 77 Darning stitches are sewn from the front of the presser foot to the back, as shown. 88 If the area to be sewn is large, you may sew several times across the area to achieve the desired result. 46
-
 1
1 -
2
-
3
-
4
-
5
-
6
-
7
-
8
-
9
-
10
-
11
-
12
-
13
-
14
-
15
-
16
-
17
-
18
-
19
-
20
-
21
-
22
-
23
-
24
-
25
-
26
-
27
-
28
-
29
-
30
-
31
-
32
-
33
-
34
-
35
-
36
-
37
-
38
-
39
-
40
-
41
-
42
-
43
-
44
-
45
-
 46
46 -
 47
47 -
 48
48 -
 49
49 -
 50
50 -
 51
51 -
 52
52 -
 53
53 -
 54
54 -
 55
55 -
 56
56 -
57
-
58
-
59
-
60
-
61
-
62
-
63
-
64
-
65
-
66
-
67
-
68
-
69
-
70
-
71
-
72
-
73
-
74
-
75
-
76
-
77
-
78
-
79
-
80
-
81
-
82
-
83
-
84
-
85
-
86
 |
 |