Singer H74 Instruction Manual 2 - Page 45
Select the buttonhole stitch. Adjust the stitch
 |
View all Singer H74 manuals
Add to My Manuals
Save this manual to your list of manuals |
Page 45 highlights
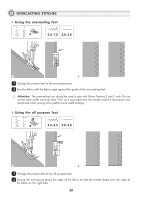
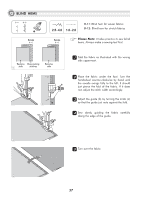
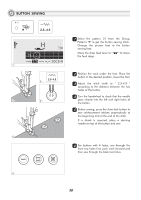
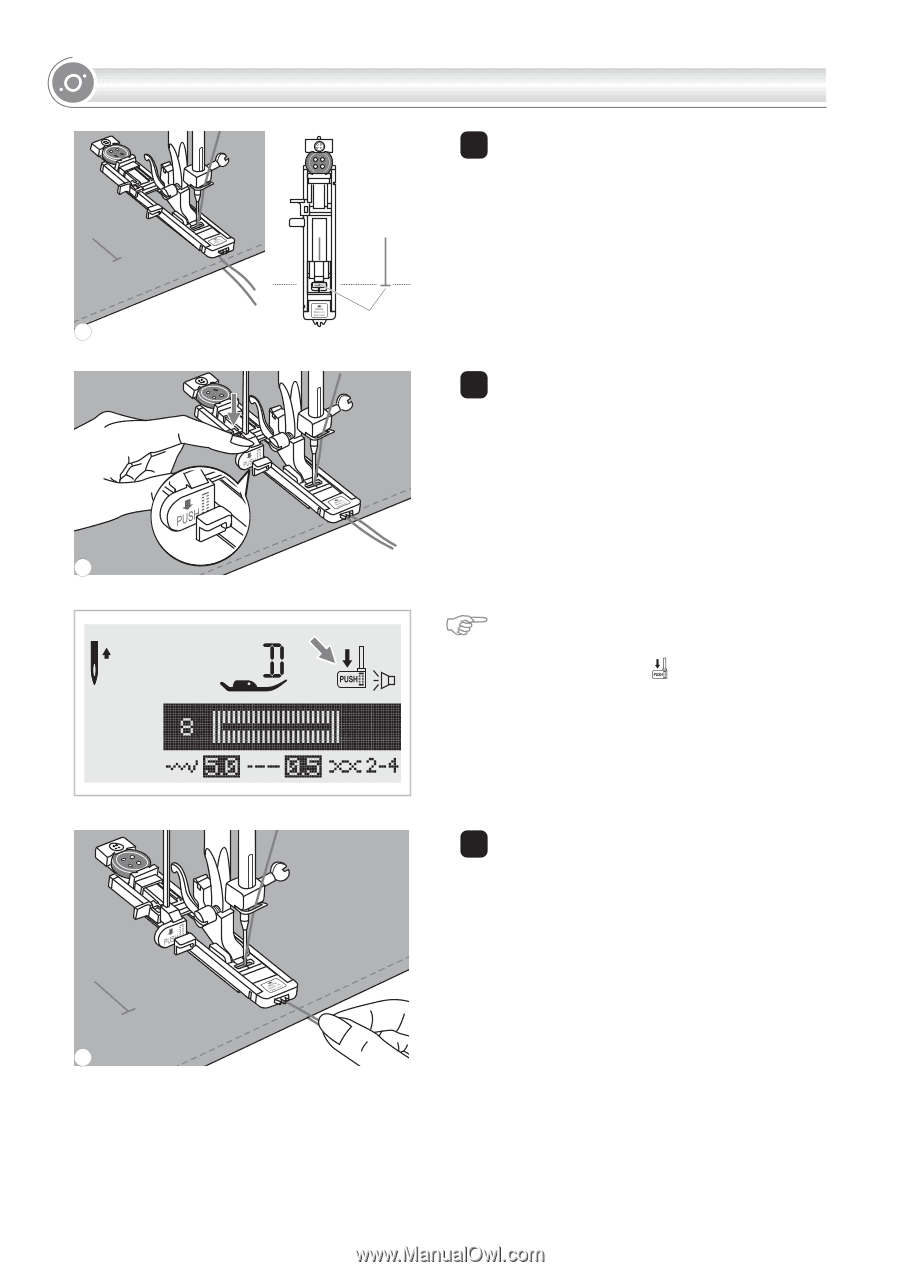
BUTTONHOLE SEWING Starting 3 point 3 Select the buttonhole stitch. Adjust the stitch width and the stitch length to the desired width and density. Position the fabric under the presser foot so that the centerline's mark is aligning with the center of the buttonhole foot. 4 Lower the buttonhole lever, making sure it is positioned behind the bracket on the buttonhole foot, as illustrated. 4 Please Note: When you select any buttonhole pattern, the LCD screen will display the figure " ", to remind you to lower the buttonhole lever. 5 Lightly hold the end of the upper thread and start sewing. 5 40
-
 1
1 -
2
-
3
-
4
-
5
-
6
-
7
-
8
-
9
-
10
-
11
-
12
-
13
-
14
-
15
-
16
-
17
-
18
-
19
-
20
-
21
-
22
-
23
-
24
-
25
-
26
-
27
-
28
-
29
-
30
-
31
-
32
-
33
-
34
-
35
-
36
-
37
-
38
-
39
-
 40
40 -
 41
41 -
 42
42 -
 43
43 -
 44
44 -
 45
45 -
 46
46 -
 47
47 -
 48
48 -
 49
49 -
 50
50 -
51
-
52
-
53
-
54
-
55
-
56
-
57
-
58
-
59
-
60
-
61
-
62
-
63
-
64
-
65
-
66
-
67
-
68
-
69
-
70
-
71
-
72
-
73
-
74
-
75
-
76
-
77
-
78
-
79
-
80
-
81
-
82
-
83
-
84
-
85
-
86
 |
 |
40
Select the buttonhole stitch. Adjust the stitch
width and the stitch length to the desired
width and density.
Position the fabric under the presser foot so
that the centerline's mark is aligning with the
center of the buttonhole foot.
Lower the buttonhole lever, making sure it is
positioned
behind
the
bracket
on
the
buttonhole foot, as illustrated.
Please
Note:
When
you
select
any
buttonhole
pattern,
the
LCD
screen
will
display the figure "
", to remind you to
lower the buttonhole lever.
Lightly hold the end of the upper thread and
start sewing.
4
3
Starting
point
5
BUTTONHOLE SEWING
4
3
5