Singer One Instruction Manual 3 - Page 21
adjusting, selectors, fabric
 |
View all Singer One manuals
Add to My Manuals
Save this manual to your list of manuals |
Page 21 highlights
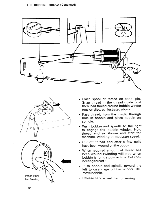
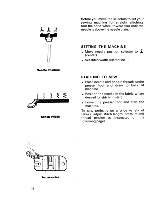
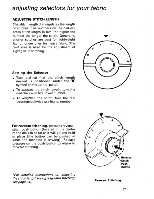
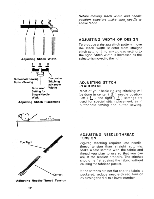
adjusting selectors for your fabric ADJUSTING STITCH LENGTH The stitch length dial regulates the length of stitches. The numbers on the dial express stitch length in mm; the higher the number the longer the stitch. Generally, shorter stitches are best for lightweight fabric; longer ones for heavy fabric. The 0-1 area is used for the adjustment of zigzag satin stitching. 2 OOOOOOOOOO ..••• Setting the Selector . Turn dial so that the stitch length desired is positioned under the IV symbol on the control panel. • To shorten the stitch length, turn the dial clockwise to a lower number. • To lengthen the stitch, turn the dial counterclockwise to a higher number. For reverse stitching, press the reversestitch push button (located in the center of the dial) in as far as it will go and hold in place (the button can be pushed in while the machine is sewing). Release pressure on the push button to return to forWard stitching. (For detailed instructions on adjusting the stitch length for zig-zag satin stitching, see page 24.) 3 7 J.° , ReverseStitch Push Button Reverse Stitching 17
-
 1
1 -
2
-
3
-
4
-
5
-
6
-
7
-
8
-
9
-
10
-
11
-
12
-
13
-
14
-
15
-
 16
16 -
 17
17 -
 18
18 -
 19
19 -
 20
20 -
 21
21 -
 22
22 -
 23
23 -
 24
24 -
 25
25 -
 26
26 -
27
-
28
-
29
-
30
-
31
-
32
-
33
-
34
-
35
-
36
-
37
-
38
-
39
-
40
-
41
-
42
-
43
-
44
-
45
-
46
-
47
-
48
-
49
-
50
-
51
-
52
-
53
-
54
-
55
-
56
 |
 |
