Sony BDV-IS1000/C Operating Instructions - Page 62
Press, to select the setting for the, Control for HDMI function., Connect the calibration mic to
 |
View all Sony BDV-IS1000/C manuals
Add to My Manuals
Save this manual to your list of manuals |
Page 62 highlights
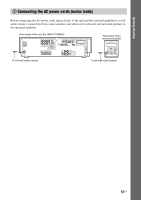
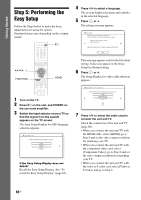
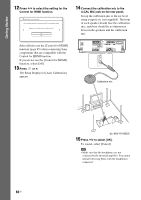
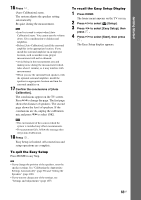
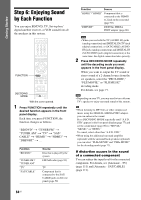
Getting Started 12 Press X/x to select the setting for the Control for HDMI function. Easy Setup - Control for HDMI You can operate this unit in conjunction with a TV connected by HDMI. Check your TV settings when using this function. On Select [On] to use the [Control for HDMI] function (page 95) when connecting Sony components that are compatible with the Control for HDMI function. If you do not use the [Control for HDMI] function, select [Off]. 13 Press or c. The Setup Display for [Auto Calibration] appears. 14 Connect the calibration mic to the A.CAL MIC jack on the rear panel. Set up the calibration mic at the ear level using a tripod, etc. (not supplied). The front of each speaker should face the calibration mic, and there should be no obstruction between the speakers and the calibration mic. LAN(100) COMPONENT VIDEO OUT VIDEO OUT Y PB/ PR/ CB CR VIDEO S-VIDEO Y PB / CB PR / CR SAT/CABLE COMPONENT VIDEO IN DC5V 500mA MAX EXTERNAL FRONT R SPEAKER FRONT L CENTER WOOFER HDMI IR REMOTE TV OPTICAL SAT/CABLE DIGITAL IN OUT IN IN 1 IN 2 COAXIAL OUT TV AUDIO IN R L A.CAL MIC ECM-AC2 R L AUDIO VIDEO SAT/CABLE IN DMPORT DC5V 700mA MAX EZW-RT10 ANTENNA 75 COAXIAL FM AM AM.CICAL ECM-AC2 Calibration mic 62US Ex. BDV-IT1000ES 15 Press X/x to select [OK]. To cancel, select [Cancel]. Note • Make sure that the headphones are not connected to the surround amplifier. You cannot operate following Steps with the headphones connected.
-
 1
1 -
2
-
3
-
4
-
5
-
6
-
7
-
8
-
9
-
10
-
11
-
12
-
13
-
14
-
15
-
16
-
17
-
18
-
19
-
20
-
21
-
22
-
23
-
24
-
25
-
26
-
27
-
28
-
29
-
30
-
31
-
32
-
33
-
34
-
35
-
36
-
37
-
38
-
39
-
40
-
41
-
42
-
43
-
44
-
45
-
46
-
47
-
48
-
49
-
50
-
51
-
52
-
53
-
54
-
55
-
56
-
 57
57 -
 58
58 -
 59
59 -
 60
60 -
 61
61 -
 62
62 -
 63
63 -
 64
64 -
 65
65 -
 66
66 -
 67
67 -
68
-
69
-
70
-
71
-
72
-
73
-
74
-
75
-
76
-
77
-
78
-
79
-
80
-
81
-
82
-
83
-
84
-
85
-
86
-
87
-
88
-
89
-
90
-
91
-
92
-
93
-
94
-
95
-
96
-
97
-
98
-
99
-
100
-
101
-
102
-
103
-
104
-
105
-
106
-
107
-
108
-
109
-
110
-
111
-
112
-
113
-
114
-
115
-
116
-
117
-
118
-
119
-
120
-
121
-
122
-
123
-
124
-
125
-
126
-
127
-
128
-
129
-
130
-
131
-
132
-
133
-
134
-
135
-
136
-
137
-
138
-
139
-
140
-
141
-
142
-
143
-
144
-
145
-
146
-
147
-
148
-
149
-
150
-
151
-
152
-
153
-
154
-
155
 |
 |
