Sony CX150 Operating Instructions - Page 48
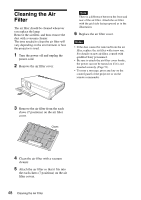
Cleaning the Air Filter
 |
UPC - 027242728158
View all Sony CX150 manuals
Add to My Manuals
Save this manual to your list of manuals |
Page 48 highlights
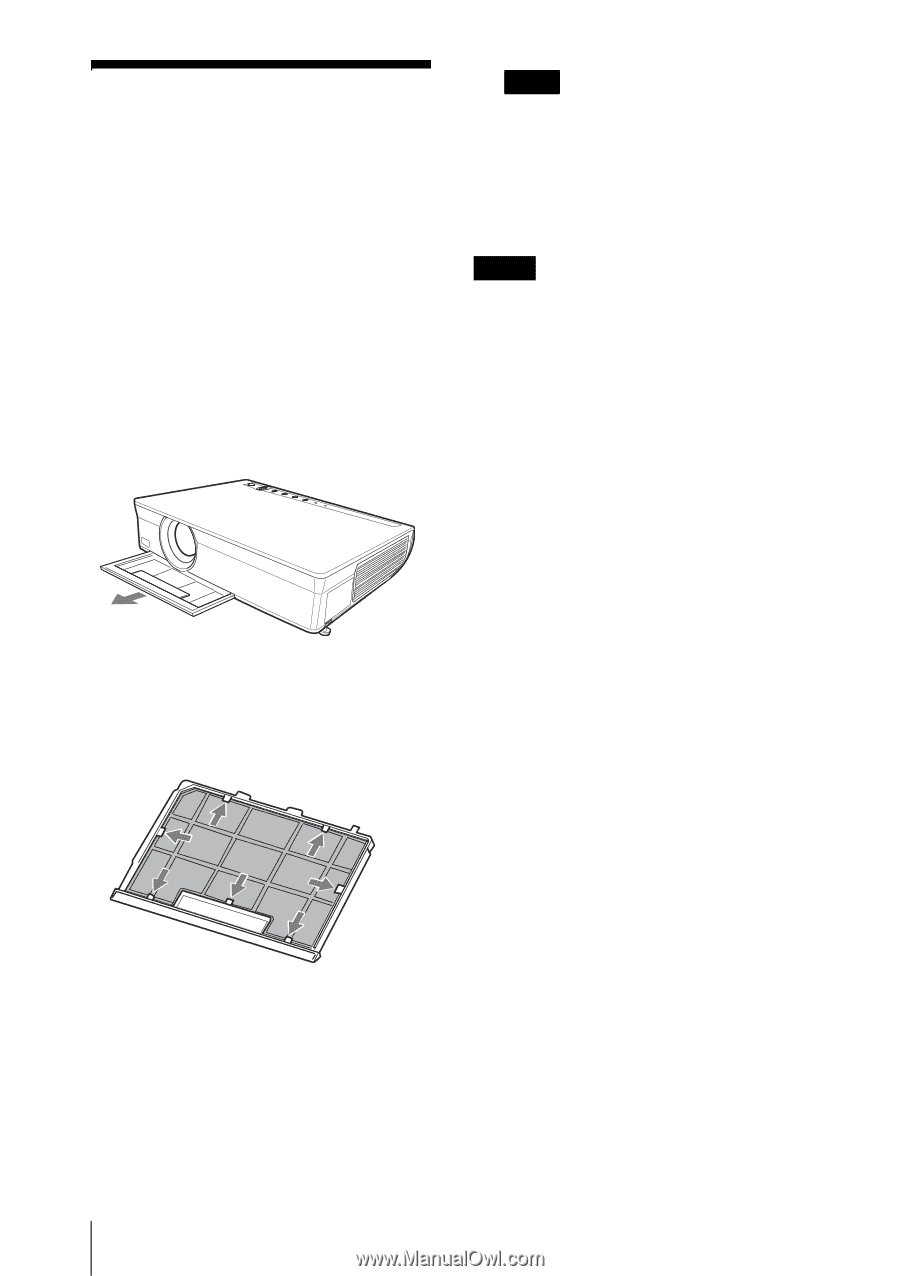
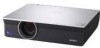
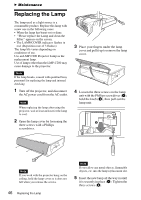
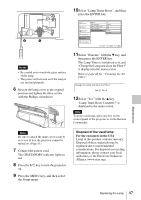
Cleaning the Air Filter The air filter should be cleaned whenever you replace the lamp. Remove the air filter, and then remove the dust with a vacuum cleaner. The time needed to clean the air filter will vary depending on the environment or how the projector is used. 1 Turn the power off and unplug the power cord. 2 Remove the air filter cover. Note There is a difference between the front and rear of the air filter. Attach the air filter with the grid side facing upward as in the illustration. 6 Replace the air filter cover. Notes • If the dust cannot be removed from the air filter, replace the air filter with a new one. For details on new air filter, consult with qualified Sony personnnel. • Be sure to attach the air filter cover firmly; the power can not be turned on if it is not inserted securely. (Page 51) • To erase a message, press any key on the control panel of the projector or on the remote commander. 3 Remove the air filter from the each claws (7 positions) on the air filter cover. Claws 4 Clean the air filter with a vacuum cleaner. 5 Attach the air filter so that it fits into the each claws (7 positions) on the air filter covers. 48 Cleaning the Air Filter
-
 1
1 -
2
-
3
-
4
-
5
-
6
-
7
-
8
-
9
-
10
-
11
-
12
-
13
-
14
-
15
-
16
-
17
-
18
-
19
-
20
-
21
-
22
-
23
-
24
-
25
-
26
-
27
-
28
-
29
-
30
-
31
-
32
-
33
-
34
-
35
-
36
-
37
-
38
-
39
-
40
-
41
-
42
-
 43
43 -
 44
44 -
 45
45 -
 46
46 -
 47
47 -
 48
48 -
 49
49 -
 50
50 -
 51
51 -
 52
52 -
 53
53 -
54
-
55
-
56
-
57
-
58
-
59
-
60
-
61
-
62
-
63
-
64
-
65
-
66
-
67
-
68
-
69
-
70
 |
 |