Sony DCR-DVD910 Operating Guide - Page 59
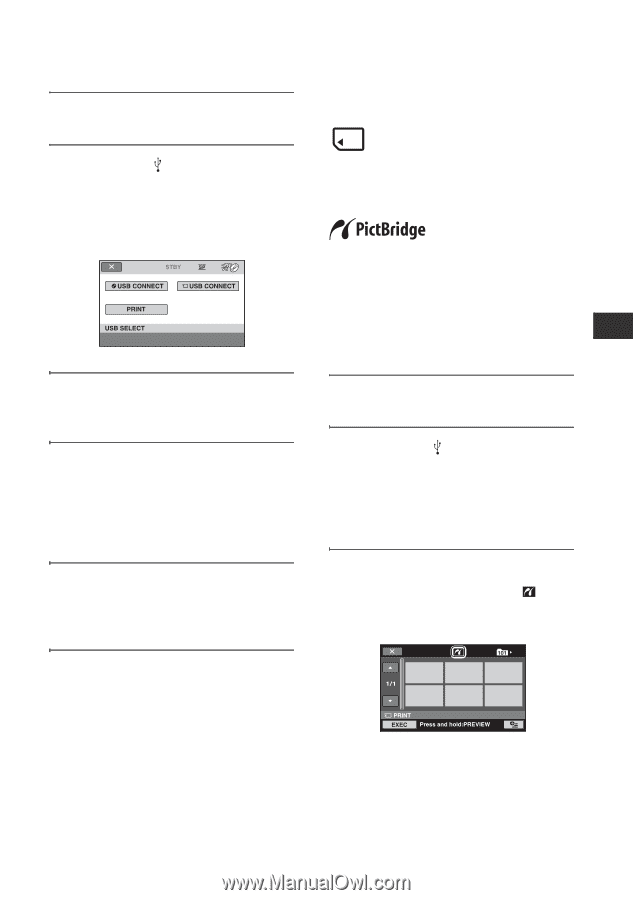
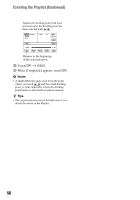
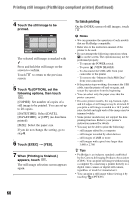
Printing still images (PictBridge compliant printer), Touch [PRINT].
 |
UPC - 689466092851
View all Sony DCR-DVD910 manuals
Add to My Manuals
Save this manual to your list of manuals |
Page 59 highlights
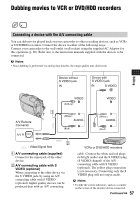
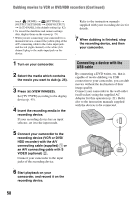
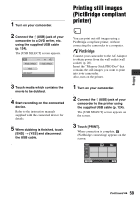
1 Turn on your camcorder. 2 Connect the (USB) jack of your camcorder to a DVD writer, etc. using the supplied USB cable (p. 124). The [USB SELECT] screen appears. 3 Touch media which contains the movie to be dubbed. 4 Start recording on the connected device. Refer to the instruction manuals supplied with the connected device for details. 5 When dubbing is finished, touch [END] t [YES] and disconnect the USB cable. Printing still images (PictBridge compliant printer) You can print out still images using a PictBridge compliant printer, without connecting the camcorder to a computer. Connect your camcorder to the AC Adaptor to obtain power from the wall outlet (wall socket) (p. 20). Insert the "Memory Stick PRO Duo" that contains the still images you want to print into your camcorder. Also, turn on the printer. 1 Turn on your camcorder. 2 Connect the (USB) jack of your camcorder to the printer using the supplied USB cable (p. 124). The [USB SELECT] screen appears on the screen. 3 Touch [PRINT]. When connection is complete, (PictBridge connecting) appears on the screen. Editing Continued , 59
-
 1
1 -
2
-
3
-
4
-
5
-
6
-
7
-
8
-
9
-
10
-
11
-
12
-
13
-
14
-
15
-
16
-
17
-
18
-
19
-
20
-
21
-
22
-
23
-
24
-
25
-
26
-
27
-
28
-
29
-
30
-
31
-
32
-
33
-
34
-
35
-
36
-
37
-
38
-
39
-
40
-
41
-
42
-
43
-
44
-
45
-
46
-
47
-
48
-
49
-
50
-
51
-
52
-
53
-
 54
54 -
 55
55 -
 56
56 -
 57
57 -
 58
58 -
 59
59 -
 60
60 -
 61
61 -
 62
62 -
 63
63 -
 64
64 -
65
-
66
-
67
-
68
-
69
-
70
-
71
-
72
-
73
-
74
-
75
-
76
-
77
-
78
-
79
-
80
-
81
-
82
-
83
-
84
-
85
-
86
-
87
-
88
-
89
-
90
-
91
-
92
-
93
-
94
-
95
-
96
-
97
-
98
-
99
-
100
-
101
-
102
-
103
-
104
-
105
-
106
-
107
-
108
-
109
-
110
-
111
-
112
-
113
-
114
-
115
-
116
-
117
-
118
-
119
-
120
-
121
-
122
-
123
-
124
-
125
-
126
-
127
-
128
-
129
-
130
-
131
-
132
-
133
-
134
-
135
-
136
-
137
-
138
-
139
-
140
-
141
-
142
-
143
-
144
-
145
-
146
-
147
-
148
-
149
-
150
-
151
 |
 |