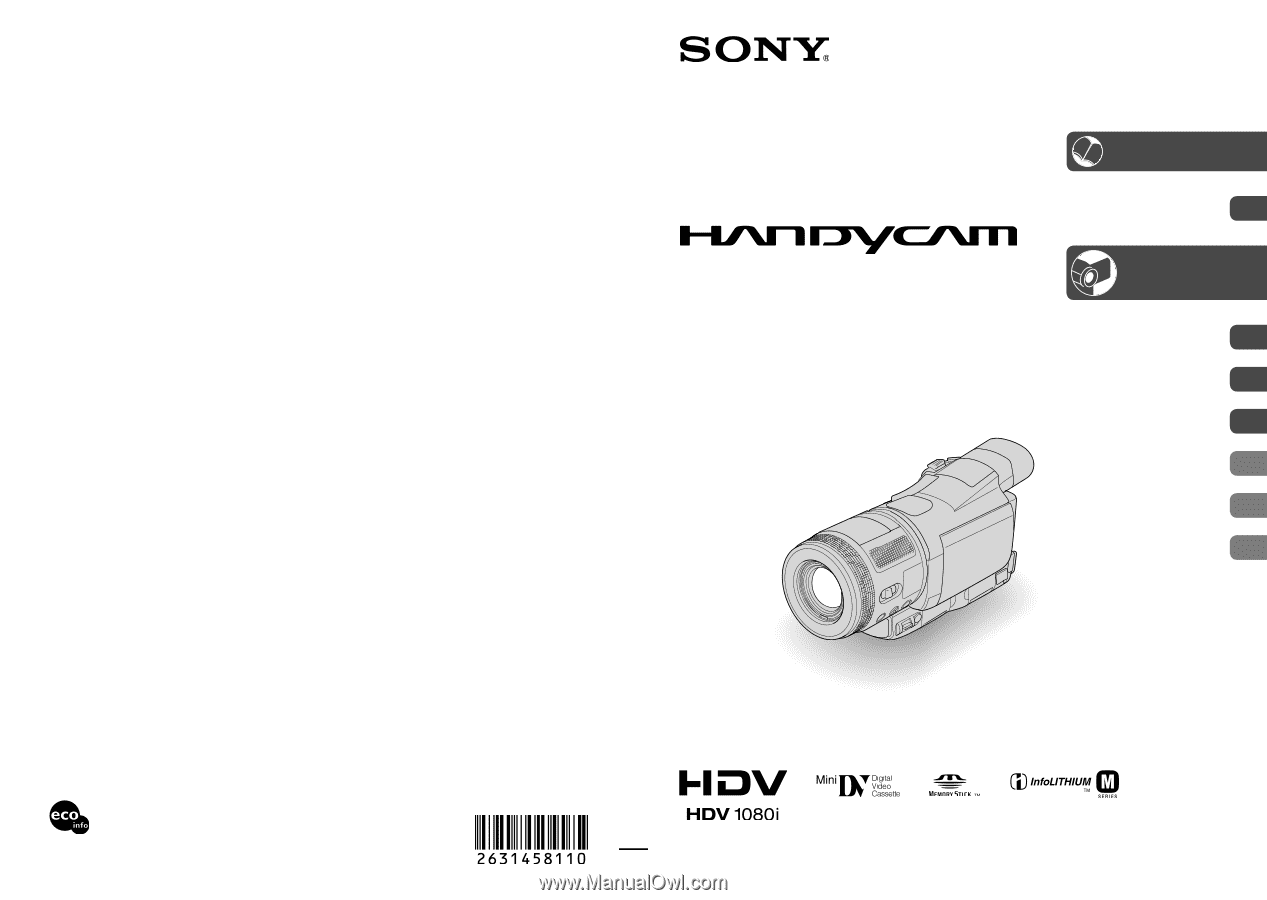
Sony HDR HC1 Operating Instructions
Sony HDR HC1 - 2.8MP High Definition MiniDV Camcorder Manual
 |
UPC - 027242681330
View all Sony HDR HC1 manuals
Add to My Manuals
Save this manual to your list of manuals |
Sony HDR HC1 manual content summary:
- Sony HDR HC1 | Operating Instructions - Page 1
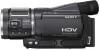
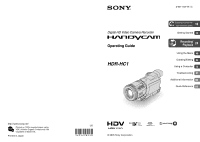
ink. Printed in Japan Digital HD Video Camera Recorder Operating Guide HDR-HC1 2-631-458-11 (1) 10 Enjoying pictures with high definition quality Getting Started 12 Recording/ Playback 24 Using the Menu 40 Dubbing/Editing 64 Using a Computer 73 Troubleshooting 81 Additional Information 100 - Sony HDR HC1 | Operating Instructions - Page 2
This symbol is intended to alert the user to the presence of important operating and maintenance (servicing) instructions in the literature accompanying the appliance. For customers in the U.S.A. and CANADA RECYCLING LITHIUM-ION BATTERIES Lithium-Ion batteries are recyclable. You can help preserve - Sony HDR HC1 | Operating Instructions - Page 3
: SONY Model No.: HDR-HC1 Responsible Party: Sony Electronics approved in this manual could void your with the instructions, may off and on, the user is encouraged to try digital device pursuant to Subpart B of Part 15 of FCC Rules. Notes on use On the types of cassette you can use in your camcorder - Sony HDR HC1 | Operating Instructions - Page 4
Battery pack • The camcorder is not dustproofed, dripproofed or waterproofed. See "Maintenance and precautions" (p. 107). • Before connecting your camcorder to another device with a component video the picture and sound are recorded without any problems. • Compensation for the contents of recordings - Sony HDR HC1 | Operating Instructions - Page 5
HDV format. The screen appears blue. Check the contents of tapes by playing them back on this camcorder prior to playing them back on other devices. On this manual • The images of the LCD screen and the viewfinder used in this manual for illustration purposes are captured using a digital still camera - Sony HDR HC1 | Operating Instructions - Page 6
2 Enjoying pictures with high definition quality Trying out the new HDV format 10 Viewing video recorded in the HDV format 11 Getting Started Step 1: Checking supplied items 12 Step 2: Charging the battery pack 13 Step 3: Turning the power on and holding your camcorder firmly ...........16 Step - Sony HDR HC1 | Operating Instructions - Page 7
review 33 Remote Commander 34 Searching quickly for a desired scene (Zero set memory 34 Searching for a scene by date of recording (Date search 35 Connecting to a TV for viewing 36 Using the Menu Using the menu items 40 Menu items 42 CAMERA SET menu 44 Settings to adjust your camcorder DVD - Sony HDR HC1 | Operating Instructions - Page 8
Connecting to a computer 73 Copying still images to a computer 73 Copying movies on a tape to the computer 76 Creating a DVD (Direct Access to "Click to DVD 78 Troubleshooting Troubleshooting 81 Warning indicators and messages 96 Additional Information Using your camcorder abroad 100 HDV - Sony HDR HC1 | Operating Instructions - Page 9
9 - Sony HDR HC1 | Operating Instructions - Page 10
These operating instructions refer to the HDV1080i format as HDV format unless there is a need to specify. Why shooting in the HDV format? Moving to digital video, like the rest of the world, will enable you to capture important moments in your life using the HDV format and the high quality images - Sony HDR HC1 | Operating Instructions - Page 11
i.LINK cable allows you to copy pictures in HD (high definition) quality. Connecting to HDV1080i non-compliant devices Use your camcorder to down convert HDV format video to SD (standard definition) quality to enable copying. Connecting to a computer (p. 73) Copying "Memory Stick Duo" still images to - Sony HDR HC1 | Operating Instructions - Page 12
A/V connecting cable (1) (p. 36, 64) Component video cable (1) (p. 36, 37) AC Adaptor (1) (p. 13) USB cable (1) (p. 73) Power cord (1) (p. 13) Lens cap (1) Shoulder Strap (1) (p. 114) Rechargeable battery pack NP-FM50 (1) (p. 13, 105) Operating Guide (This manual) (1) Attached to your camcorder - Sony HDR HC1 | Operating Instructions - Page 13
DC plug To the wall outlet Power cord AC Adaptor 1 Attach the battery pack by sliding it in the direction of the arrow until it clicks. CHG (charge) lamp 3 Connect the AC Adaptor to the DC IN jack of your camcorder. Be sure that the mark on the DC plug is facing up - Sony HDR HC1 | Operating Instructions - Page 14
your camcorder using the power from the wall outlet by making the same connections as you do when charging the battery pack. The battery pack will .) available when you use a fully charged battery pack. Recording in the HDV format Battery pack Continuous recording time* Typical recording time* - Sony HDR HC1 | Operating Instructions - Page 15
AC Adaptor is connected to the DC IN jack of your camcorder, even when the power cord is disconnected from the wall outlet. • Use the supplied or optional Sony "InfoLITHIUM" battery pack (M series). You cannot use the battery pack NP-FM30 with your camcorder. • When attaching an optional video light - Sony HDR HC1 | Operating Instructions - Page 16
play or edit pictures. • When you slide the POWER switch from OFF (CHG) to CAMERA-TAPE or CAMERA-MEMORY, the current date and time will be displayed on the LCD screen for about 5 seconds. 3 Hold the camcorder correctly. POWER switch 1 Remove the lens cap. Pull the lens cap string down and attach - Sony HDR HC1 | Operating Instructions - Page 17
Getting Started To turn off the power Slide the POWER switch up to OFF (CHG). • At the time of purchase, the power will be set to turn off automatically if you leave your camcorder without any operation attempted for approximately 5 minutes, to save battery power. ([A.SHUT OFF], p. 61). 17 - Sony HDR HC1 | Operating Instructions - Page 18
last longer Press and hold DISPLAY/BATT INFO for a few seconds until appears. This setting is practical when you use your camcorder in bright conditions or where you want to save battery power. The recorded picture will not be affected by the setting. To turn on the LCD backlight, press and hold - Sony HDR HC1 | Operating Instructions - Page 19
panel to support it. Then, touch the buttons displayed on the screen. Touch the button on the LCD screen. Checking the screen indicators (Display guide) You can the area selecting display. DISP GUIDE 1/2 FOCUS: MANUAL PROGRAM AE: SPOTLIGHT STEADYSHOT: OFF END To finish the operation Touch [END]. - Sony HDR HC1 | Operating Instructions - Page 20
the date and time, the [CLOCK SET] screen appears every time you turn on your camcorder or change the POWER switch position. • If you do not use your camcorder for about 3 months, the built-in rechargeable battery gets discharged and the date and time settings may be cleared from the memory. In that - Sony HDR HC1 | Operating Instructions - Page 21
outwards, then press . 1 Slide and hold the OPEN/EJECT lever in the direction of the arrow and open the lid. Lid Push the center Window of the back of the cassette lightly. The cassette compartment automatically slides back in. Do not force the cassette into the compartment. This may cause - Sony HDR HC1 | Operating Instructions - Page 22
Stick Duo" in once. • When the access lamp is lit or flashing, your camcorder is reading/writing data. Do not shake or knock your camcorder, turn the power off, eject the "Memory Stick Duo," or remove the battery pack. Otherwise, image data may be damaged. • Make sure that the "Memory Stick Duo - Sony HDR HC1 | Operating Instructions - Page 23
23 Getting Started - Sony HDR HC1 | Operating Instructions - Page 24
recording medium. Movies on tape: The CAMERA-TAPE lamp lights up. Still images on "Memory Stick Duo": The CAMERA-MEMORY lamp lights up.* * The pressing PHOTO deeply. Still images will be fixed to image size [1440 × 810] in the HDV format, [1080 × 810] (4:3) or [1440 × 810] (16:9) in the DV format - Sony HDR HC1 | Operating Instructions - Page 25
Playback 1 Slide the POWER switch in the direction of the arrow repeatedly to turn on the PLAY/EDIT lamp. Recording/Playback 2 Start playing back. Movies Touch , then touch to start playback. A C B Stop Play/Pause toggles as you touch it.* Rewind/Fast forward * Playback automatically - Sony HDR HC1 | Operating Instructions - Page 26
camcorder and the subject to get a sharp focus is about 1 cm (about 1/2 in.) for wide angle and about 80 cm (about 2 5/8 ft.) for telephoto. • You can set [DIGITAL picture manually. When recording indoors on a clear day, for instance, you can avoid backlight shadows on people next to the window by fi - Sony HDR HC1 | Operating Instructions - Page 27
LOCK switch to ON when using the external flash (optional). To adjust the focus manually.... Set the FOCUS/ZOOM switch to MANUAL ( appears). Rotate the focus FOCUS again. • Press [SET] on the LCD screen of your camcorder during expanded focus for setting up the peaking function. Press [ON] - Sony HDR HC1 | Operating Instructions - Page 28
record in mirror mode Open the LCD panel 90 degrees to the camcorder (), then rotate it 180 degrees to the lens side (). • A mirror The flash charge lamp flickers when charging the flash, and remains lit when the battery charge is complete. • You can only use the flash in the CAMERAMEMORY mode. • - Sony HDR HC1 | Operating Instructions - Page 29
the remaining battery (Battery Info Set the connected, the audio input from the external microphone takes precedence over others. REC lamp The REC lamp lights up in red during recording (p. 60). Remote sensor Point the Remote Commander (p. 34) towards the remote sensor to operate your camcorder - Sony HDR HC1 | Operating Instructions - Page 30
] or [STD]) (49) "Memory Stick Duo" indicator and the number of images that can be recorded (approx.) Review button (24) Data code during playback The date/time during recording and the camera setting data will be recorded automatically. They do not appear on the screen during recording, but you - Sony HDR HC1 | Operating Instructions - Page 31
and DV formats, the picture and sound disappear temporarily. • You cannot play back the tape recorded in the HDV format on video cameras of the DV format or mini-DV players. w; wa ws 7 Data file name Picture number/Total number of recorded pictures in the current playback folder - Sony HDR HC1 | Operating Instructions - Page 32
the [DISP GUIDE] (p. 19 Meaning Recording format (56) EXT SUR MIC (58) AUDIO MODE (57)* Continuous 58) Meaning HDV input/DV input (67) HDV output/DV output (36, 66) i.LINK connection (36, 66 connecting (70) Warning (96) Meaning AE SHIFT (46) WB SHIFT (46) Picture effect (53) Digital effect (52) Manual - Sony HDR HC1 | Operating Instructions - Page 33
starting point Make sure that the CAMERA-TAPE lamp lights up (p. 24 review) You can view about 2 seconds of the scene recorded just before you stopped the tape. Touch 6 0 min . STBY 0:00:00 The last 2 seconds (approx.) of the most recently recorded scene are played back. Then, your camcorder - Sony HDR HC1 | Operating Instructions - Page 34
you press this button will be recorded as a still image. SEARCH M. (p. 35 Video control buttons (Rewind, Playback, Fast-forward, Pause, Stop, Slow) (p. 25) Commander towards the remote sensor to operate your camcorder (p. 34 29). • To change the battery, see page 110. Searching quickly for a - Sony HDR HC1 | Operating Instructions - Page 35
Recording/Playback Searching for a scene by date of recording (Date search) You can locate the point where the recording date changes. 1 Slide the POWER switch down to turn on the PLAY/EDIT lamp. 2 Press SEARCH M. . 3 Press (previous)/(next) to select a recording date. 6 0 min 0:00:00:00 - Sony HDR HC1 | Operating Instructions - Page 36
See page 39 for "Notes on Connection" and refer also to the instruction manuals supplied with the devices to be connected. Select connection method depending on what TV to be connected with and connectors the TV is equipped with. high definition TV HD (high definition) image quality * i.LINK (for - Sony HDR HC1 | Operating Instructions - Page 37
(supplied) (Red) (White) (Yellow) Do not connect the video plug (yellow). i.LINKcable (optional) * Change the settings depending on the TV connected. (STANDARD SET) [VCR HDV/DV] [AUTO] (p. 56) [COMPONENT] [1080i/480i] (p. 59) (STANDARD SET) [VCR HDV/DV] [AUTO] (p. 56) [i.LINK CONV] [ON - Sony HDR HC1 | Operating Instructions - Page 38
to a TV for viewing (Continued) Type Camcorder Cable TV Component video cable (supplied) (Green) Y (Blue) PB/CB (Red) PR/CR A/V connecting cable (supplied) (Red) (White) (Yellow) Do not connect the video plug (yellow). A/V connecting cable with S VIDEO (optional) (Red) (White) (Yellow) Do not - Sony HDR HC1 | Operating Instructions - Page 39
signals are recorded in the pictures. • The TV needs to be set so that it recognizes that the camcorder is connected. Refer to the instruction manuals supplied with your TV. • When connecting only with the component video cable (supplied), audio signals are not output. To output audio signals - Sony HDR HC1 | Operating Instructions - Page 40
instructions below to use each of the menu items listed after this page. 1 Slide the POWER switch down to turn on the respective lamp. CAMERA-TAPE lamp: settings on a tape CAMERA Touch . 6 0 min STBY 0:00:00 MENU DISP GUIDE 1/3 STATUS CHECK SHUTTR SPEED PRGRAM AE AE SHIFT Touch the - Sony HDR HC1 | Operating Instructions - Page 41
Using the Menu Select the desired item. • You can also touch the item directly to select it. Customize the item. After finishing the settings, touch (close) to hide the menu screen. If you decide not to change the setting, touch to return to the previous screen. 41 - Sony HDR HC1 | Operating Instructions - Page 42
WHITE BAL. SHARPNESS SHUTTR SPEED AUTO SHUTTER AE SHIFT CAMERA COLOR WB SHIFT SPOT FOCUS FLASH SET - SUPER NS NS LIGHT COLOR SLOW S ZEBRA HISTOGRAM SELF-TIMER DIGITAL ZOOM STEADYSHOT CONV. LENS MEMORY SET menu (p. 49) STILL SET - Sony HDR HC1 | Operating Instructions - Page 43
of lamp: TAPE EDIT/PLAY menu (p. 55) VAR. SPD PB - REC CTRL - BURN DVD - END SEARCH STANDARD SET menu (p. 56) VCR HDV/DV - REC FORMAT DV SET VOLUME MULTI-SOUND - MIC LEVEL EXT SUR MIC LCD/VF SET COMPONENT i.LINK CONV TV TYPE USB SELECT - DISP - Sony HDR HC1 | Operating Instructions - Page 44
CAMERA SET menu Settings to adjust your camcorder to bring out the subject such as people or flowers while creating a soft background. BEACH&SKI*( ) SUNSET&MOON**( ) Select also prevents your camcorder from focusing on glass or metal mesh in windows that comes in between the camcorder and the subject. - Sony HDR HC1 | Operating Instructions - Page 45
lighting conditions change quickly - Under the video lamps of those at a studio, or you have changed the battery pack while [AUTO] is selected, select [AUTO] and aim your camcorder at a nearby white object setting. Soften Sharpen SHUTTR SPEED You can manually adjust and fix the shutter speed for - Sony HDR HC1 | Operating Instructions - Page 46
CAMERA SET menu (Continued) • For example, if you select 1/100 second, [100] appears on the screen. • When shooting a bright subject, setting the shutter speed to a faster value is recommended. • At a slow shutter speed, automatic focus may be lost. Use a tripod and adjust the focus manually HIGH( - Sony HDR HC1 | Operating Instructions - Page 47
manually (p. 27) when it is hard to focus automatically. • The shutter speed of your camcorder camcorder changes depending on the brightness. The motion of the picture may slow down at this time. ZEBRA This is useful as a guide of tones in your picture) window appears on the screen. This item - Sony HDR HC1 | Operating Instructions - Page 48
• You can also use the self-timer with the Remote Commander (p. 34). DIGITAL ZOOM You can select the maximum zoom level in case you want to zoom and after that, up to 120 × zoom is performed digitally. STEADYSHOT You can compensate for camera shake (the default setting is [ON]). Set [STEADYSHOT] - Sony HDR HC1 | Operating Instructions - Page 49
of images to be recorded. Capacity of the "Memory Stick Duo" (MB) and the number of recordable pictures When the POWER switch is set to CAMERA-MEMORY 1920 × 1920 × 1440 × 640 × 1440 1080 1080 480 16MB (supplied) 32MB 64MB 128MB 256MB 512MB 1GB 2GB 11 26 22 54 45 105 91 - Sony HDR HC1 | Operating Instructions - Page 50
follows: - Images recorded with the POWER switch set to CAMERA-TAPE are 1440 × 810 when in HDV format or DV format (16:9), and 1080 × 810 on the bottom. • When using the "Memory Stick Duo" made by Sony Corporation. The number of recordable pictures varies depending on the recording environment. - Sony HDR HC1 | Operating Instructions - Page 51
of 9999 images are stored) a new folder is automatically created. Touch [YES] . • You cannot delete the created folders using your camcorder. You will have to format the "Memory Stick Duo" (p. 51), or delete them using your computer. • The number of recordable pictures on a "Memory Stick Duo - Sony HDR HC1 | Operating Instructions - Page 52
changes from black-and-white to color. When fading out, it gradually changes from color to black-and-white. D. EFFECT (Digital effect) You can add digital effects to your recordings. Touch the desired effect. Adjust the effect with touch . / , then When you select [STILL], the image - Sony HDR HC1 | Operating Instructions - Page 53
. • You cannot record pictures edited using special effects on the tape in your camcorder. • You cannot add effects to externally input pictures. The playback pictures edited with digital effects are output via the HDV/DV Interface (i.LINK) jack without effect control. • You can save pictures edited - Sony HDR HC1 | Operating Instructions - Page 54
about 10 minutes, after you have removed both a cassette and a "Memory Stick Duo" from your camcorder, and slide the POWER switch down to turn on the CAMERATAPE lamp. • The demonstration will be Duo" is inserted. - When the POWER switch is set to other than CAMERA-TAPE. PictBridge PRINT See page 70. - Sony HDR HC1 | Operating Instructions - Page 55
**Pictures output from the HDV/DV Interface (i.LINK) DVD When your camcorder is connected to a Sony VAIO series personal computer, you can easily burn the picture recorded on the tape on a DVD (Direct Access to "Click to DVD") using this command. See "Creating a DVD (Direct Access to "Click to DVD - Sony HDR HC1 | Operating Instructions - Page 56
DV format only. Select this when connecting the camcorder to a computer, etc. • Disconnect the i.LINK cable (optional) before setting [VCR HDV/DV]. Otherwise, the connected device such as a VCR may not be 56 able to recognize the video signal from this camcorder. • When [AUTO] is selected and the - Sony HDR HC1 | Operating Instructions - Page 57
the TV to be connected. Refer also to the instruction manuals supplied with your TV TV, set [ WIDE SELECT] to [4:3] on your camcorder when recording a picture. AUDIO MODE 12BIT Records bit mode (1 stereo sound with high quality). • When recording in the HDV format, sound is automatically recorded - Sony HDR HC1 | Operating Instructions - Page 58
12 hours. • The limiter in your camcorder enables recording with reduced distortion, even if you set the recording level too high in the [MANUAL] setting. For best results, adjust the recording level so as to avoid exceeding 0dB. EXT SUR MIC (External surround microphone) WIDE STEREO ( ) Records - Sony HDR HC1 | Operating Instructions - Page 59
TV. HDV format pictures DV format pictures • When you connect your camcorder to a TV compatible with the ID-1 system, or via an S VIDEO jack, manual supplied with your TV. USB SELECT Select [USB SELECT] to view pictures on a computer via the USB cable (supplied) (p. 73), or connect your camcorder - Sony HDR HC1 | Operating Instructions - Page 60
HDV/ the subject at the cross point of the guide frame makes a balanced composition. COLOR BAR You to adjust the color on the monitor connected. DATA CODE During playback, displays camcorder from responding to a command sent by another VCR remote control unit. REC LAMP (Recording lamp) The camera - Sony HDR HC1 | Operating Instructions - Page 61
is automatically turned off when you do not operate your camcorder for more than approximately 5 minutes. NEVER The camcorder is not automatically turned off. • When you connect your camcorder to a wall outlet, [A.SHUT OFF] is automatically set to [NEVER]. CALIBRATION See page 109. TIME/LANGU - Sony HDR HC1 | Operating Instructions - Page 62
displayed, touch / . 6 0 min STBY Select the category. 0:00:00 END CAMERA SET PICT. APPLI. EDIT/PLAY STANDARD SET TIME/LANGU. OK 2 Touch / to . 6 0 min STBY Select button to delete. 0:00:00 MENU DISP GUIDE END 1/3 STATUS CHECK SHUTTR SPEED PRGRAM AE AE SHIFT 2 Touch the menu - Sony HDR HC1 | Operating Instructions - Page 63
Using the Menu Arranging the order of menu items displayed on Personal Menu 1 Touch [P-MENU SET UP] [SORT]. If the desired menu item is not displayed, touch / . 2 Touch the menu item you want to move. 3 Touch / to move the menu item to the desired place. 4 Touch . To sort more items, repeat - Sony HDR HC1 | Operating Instructions - Page 64
as a VCR, DVD recorder, etc. Use the supplied AC Adaptor as the power source (p. 13). Refer also to the instruction manuals supplied with the devices to be connected. Connecting to external devices The connection method and the image quality will differ depending on the video equipment and the - Sony HDR HC1 | Operating Instructions - Page 65
HDR-HC1, set [VCR HDV/DV] also on the recording device to [AUTO] (p. 56). • If the player and the recorder are both HDR-HC1 and connected with the i.LINK cable (optional), pictures are not continued smoothly after recording pause or stop. When connecting with the A/V connecting cable with S VIDEO - Sony HDR HC1 | Operating Instructions - Page 66
record the picture and sound separately. • When you use an i.LINK cable (optional), the video and sound signals are transmitted digitally, producing high quality pictures. • When i.LINK cable (optional) is connected, the format of the output signal ( or )will be indicated on the LCD screen of - Sony HDR HC1 | Operating Instructions - Page 67
Set the input signal of your camcorder. Set [VCR HDV/DV] to [AUTO] when recording from an HDV format compatible device. Set [VCR HDV/DV] to [DV] or [AUTO] when recording from a DV format compatible device (p. 56). 3 Connect your VCR as a player to your camcorder. • When i.LINK cable (optional) is - Sony HDR HC1 | Operating Instructions - Page 68
record TV programs from the HDV/DV Interface (i.LINK) jack. • You can record pictures from DV devices only in the DV format. • Note the following when connecting with an i.LINK cable (optional): - The recorded picture becomes rough when a picture is paused on your camcorder while recording to a VCR - Sony HDR HC1 | Operating Instructions - Page 69
Deleting recorded pictures from the "Memory Stick Duo" 1 Slide the POWER switch down to turn on the PLAY/EDIT lamp. 2 Touch . 6 0 min 1920 101-0001 2 / 10 101 MEMORY PLAY P-MENU 3 Select a picture you want to delete with / . • To delete all pictures at once, select [ ALL ERASE] (p. 50). 4 - Sony HDR HC1 | Operating Instructions - Page 70
printing (Print mark) The DPOF (Digital Print Order Format) standard is used to select images for printing on your camcorder. By marking images that you pictures using a PictBridge compliant printer without connecting the camcorder to a computer. Connect your camcorder to the AC Adaptor to supply - Sony HDR HC1 | Operating Instructions - Page 71
Association (CIPA). You can print still images without using a computer by connecting a printer directly to a digital video camera or digital still camera, regardless of model or manufacturer. Dubbing/Editing • Refer also to the operating instructions for the printer to be used. • Do not attempt - Sony HDR HC1 | Operating Instructions - Page 72
supplies power to optional accessories such as a video light, a flash, or a microphone. The accessory can be turned on or off as you operate the POWER switch on your camcorder. Refer to the operating instructions supplied with your accessory for details. • When you connect an accessory, open the shoe - Sony HDR HC1 | Operating Instructions - Page 73
on a "Memory Stick Duo" to the computer p. 73 Copy the movie in the HDV format on a tape to the computer p. 76 Copy the movie in the DV format on a tape to the computer p. 76 About connection There are 2 ways to connect your camcorder to a computer: - USB cable (supplied) When copying pictures - Sony HDR HC1 | Operating Instructions - Page 74
the USB cable to the USB jack on your computer. [USB CONNECT] appears on the LCD screen of your camcorder. It may take some time for the computer to recognize the camcorder when you connect the USB cable for the first time. Copying the pictures For Windows users Double-click the [Removable Disk] icon - Sony HDR HC1 | Operating Instructions - Page 75
camcorder When no new folders have been created, only [101MSDCF] is displayed. Folder containing movie data recorded using other camcorders file onto the hard disk of your computer. Disconnecting the USB cable (supplied) For Windows users If [USB CONNECT] appears on the LCD screen, follow the - Sony HDR HC1 | Operating Instructions - Page 76
. • Refer to the operational instruction of the editing software for the recommended connection. • Some editing software on the computer may not work correctly. HDV/DV Interface (i.LINK) jack i.LINK cable (optional) Notes on connecting to the computer • Connect the i.LINK cable (optional) to - Sony HDR HC1 | Operating Instructions - Page 77
[i.LINK CONV]. • A tape recorded in the DV format cannot be copied in the HDV format to a computer. • You can create DVDs from a tape by connecting your camcorder to a Sony VAIO series computer that has "Click to DVD Ver.2.3" or later installed (p. 78). The quality of the picture to be copied to - Sony HDR HC1 | Operating Instructions - Page 78
"Click to DVD") You can create DVDs from a tape when you connect your camcorder to a Sony VAIO series computer* with "Click to DVD" installed via an i.LINK cable (optional). The picture is automatically copied and written to a DVD. The following procedures describe how to create a DVD from a picture - Sony HDR HC1 | Operating Instructions - Page 79
since it takes a few hours to create a DVD. 3 Slide the POWER switch down to turn on the PLAY/EDIT lamp. 4 Touch [MENU] (STANDARD SET)[i.LINK CONV][ON HDVDV] . 5 Insert a recorded cassette into your camcorder. 6 Connect your camcorder to a computer via an i.LINK cable (optional) (p. 78 - Sony HDR HC1 | Operating Instructions - Page 80
the i.LINK cable (optional) or turn off the camcorder at this stage, DVD creation will continue on your computer. • When any of the following occurs, copying of the picture is canceled. A DVD containing the data up to the point the operation was canceled is created. Refer to the help files of "Click - Sony HDR HC1 | Operating Instructions - Page 81
If you run into any problems using your camcorder, use the following table to troubleshoot the problem. If the problem persists, remove the power source and contact your Sony dealer. Overall operations The power does not turn on. • The battery pack is discharged, running low, or not attached - Sony HDR HC1 | Operating Instructions - Page 82
environment is too high or low, or the battery pack has not been charged enough. This is not a malfunction. • Fully charge the battery again. If the problem persists, replace the battery pack with a new one. It may be damaged (p. 13, 105). A problem occurs when the camcorder is connected to the AC - Sony HDR HC1 | Operating Instructions - Page 83
pack or AC Adaptor) is connected correctly (p. 13). • Remove the battery pack from the camcorder, then attach it again (p. 14). • Attach a charged battery pack to the camcorder (p. 13). The cassette is not ejected even when the cassette lid is open. • Moisture condensation is starting in your - Sony HDR HC1 | Operating Instructions - Page 84
Troubleshooting (Continued) Pictures cannot supported on your camcorder (p. 103). Recording Refer also to "Adjusting the image during recording" (p. 86) and "Memory Stick Duo" section (p. 83). The tape does not start when you press REC START/STOP. • Slide the POWER switch down to turn on the CAMERA - Sony HDR HC1 | Operating Instructions - Page 85
due to moisture condensation. Remove the cassette and leave your camcorder for at Duo." • When the POWER switch is set to CAMERA-TAPE, you cannot record still images on the [FADER] - [COLOR BAR] Troubleshooting The recording angle differs depending on record pictures in the HDV and DV formats on - Sony HDR HC1 | Operating Instructions - Page 86
Troubleshooting (Continued) - When the POWER switch is set to CAMERA , or the flash is not attached correctly. • The external flash (optional) does not work when the POWER switch (p. 90). You cannot adjust the exposure manually. • You cannot adjust the exposure manually with: - NightShot - [COLOR SLOW - Sony HDR HC1 | Operating Instructions - Page 87
Troubleshooting The focus does not function. • You cannot operate when the exposure is anything other than the automatic mode. [DIGITAL ZOOM] does not function. • You cannot use [DIGITAL ZOOM] together with: - TELE MACRO - When the setting is record a TV screen or computer screen. Continued 87 - Sony HDR HC1 | Operating Instructions - Page 88
Troubleshooting is not possible with the tape recorded in the HDV format. The pictures stored on a "Memory Stick Duo ed files or folders, or have edited the data on a computer. (The file name flashes in that case.) This is with 4CH MIC REC on another camcorder. • Adjust [ AUDIO MIX] (p. - Sony HDR HC1 | Operating Instructions - Page 89
• You cannot view the picture in the HD (high definition) quality on the TV which is not compatible with the HDV1080i specification (p. 36). Refer to the instruction manuals supplied with your TV. Cannot view the picture or hear the sound on the TV connected with the Troubleshooting Continued 89 - Sony HDR HC1 | Operating Instructions - Page 90
Troubleshooting (Continued) component video cable (supplied). • Set [COMPONENT] on the (STANDARD SET) menu according to the requirements of the connected device (p. 59). • When you are using the component video cable (supplied), make sure the red and white plugs of the A/V connecting cable are - Sony HDR HC1 | Operating Instructions - Page 91
27) You cannot adjust [SHARPNESS]. • You cannot adjust [SHARPNESS] with: - [COLOR BAR] - [CINEMA EFECT] of [D. EFFECT] Troubleshooting [SHUTTR SPEED] cannot be adjusted manually. • You cannot adjust [SHUTTR SPEED] with: - NightShot - [PROGRAM AE] - [COLOR BAR] - [COLOR SLOW S] - [OLD MOVIE] or - Sony HDR HC1 | Operating Instructions - Page 92
Troubleshooting (Continued [HISTOGRAM] is not displayed in the following. - While using [DIGITAL ZOOM] - While using [D.EFFECT] - While using [COLOR BAR] OLD MOVIE] together with: - [PICT. EFFECT] - When [SHUTTR SPEED] is set to [MANUAL] - [PROGRAM AE] - When [ WIDE SELECT] of [DV SET] is set to [4:3] - Sony HDR HC1 | Operating Instructions - Page 93
if you press DISPLAY/BATT INFO while [DISP OUTPUT] is set to [V-OUT/PANEL] (p. 61). Troubleshooting Pictures from connected devices cannot be zoomed. • You cannot zoom the pictures from connected devices on your camcorder (p. 28). Time code and other information appear on the display of the - Sony HDR HC1 | Operating Instructions - Page 94
(USB) jack on the computer. • Disconnect the cable from the computer and camcorder, restart the computer, then connect them again correctly. You cannot monitor video that the camcorder is capturing. • Disconnect the cable from the computer, turn on the camcorder, then connect it again. You cannot - Sony HDR HC1 | Operating Instructions - Page 95
or editing. Finish camcorder operations before connecting the camcorder to the computer. You cannot copy video and still images to the computer. • Display pictures recorded on a "Memory Stick Duo" with the following procedures for the Windows computer. 1 Double-click [My Computer]. 2 Double-click - Sony HDR HC1 | Operating Instructions - Page 96
Sony service facility. C:(or E Self-diagnosis display) C:04: • The battery pack is not an "InfoLITHIUM" battery pack. Use an "InfoLITHIUM" battery pack (p. 105). • Connect the DC plug of the AC Adaptor to the DC IN jack of your camcorder securely (p. 13). C:21: • Moisture condensation - Sony HDR HC1 | Operating Instructions - Page 97
the screen, follow the instructions. Battery Use the " InfoLITHIUM" battery pack (p. 105). Battery level is low. • Change the battery (p. 13, 105) Old battery. Use a new one (p. 105). Re-attach the power source (p. 13). Moisture condensation Moisture condensation. Eject the cassette (p. 108 - Sony HDR HC1 | Operating Instructions - Page 98
exceeding 999MSDCF. You cannot delete created folders using your camcorder. • You will have to format the "Memory Stick Duo" (p. 51), or delete them using your computer. Cannot record still images on Memory Stick (p. 85). PictBridge compliant printer Check the connected device. • Switch off the - Sony HDR HC1 | Operating Instructions - Page 99
Troubleshooting Flash Charging... Cannot record still images. • You are trying to record incompatible format. No output image in "VCR HDV/DV". Change format. • Stop the playback or signal input, or change the [VCR HDV/DV] setting (p. 56). Dirty video head. Use a cleaning cassette (p. 108). - Sony HDR HC1 | Operating Instructions - Page 100
HDV format pictures recorded in HDV format You need an HDV1080i compatible TV (or monitor) with a component jack and AUDIO/VIDEO VIDEO input jack. Simple setting of the clock by time difference You can easily set the clock to the local time by setting a time difference when using your camcorder - Sony HDR HC1 | Operating Instructions - Page 101
camcorder adopts the Interlace mode with 1080 effective scan lines of screen ruling (1080i, number of pixels 1440 × 1080 dots). The video bit rate for recording is about 25 Mbps. i.LINK is adopted for the digital interface, enabling a digital connection with an HDV compatible TV or computer. • HDV - Sony HDR HC1 | Operating Instructions - Page 102
jack is required to view playback pictures recorded in the HDV format. See the table below for the main 2004/05 models. Sony TV models KLV-32M1, KLV-23M1, KLV-S23A10, KLV of June, 2005 (including models on sale in the near future) • Some models are not available depending on the country or region. - Sony HDR HC1 | Operating Instructions - Page 103
support high speed camcorder. - DSC00001.JPG: This file name appears on the display of a computer. • A "Memory Stick Duo" formatted by a computer (Windows OS/Mac OS) does not have guaranteed compatibility with your camcorder camcorder, or remove the battery pack for replacement while your camcorder - Sony HDR HC1 | Operating Instructions - Page 104
camcorder is 2 GB. • This unit does not support high speed data transfer. On image data compatibility • Image data files recorded on a "Memory Stick Duo" by your camcorder conform to the Design Rule for Camera device, format it with your camcorder (p. 51). Note that formatting erases all information on - Sony HDR HC1 | Operating Instructions - Page 105
restored if it is used in high temperatures for a long time, or if left in a fully charged state, or when the battery pack is frequently used. Use the remaining battery time indication as a guide to the approximate shooting time. • The mark that indicates low battery flashes even if there are still - Sony HDR HC1 | Operating Instructions - Page 106
i.LINK cable (optional). When connecting this unit to an HDV/DVcompatible device having two or more DV Interfaces, refer to the operating instructions of the device to be connected. • i.LINK is a more familiar term for the IEEE 1394 data transport bus proposed by Sony, and is a trademark approved - Sony HDR HC1 | Operating Instructions - Page 107
by Sony (e.g. a VAIO series personal computer) as well as to video devices. Before connecting this unit to your computer, make sure that application software supported by this unit is already installed on your computer. Some i.LINK compatible video devices, such as Digital Televisions, DVD, MICROMV - Sony HDR HC1 | Operating Instructions - Page 108
battery pack completely before storing it. Moisture condensation If your camcorder is brought directly from a cold place to a warm place, moisture may condense inside your camcorder • If the following problem occurs, clean the video heads for 10 seconds with the Sony DVM12CLD cleaning cassette ( - Sony HDR HC1 | Operating Instructions - Page 109
dealer or local authorized Sony service facility to have the video head replaced. LCD screen • Do not exert excessive pressure on the LCD screen, as it may cause damage. • If your camcorder is used in a cold place, a residual image may appear on the LCD screen. This is not a malfunction. • While - Sony HDR HC1 | Operating Instructions - Page 110
Commander may not function properly. In this case, replace the battery with a Sony CR2025 lithium battery. Use of another battery may present a risk of fire or explosion. Specifications System Video recording system (HDV) Video recording system (DV) 2 rotary heads, Helical scanning system 2 rotary - Sony HDR HC1 | Operating Instructions - Page 111
camcorder /Video output 10-pin connector Video connectors MIC jack LANC jack USB jack HDV/DV battery pack) Operating temperature DC 7.2 V (battery pack) DC 8.4 V (AC Adaptor) During camera recording using the viewfinder with normal brightness: HDV recording 5.8 W DV recording 5.2 W During camera - Sony HDR HC1 | Operating Instructions - Page 112
Dimensions (approx.) Mass (approx.) Supplied accessories -20 °C to + 60 °C (-4 °F to + 140 °F) 71 × 94 × 188 mm (2 7/8 × 3 3/4 × 7 1/2 in.) (w/h/d) excluding the projecting parts 680 g (1lb7oz) main unit only 780 g (1lb11oz) including the NP-FM50 rechargeable battery pack, DVM60 cassette and lens - Sony HDR HC1 | Operating Instructions - Page 113
Power zoom lever (26) PHOTO button (24) CAMERA-TAPE, CAMERA-MEMORY, PLAY/EDIT mode lamps (16) POWER switch (16) "Memory Stick Duo" slot (22) Access lamp (22, 103) Active Interface Shoe (72) Flash (flash) button (28) NIGHTSHOT switch (26) MIC (PLUG IN POWER) jack (72 - Sony HDR HC1 | Operating Instructions - Page 114
(26) REC START/STOP button (24) LCD screen/touch panel (4, 19) HDV/DV Interface (i.LINK) jack (72) (USB) jack (72) DISPLAY/BATT INFO switch (27) Battery pack (13) DC IN jack (72) Attaching the shoulder strap Attach the shoulder strap supplied with your camcorder to the hooks for - Sony HDR HC1 | Operating Instructions - Page 115
(Carl Zeiss Lens) (5) TELE MACRO button (27) Camera recording lamp (29) Remote sensor (29) FOCUS/ZOOM switch Hooks for the shoulder strap (114) BATT (battery release) lever (14) Grip belt (16) the lens hood into the holes on the camcorder, then turn the lens hood fixing screw - Sony HDR HC1 | Operating Instructions - Page 116
Pre-installed rechargeable battery.... 109 Charging time 14 CHG (charge) lamp 14 CINEMA EFECT (Cinematic effect 52 Click to DVD 78 CLOCK SET 20 COLOR BAR 60 COLOR SLOW S (Color Slow Shutter 47, 92 COMPONENT 59 COMPONENT OUT jack 36, 72 Component video cable 37, 38 Connect computer 73 TV - Sony HDR HC1 | Operating Instructions - Page 117
CAMERA SET menu ... 44 EDIT/PLAY menu ........ 55 MEMORY SET menu 49 Menu items 42 Personal Menu ........ 40, 62 PICT.APPLI. menu....... 52 STANDARD SET menu 56 TIME/LANGU. menu 61 Using the menu 40 MENU ROTATE 61 MIC (PLUG IN POWER) jack 72 MIC LEVEL 58 Mirror mode 28 Moisture condensation - Sony HDR HC1 | Operating Instructions - Page 118
29 REC MODE (Recording mode 56 Rec review 33 REC START/STOP 24 REDEYE REDUC 46 REMAINING 60 Remaining battery 30 Remote Commander 34 REMOTE CTRL (Remote 44 SUPER NS 47 System requirements 73 S VIDEO cable 38, 64 S VIDEO jack 36, 64 T Tape See Cassette Tape counter 30 Tape playback select - Sony HDR HC1 | Operating Instructions - Page 119
SPD PB (Various speed playback 55 VCR HDV/DV 56 VF B.LIGHT (Viewfinder brightness 58 Video head 108 Video operation buttons ....... 31 Viewfinder 18 Brightness 46 WHITE FADER 52 Wide angle 26 WIDE SELECT 57 WIDE STEREO 58 Windows 73, 74 WORLD TIME 61 Write-protect tab ........ 101, 103 Z - Sony HDR HC1 | Operating Instructions - Page 120
- Sony HDR HC1 | Operating Instructions - Page 121
- Sony HDR HC1 | Operating Instructions - Page 122
- Sony HDR HC1 | Operating Instructions - Page 123
Windows, and Windows Media are trademarks or registered trademarks of U.S. Microsoft Corporation in the U.S. and other countries. • Macintosh and Mac OS are trademarks of Apple Computer, Inc in the U.S. and other countries. • HDV and the HDV logo are trademarks of Sony in each case in this manual.
-
 1
1 -
 2
2 -
 3
3 -
 4
4 -
 5
5 -
 6
6 -
 7
7 -
8
-
9
-
10
-
11
-
12
-
13
-
14
-
15
-
16
-
17
-
18
-
19
-
20
-
21
-
22
-
23
-
24
-
25
-
26
-
27
-
28
-
29
-
30
-
31
-
32
-
33
-
34
-
35
-
36
-
37
-
38
-
39
-
40
-
41
-
42
-
43
-
44
-
45
-
46
-
47
-
48
-
49
-
50
-
51
-
52
-
53
-
54
-
55
-
56
-
57
-
58
-
59
-
60
-
61
-
62
-
63
-
64
-
65
-
66
-
67
-
68
-
69
-
70
-
71
-
72
-
73
-
74
-
75
-
76
-
77
-
78
-
79
-
80
-
81
-
82
-
83
-
84
-
85
-
86
-
87
-
88
-
89
-
90
-
91
-
92
-
93
-
94
-
95
-
96
-
97
-
98
-
99
-
100
-
101
-
102
-
103
-
104
-
105
-
106
-
107
-
108
-
109
-
110
-
111
-
112
-
113
-
114
-
115
-
116
-
117
-
118
-
119
-
120
-
121
-
122
-
123
 |
 |
Printed in Japan
Printed on 100% recycled paper using
VOC (Volatile Organic Compound)-free
vegetable oil based ink.
© 2005 Sony Corporation
Digital HD Video Camera Recorder
Operating Guide
HDR-HC1
2-631-458-
11
(1)
Using the Menu
Dubbing/Editing
Using a Computer
Troubleshooting
Additional Information
Quick Reference
40
64
73
81
100
113
1
Getting Started
Recording/
Playback
12
24
10
US
Enjoying pictures with
high definition quality