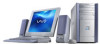
Sony PCV-RX755 VAIO User Guide - Page 25
Using LabelMaker, Click Create New Album. The Select Photo window appears.
 |
View all Sony PCV-RX755 manuals
Add to My Manuals
Save this manual to your list of manuals |
Page 25 highlights
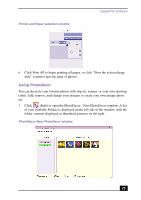
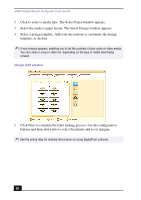
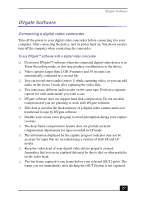
DigitalPrint Software 2 Click Create New Album. The Select Photo window appears. 3 Select the photos you want to include in your album from the available folders displayed. Click List to select individual pictures from each folder. The Select Design window appears. 4 Select a design template for your album. Use the scroll bar to see all available designs. When you have selected the design, the Select Layout window appears. 5 Select a page layout for your album. A preview of your selected design and page layout is displayed. Scroll through the album, using the book icons at the bottom of the window. 6 Click the Page List button to edit your album. Customize your album by adding more pictures, decorations, comments, or deleting pages. Click Print. 7 Select the album type and click Print. ✍ For information on stitching your album, click Stitch Album. See the online Help file for more details. Using LabelMaker Use LabelMaker to design original labels to personalize your media, such as Memory Stick® media, CDs, or video cassettes. 1 Click (Label) to open the Label - New Label window. Label - New Label window 25
-
 1
1 -
2
-
3
-
4
-
5
-
6
-
7
-
8
-
9
-
10
-
11
-
12
-
13
-
14
-
15
-
16
-
17
-
18
-
19
-
 20
20 -
 21
21 -
 22
22 -
 23
23 -
 24
24 -
 25
25 -
 26
26 -
 27
27 -
 28
28 -
 29
29 -
 30
30 -
31
-
32
-
33
-
34
-
35
-
36
-
37
-
38
-
39
-
40
-
41
-
42
-
43
-
44
-
45
-
46
-
47
-
48
-
49
-
50
-
51
-
52
-
53
-
54
-
55
-
56
-
57
-
58
-
59
-
60
-
61
-
62
-
63
-
64
-
65
-
66
-
67
-
68
-
69
-
70
-
71
-
72
-
73
-
74
-
75
-
76
-
77
-
78
-
79
-
80
-
81
-
82
-
83
-
84
-
85
-
86
-
87
-
88
-
89
-
90
-
91
-
92
-
93
 |
 |
