Sony STR-DA5600ES Operating Instructions (Large File - 18.8 MB) - Page 110
Recording using the receiver, To record digital sound
 |
View all Sony STR-DA5600ES manuals
Add to My Manuals
Save this manual to your list of manuals |
Page 110 highlights
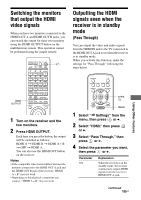
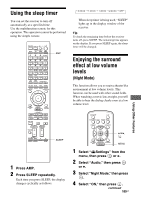
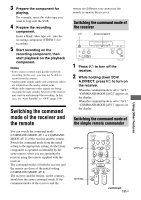
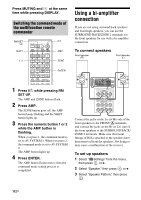
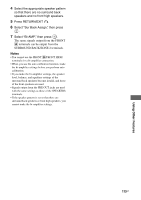
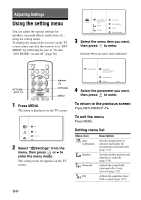
Notes • This function does not work when the multichannel input is selected. • This function does not work when "2ch Analog Direct" is being used. • This function does not work when Dolby TrueHD signals with a sampling frequency of 176.4 kHz and higher are being received. • If the Night Mode function is turned on while the receiver is receiving signals with a sampling frequency of 176.4 kHz and higher, the signals will always be played back at either 44.1 kHz or 48 kHz. Tip While this function is on, the Bass, Treble increase, and "D. Range Comp" is automatically set to "MAX." Recording using the receiver You can record from a video/audio component using the receiver. Refer to the operating instructions supplied with your recording component. V/v/b, MENU Recording with an audio component You can record with an audio component using the receiver. Refer to the operating instructions supplied with your MD deck or tape deck. 1 Select " Input" from the menu, then press or b. 110GB 2 Select the playback component, then press . 3 Prepare the playback component for playing. For example, insert a CD into the CD player. 4 Prepare the recording component. Insert a blank MD or tape into the recording deck and adjust the recording level. 5 Start recording on the recording deck, then start playback on the playback component. Notes • If you use an SCMS-compliant recording deck, you may not make recordings. • The audio input signals from the MULTI CHANNEL INPUT jacks may not be output. • Only analog input signals are output from the analog output jack (for recording). • Signals input from the COAXIAL IN jack or the OPTICAL IN jack are output to the OPTICAL MD OUT jack, unless MD input is selected. • HDMI sound cannot be recorded. To record digital sound Connect a component for playback to the digital audio input (OPTICAL IN) jack, and connect the recording component to the OPTICAL MD OUT jack. Recording with a video component 1 Select " Input" from the menu, then press or b. 2 Select the playback component, then press .
-
 1
1 -
2
-
3
-
4
-
5
-
6
-
7
-
8
-
9
-
10
-
11
-
12
-
13
-
14
-
15
-
16
-
17
-
18
-
19
-
20
-
21
-
22
-
23
-
24
-
25
-
26
-
27
-
28
-
29
-
30
-
31
-
32
-
33
-
34
-
35
-
36
-
37
-
38
-
39
-
40
-
41
-
42
-
43
-
44
-
45
-
46
-
47
-
48
-
49
-
50
-
51
-
52
-
53
-
54
-
55
-
56
-
57
-
58
-
59
-
60
-
61
-
62
-
63
-
64
-
65
-
66
-
67
-
68
-
69
-
70
-
71
-
72
-
73
-
74
-
75
-
76
-
77
-
78
-
79
-
80
-
81
-
82
-
83
-
84
-
85
-
86
-
87
-
88
-
89
-
90
-
91
-
92
-
93
-
94
-
95
-
96
-
97
-
98
-
99
-
100
-
101
-
102
-
103
-
104
-
 105
105 -
 106
106 -
 107
107 -
 108
108 -
 109
109 -
 110
110 -
 111
111 -
 112
112 -
 113
113 -
 114
114 -
 115
115 -
116
-
117
-
118
-
119
-
120
-
121
-
122
-
123
-
124
-
125
-
126
-
127
-
128
-
129
-
130
-
131
-
132
-
133
-
134
-
135
-
136
-
137
-
138
-
139
-
140
-
141
-
142
-
143
-
144
-
145
-
146
-
147
-
148
-
149
-
150
-
151
-
152
-
153
-
154
-
155
-
156
-
157
-
158
-
159
-
160
-
161
-
162
-
163
-
164
-
165
-
166
-
167
-
168
-
169
-
170
-
171
-
172
-
173
-
174
-
175
-
176
-
177
-
178
 |
 |