Sony STR-DG600 Operating Instructions - Page 71
Other Operations, Switching the audio input mode (INPUT MODE)
 |
View all Sony STR-DG600 manuals
Add to My Manuals
Save this manual to your list of manuals |
Page 71 highlights
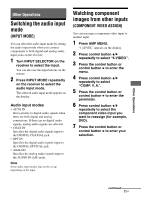
Other Operations Other Operations Switching the audio input mode (INPUT MODE) You can select the audio input mode by setting the audio input mode when you connect components to both digital and analog audio input jacks on the receiver. 1 Turn INPUT SELECTOR on the receiver to select the input. You can also use the input buttons on the remote. 2 Press INPUT MODE repeatedly on the receiver to select the audio input mode. The selected audio input mode appears on the display. Audio input modes • AUTO IN Gives priority to digital audio signals when there are both digital and analog connections. If there are no digital audio signals, analog audio signals are selected. • COAX IN Specifies the digital audio signals input to the DIGITAL COAXIAL jack. • OPT IN Specifies the digital audio signals input to the DIGITAL OPTICAL jack. • ANALOG Specifies the analog audio signals input to the AUDIO IN (L/R) jacks. Note Some audio input modes may not be set up depending on the input. Watching component images from other inputs (COMPONENT VIDEO ASSIGN) You can reassign a component video input to another input. 1 Press AMP MENU. "1-LEVEL" appears on the display. 2 Press control button V/v repeatedly to select "6-VIDEO". 3 Press the control button or control button b to enter the menu. 4 Press control button V/v repeatedly to select "COMP. V. A.". 5 Press the control button or control button b to enter the parameter. 6 Press control button V/v repeatedly to select the component video input you want to reassign (for example, DVD). 7 Press the control button or control button b to enter your selection. continued 71US
-
 1
1 -
2
-
3
-
4
-
5
-
6
-
7
-
8
-
9
-
10
-
11
-
12
-
13
-
14
-
15
-
16
-
17
-
18
-
19
-
20
-
21
-
22
-
23
-
24
-
25
-
26
-
27
-
28
-
29
-
30
-
31
-
32
-
33
-
34
-
35
-
36
-
37
-
38
-
39
-
40
-
41
-
42
-
43
-
44
-
45
-
46
-
47
-
48
-
49
-
50
-
51
-
52
-
53
-
54
-
55
-
56
-
57
-
58
-
59
-
60
-
61
-
62
-
63
-
64
-
65
-
 66
66 -
 67
67 -
 68
68 -
 69
69 -
 70
70 -
 71
71 -
 72
72 -
 73
73 -
 74
74 -
 75
75 -
 76
76 -
77
-
78
-
79
-
80
-
81
-
82
-
83
-
84
-
85
-
86
-
87
-
88
 |
 |
