Sony STR-DG600 Operating Instructions - Page 72
Naming inputs, Assignable inputs for, component video input
 |
View all Sony STR-DG600 manuals
Add to My Manuals
Save this manual to your list of manuals |
Page 72 highlights
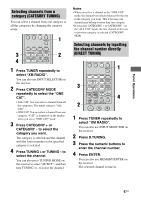
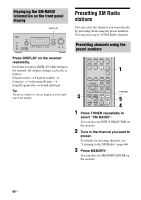
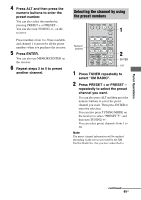
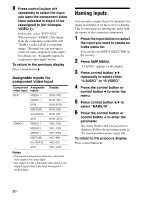
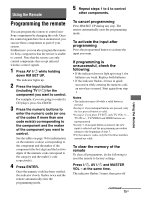
8 Press control button V/v repeatedly to select the input you want the component video input selected in step 6 to be reassigned to (for example, VIDEO 1). In this case, select "DVD-VD1". When you press VIDEO 1, the image from the component connected to the VIDEO 1 jacks will be a component image. The input you can reassign to varies for each component video input. For details, see "Assignable inputs for component video input" below. To return to the previous display Press control button B. Assignable inputs for component video input Component Assignable video input inputs DVD VIDEO 1 VIDEO 3 DVD MD/TAPE SA-CD/CD AUX VIDEO 2 VIDEO 1 VIDEO 2 VIDEO 3 MD/TAPE SA-CD/CD AUX Display DVD-VD1 DVD-VD3 DVD-DVD DVD-MD DVD-CD DVD-AUX VD2-VD1 VD2-VD2 VD2-VD3 VD2-MD VD2-CD VD2-AUX Notes • You cannot reassign more than one component video input to the same input. • You cannot use the component video input as the original input when it has been reassigned to another input. Naming inputs You can enter a name of up to 8 characters for inputs and display it on the receiver's display. This is convenient for labeling the jacks with the names of the connected components. 1 Press the input button to select the input you want to create an index name for. You can also use INPUT SELECTOR on the receiver. 2 Press AMP MENU. "1-LEVEL" appears on the display. 3 Press control button V/v repeatedly to select either "5-AUDIO" or "6-VIDEO". 4 Press the control button or control button b to enter the menu. 5 Press control button V/v to select "NAME IN". 6 Press the control button or control button b to enter the parameter. The cursor flashes and you can select a character. Follow the procedure given in "To create an index name" (page 64). To return to the previous display Press control button B. 72US
-
 1
1 -
2
-
3
-
4
-
5
-
6
-
7
-
8
-
9
-
10
-
11
-
12
-
13
-
14
-
15
-
16
-
17
-
18
-
19
-
20
-
21
-
22
-
23
-
24
-
25
-
26
-
27
-
28
-
29
-
30
-
31
-
32
-
33
-
34
-
35
-
36
-
37
-
38
-
39
-
40
-
41
-
42
-
43
-
44
-
45
-
46
-
47
-
48
-
49
-
50
-
51
-
52
-
53
-
54
-
55
-
56
-
57
-
58
-
59
-
60
-
61
-
62
-
63
-
64
-
65
-
66
-
 67
67 -
 68
68 -
 69
69 -
 70
70 -
 71
71 -
 72
72 -
 73
73 -
 74
74 -
 75
75 -
 76
76 -
 77
77 -
78
-
79
-
80
-
81
-
82
-
83
-
84
-
85
-
86
-
87
-
88
 |
 |