Sony VGC-RA839G VAIO User Guide - Page 101
Using the RAID Configuration Wizard, Custom Recovery for Advanced Users
 |
View all Sony VGC-RA839G manuals
Add to My Manuals
Save this manual to your list of manuals |
Page 101 highlights
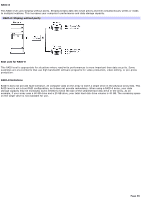
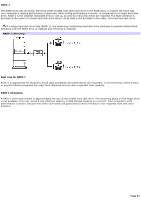
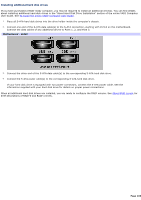
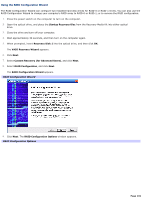
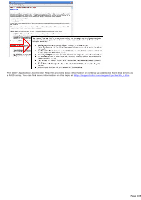
Using the RAID Configuration Wizard The RAID Configuration Wizard can configure two installed hard disk drives for RAID-0 or RAID-1 levels. You can also use the RAID Configuration Wizard to change your computer's RAID array to RAID-0 or RAID-1, or to remove the RAID configuration. 1. Press the power switch on the computer to turn on the computer. 2. Open the optical drive, and place the Startup Recovery Disc from the Recovery Media Kit into either optical drive. 3. Close the drive and turn off your computer. 4. Wait approximately 30 seconds, and then turn on the computer again. 5. When prompted, insert Recovery Disk 1 into the optical drive, and then click OK. The VAIO Recovery Wizard appears. 6. Click Next. 7. Select Custom Recovery (for Advanced Users), and click Next. 8. Select RAID Configuration, and click Next. The RAID Configuration Wizard appears. RAID Configuration Wizard 9. Click Next. The RAID Configuration Options window appears. RAID Configuration Options Page 101
-
 1
1 -
2
-
3
-
4
-
5
-
6
-
7
-
8
-
9
-
10
-
11
-
12
-
13
-
14
-
15
-
16
-
17
-
18
-
19
-
20
-
21
-
22
-
23
-
24
-
25
-
26
-
27
-
28
-
29
-
30
-
31
-
32
-
33
-
34
-
35
-
36
-
37
-
38
-
39
-
40
-
41
-
42
-
43
-
44
-
45
-
46
-
47
-
48
-
49
-
50
-
51
-
52
-
53
-
54
-
55
-
56
-
57
-
58
-
59
-
60
-
61
-
62
-
63
-
64
-
65
-
66
-
67
-
68
-
69
-
70
-
71
-
72
-
73
-
74
-
75
-
76
-
77
-
78
-
79
-
80
-
81
-
82
-
83
-
84
-
85
-
86
-
87
-
88
-
89
-
90
-
91
-
92
-
93
-
94
-
95
-
 96
96 -
 97
97 -
 98
98 -
 99
99 -
 100
100 -
 101
101 -
 102
102 -
 103
103 -
 104
104 -
 105
105 -
 106
106 -
107
-
108
-
109
-
110
-
111
-
112
-
113
-
114
-
115
-
116
-
117
-
118
-
119
-
120
-
121
-
122
-
123
-
124
-
125
-
126
-
127
-
128
-
129
-
130
-
131
-
132
-
133
-
134
-
135
-
136
-
137
-
138
-
139
-
140
-
141
-
142
-
143
-
144
-
145
-
146
-
147
-
148
-
149
-
150
-
151
-
152
-
153
-
154
-
155
-
156
-
157
-
158
-
159
-
160
-
161
-
162
-
163
-
164
 |
 |
