TEAC DM-3200 DM-3200 Owner's Manual - Page 38
Connections, x stereo digital I/O - adat
 |
View all TEAC DM-3200 manuals
Add to My Manuals
Save this manual to your list of manuals |
Page 38 highlights
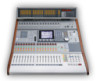
3 - Connections This section describes how the DM-3200 connects to other equipment in your studio. Since the DM-3200 is extremely "soft" in terms of the internal routing and patching, it is unlikely that you will need to spend a lot of time connecting and disconnecting equipment once you have your setup in place. A patchbay is also probably less necessary with the DM-3200 than with many other mixers. See "Routing" on page 47 for full details of how the routing and assignment are managed. Stereo outs 2-track in Mic/line inputs and inserts Assignable sends/returns MIDI, control and sync connections ADAT I/O 2 x stereo digital I/O Cascade TDIF I/O connector Figure 3.1: Overview of rear panel features The illustration above provides an overview of the way in which the top and rear panel connections are arranged. Not highlighted are the power connector and switch, and the two option slots, which may be used to expand the capabilities of the DM-3200. 38 TASCAM DM-3200 User's Manual
-
 1
1 -
2
-
3
-
4
-
5
-
6
-
7
-
8
-
9
-
10
-
11
-
12
-
13
-
14
-
15
-
16
-
17
-
18
-
19
-
20
-
21
-
22
-
23
-
24
-
25
-
26
-
27
-
28
-
29
-
30
-
31
-
32
-
 33
33 -
 34
34 -
 35
35 -
 36
36 -
 37
37 -
 38
38 -
 39
39 -
 40
40 -
 41
41 -
 42
42 -
 43
43 -
44
-
45
-
46
-
47
-
48
-
49
-
50
-
51
-
52
-
53
-
54
-
55
-
56
-
57
-
58
-
59
-
60
-
61
-
62
-
63
-
64
-
65
-
66
-
67
-
68
-
69
-
70
-
71
-
72
-
73
-
74
-
75
-
76
-
77
-
78
-
79
-
80
-
81
-
82
-
83
-
84
-
85
-
86
-
87
-
88
-
89
-
90
-
91
-
92
-
93
-
94
-
95
-
96
-
97
-
98
-
99
-
100
-
101
-
102
-
103
-
104
-
105
-
106
-
107
-
108
-
109
-
110
-
111
-
112
-
113
-
114
-
115
-
116
-
117
-
118
-
119
-
120
 |
 |
