TEAC LP-R550USB Owners Manual - Page 24
Before Recording, automatically. Make sure to press the STOP button - cd recorder cassette
 |
View all TEAC LP-R550USB manuals
Add to My Manuals
Save this manual to your list of manuals |
Page 24 highlights
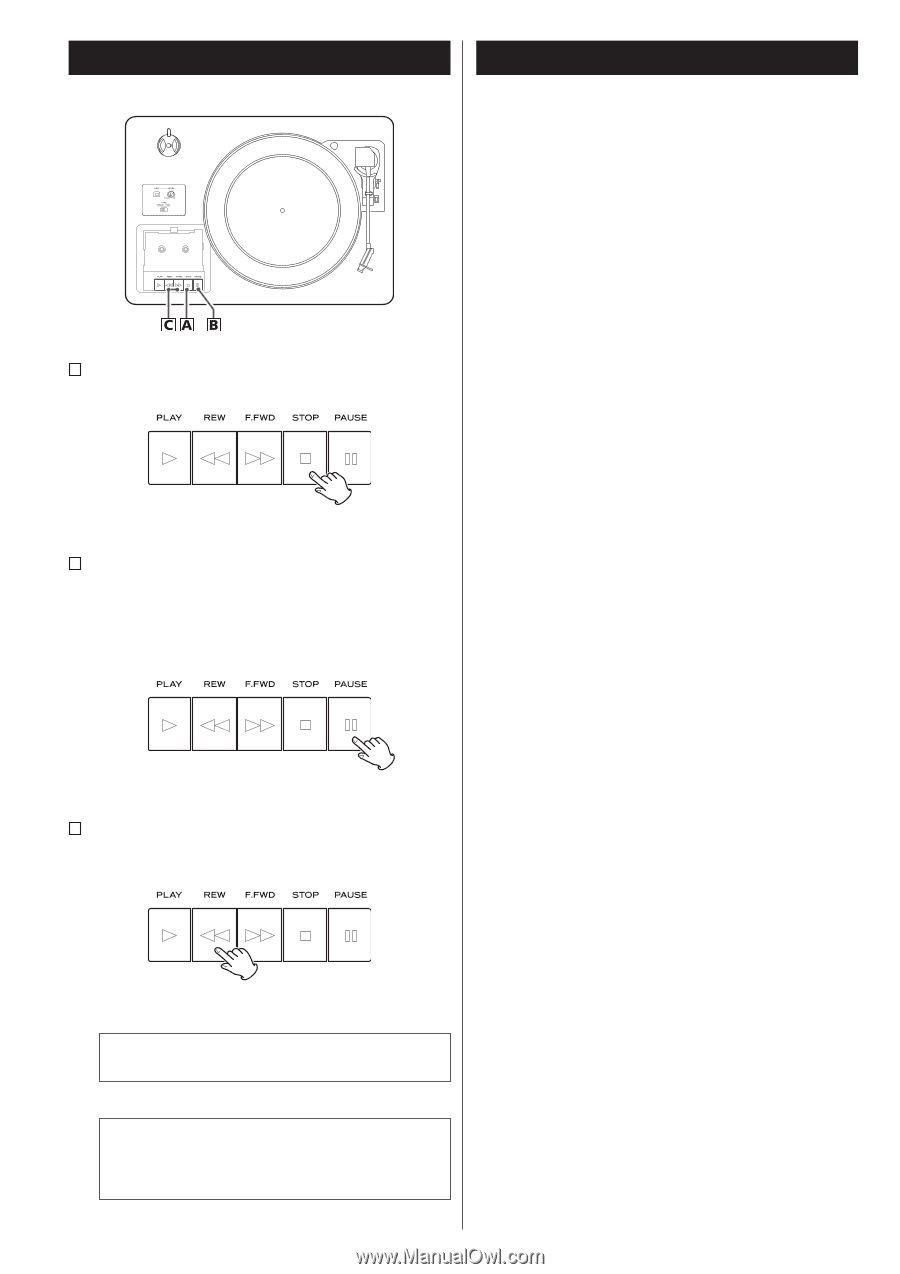
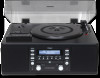
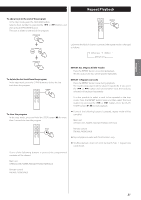
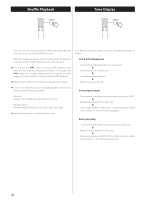
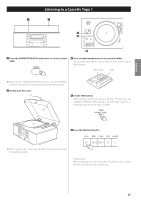
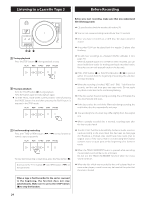
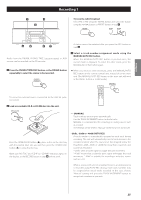
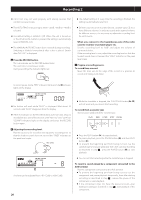
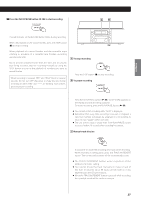
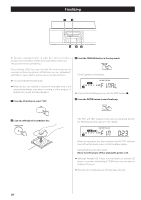
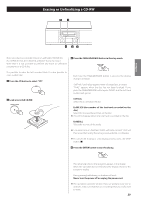
Listening to a Cassette Tape 2 Before Recording Before you start recording, make sure that you understand the following points: < CD specifications limit the number of tracks to 99. < You can not create recording tracks shorter than 10 seconds. < Once you have recorded on a CD-R disc, the data cannot be erased. < A recorded CD-R can be played back in a regular CD player after finalizing. A To stop playback Press the STOP button (H) during playback to stop. < To add more recordings to a finalized CD-RW, unfinalize it. (See page 29.) When all available space on a CD-RW has been recorded, you can record additional tracks by erasing previously recorded tracks. Note that you can only erase all tracks or the last track. < If the STOP button (H) or PLAY/PAUSE button (y/J) is pressed within 10 seconds from the beginning of recording, the unit does not stop recording. B To pause playback Press the PAUSE button (J) during playback . Press the button again to start playback again. < To enter PAUSE mode at the current position, order of pressing the PAUSE button first and then pressing the PLAY button is required in the STOP mode. < When the recording is finished, "REC" and "- ENd - " blink for a few seconds, and the unit then goes into stop mode. Do not apply any shock or vibration to the unit during blinking. < If the disc reaches the end during recording, the unit finalizes the disc automatically and stops. < If the disc reaches the end of the 99th track during recording, the unit finalizes the disc automatically and stops. < The recording time of a track may differ slightly from the original one. < When a partially recorded disc is inserted, recording starts after the last recorded track. C Fast-forwarding/rewinding Press the F.FWD or REW button (,/m) to fast-forward or rewind a tape respectively. < The AUTO REC function automatically divides an audio source in tracks according to the sound level that has been set (See page 25). Therefore, a finished copy could have more tracks than its original source. if the source that is recorded using this function contains noise or quiet parts at the beginning of or between tracks. To stop fast-forwarding or rewinding, press the Stop button (H). < When the TRACK INCREMENT button is pressed while recording, the recorded sound will be cut for a moment. Do not use the TRACK INCREMENT function while the music sound continues. Never press the PLAY button (y) and REW button (m) at the same time. < When the disc which was recorded by this unit is played back on some other players, a small noise may be heard at the point that the track is divided. When a tape is fast-forwarded to the end or rewound to the beginning, the function does not stop automatically. Make sure to press the STOP button (H) to stop the function. 24
-
 1
1 -
2
-
3
-
4
-
5
-
6
-
7
-
8
-
9
-
10
-
11
-
12
-
13
-
14
-
15
-
16
-
17
-
18
-
 19
19 -
 20
20 -
 21
21 -
 22
22 -
 23
23 -
 24
24 -
 25
25 -
 26
26 -
 27
27 -
 28
28 -
 29
29 -
30
-
31
-
32
-
33
-
34
-
35
-
36
-
37
-
38
-
39
-
40
-
41
-
42
-
43
-
44
-
45
-
46
-
47
-
48
-
49
-
50
-
51
-
52
-
53
-
54
-
55
-
56
-
57
-
58
-
59
-
60
-
61
-
62
-
63
-
64
-
65
-
66
-
67
-
68
-
69
-
70
-
71
-
72
-
73
-
74
-
75
-
76
-
77
-
78
-
79
-
80
-
81
-
82
-
83
-
84
-
85
-
86
-
87
-
88
-
89
-
90
-
91
-
92
-
93
-
94
-
95
-
96
-
97
-
98
-
99
-
100
 |
 |