TEAC LP-R550USB Owners Manual - Page 32
Recording into a computer, Connecting this unit to a computer, Selecting a recording source - b usb turntable audio system
 |
View all TEAC LP-R550USB manuals
Add to My Manuals
Save this manual to your list of manuals |
Page 32 highlights
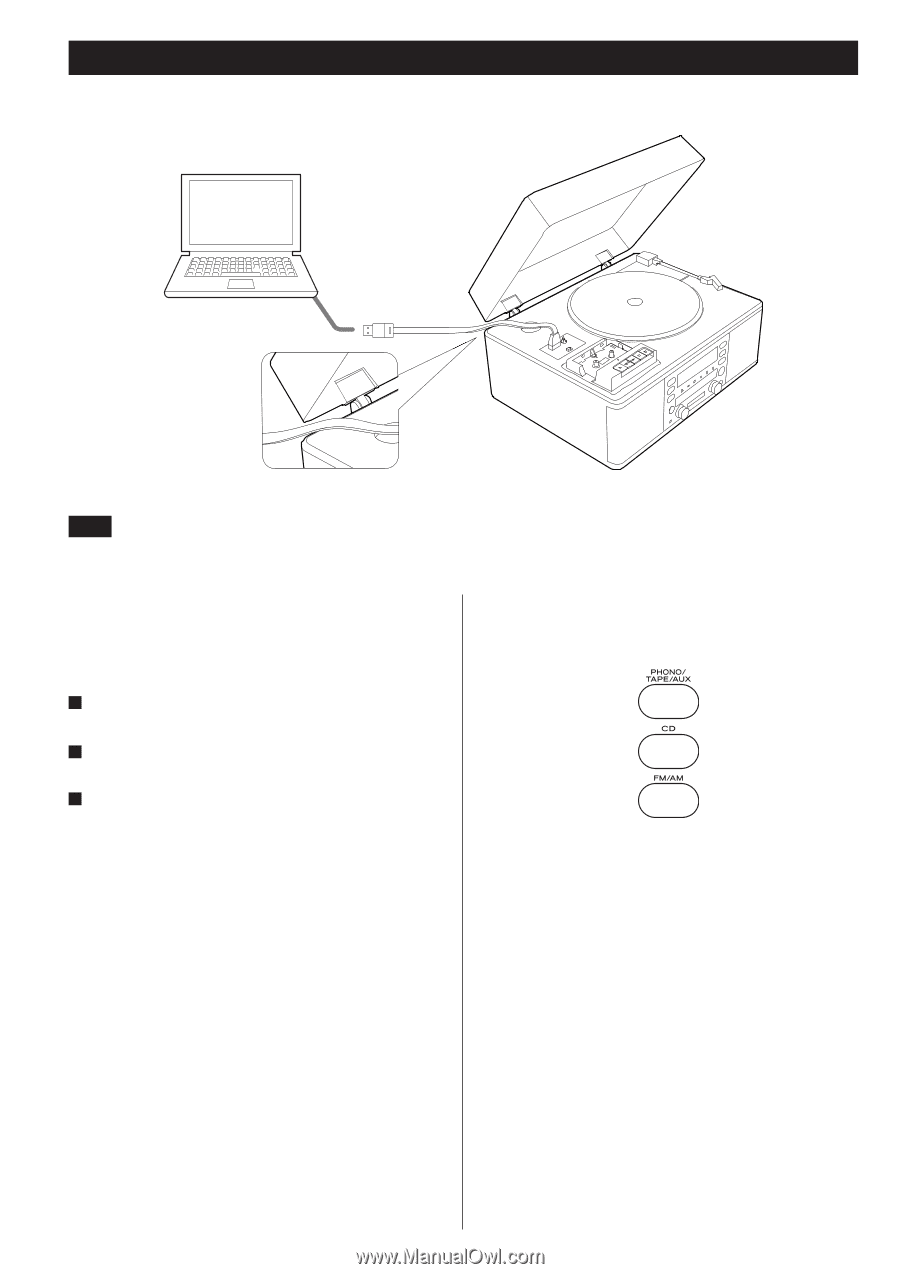
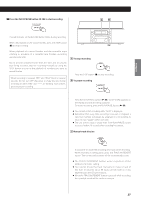
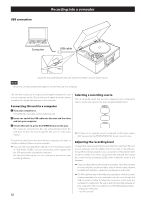
USB connection Recording into a computer Computer USB cable Route the USB cable between this unit and the turntable cover, as shown above. NOTE Be sure to use the provided USB cable to connect this unit to a computer. This unit has a USB port to output sound signals. Connect this unit to your computer via the USB so that sound signals from the unit are converted into digital data and sent to the computer. Connecting this unit to a computer 1 Turn your computre on. Check that the operating system starts properly. 2 Insert one end of the USB cable into this unit and the other end into your computer. 3 To turn this unit on, press the POWER button on the unit. The computer connected to this unit automatically detects the USB port on the unit and recognizes the port as "USB Audio CODEC". To record the sound from the unit with your computer, you need to install a recording software on your computer. < If you set the recording device setting on the recording software to "USB Audio CODEC," you can record the sound output from the USB port on this unit into the computer. For detailed information, see the instruction manual for your recording software. 32 Selecting a recording source You can send the sound that the unit is playing to your computer.To select a source you want to play, press the appropriate button. < To listen to an external source connected to AUX jacks, select AUX by pressing the PHONO/TAPE/AUX button once or twice. Adjusting the recording level To adjust the volume level of the sound data that is sent from this unit to your computer, turn the LEVEL knob on the right of the USB port. Using the recording software on your computer or thecomputer itself, check the volume level of the sound from this unit,and then adjust the sound level by turning the LEVEL knob so that the sound is not distorted. < If you can adjust the recording level by using the recording software on your computer, set the recording level on the recording software to middle first, and then adjust the recording level on this unit. < DO NOT perform any of the following operations while the sound is being recorded into your computer from this unit through the USB connection. Failure to follow the instruction could cause the computer to malfunction. Be sure to exit the recording software on your computer before you perform any of the following operations. N Unplug the USB cable. N Turn this unit off.
-
 1
1 -
2
-
3
-
4
-
5
-
6
-
7
-
8
-
9
-
10
-
11
-
12
-
13
-
14
-
15
-
16
-
17
-
18
-
19
-
20
-
21
-
22
-
23
-
24
-
25
-
26
-
 27
27 -
 28
28 -
 29
29 -
 30
30 -
 31
31 -
 32
32 -
 33
33 -
 34
34 -
 35
35 -
 36
36 -
 37
37 -
38
-
39
-
40
-
41
-
42
-
43
-
44
-
45
-
46
-
47
-
48
-
49
-
50
-
51
-
52
-
53
-
54
-
55
-
56
-
57
-
58
-
59
-
60
-
61
-
62
-
63
-
64
-
65
-
66
-
67
-
68
-
69
-
70
-
71
-
72
-
73
-
74
-
75
-
76
-
77
-
78
-
79
-
80
-
81
-
82
-
83
-
84
-
85
-
86
-
87
-
88
-
89
-
90
-
91
-
92
-
93
-
94
-
95
-
96
-
97
-
98
-
99
-
100
 |
 |