TEAC LP-R550USB Owners Manual - Page 25
Recording 1, Press the PHONO/TAPE/AUX button or the FM/AM button
 |
View all TEAC LP-R550USB manuals
Add to My Manuals
Save this manual to your list of manuals |
Page 25 highlights
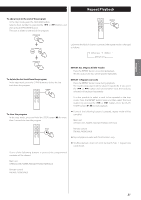
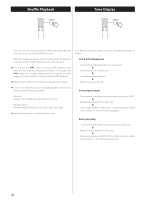
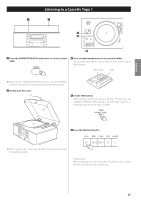
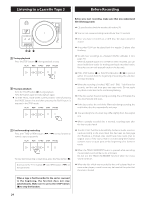
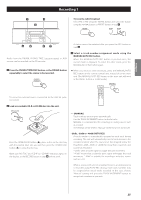
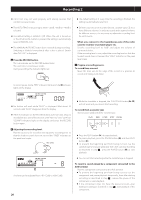
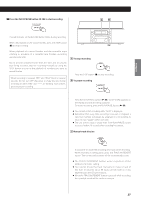
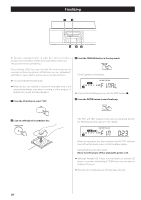
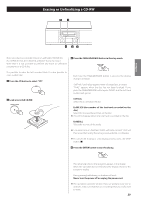
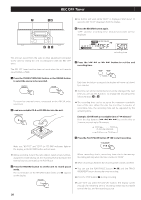
Recording 1 To record a radio broadcast Select FM or AM using the FM/AM button and select the station using the button or PRESET button in step 1 . ENGLISH A station cannot be selected after you press the REC button in 5 step 4 Audio from the FM/AM, PHONO, TAPE (cassette tapes) or AUX sources can be recorded on the CD recorder. 1 Press the PHONO/TAPE/AUX button or the FM/AM button repeatedly to select the source to be recorded. 3 Select a track-number-assignment mode using the MANUAL/AUTO REC button. When the MANUAL/AUTO REC button is pressed once, the current mode is displayed. To select the other mode, press the MANUAL/AUTO REC button again. < When you record a radio broadcast, press the MANUAL/AUTO REC button on the remote control unit, instead of on the main unit. (The MANUAL/AUTO REC button on the main unit will work as the PRESET button in TUNER mode.) To record an external source connected to the AUX IN jacks, select AUX. 2 Load a recordable CD-R or CD-RW disc into the unit. - - (MANUAL) Track numbers are not given automatically. Use the TRACK INCREMENT button to divide tracks. MANUAL is recommended for recording an analog source such as a record. The settings will be reset to "Manual" when the unit is turned off. Press the OPEN/CLOSE button (L), place a disc on the disc tray with the printed label side up, and then press the OPEN/CLOSE button (L) to close the disc tray. Make sure "NO TOC" and "CD-R" (or "CD-RW") indicators lights on the display, or the RECORD button in step 4 will not work. -20db, -30db or -40db (AUTO REC) A track number is automatically assigned to each track during recording. The unit will automatically insert a track division in the recorded material when the sound level has dropped below the threshold (-20dB, -30dB, or -40dB) for more than 2 seconds, and sound has re-started. "-20db" takes a louder signal to trigger the track increment. "-40db" means that a relatively quiet signal will trigger the track increment. "-40db" is suitable for recording a noiseless source such as a CD. When a source with a lot of unwanted noise or an analog source is recorded using AUTO REC setting, more track numbers may be assigned than actual tracks recorded. In this case, choose "Manual" setting and press the TRACK INCREMENT button to assign track numbers as you wish. 25
-
 1
1 -
2
-
3
-
4
-
5
-
6
-
7
-
8
-
9
-
10
-
11
-
12
-
13
-
14
-
15
-
16
-
17
-
18
-
19
-
 20
20 -
 21
21 -
 22
22 -
 23
23 -
 24
24 -
 25
25 -
 26
26 -
 27
27 -
 28
28 -
 29
29 -
 30
30 -
31
-
32
-
33
-
34
-
35
-
36
-
37
-
38
-
39
-
40
-
41
-
42
-
43
-
44
-
45
-
46
-
47
-
48
-
49
-
50
-
51
-
52
-
53
-
54
-
55
-
56
-
57
-
58
-
59
-
60
-
61
-
62
-
63
-
64
-
65
-
66
-
67
-
68
-
69
-
70
-
71
-
72
-
73
-
74
-
75
-
76
-
77
-
78
-
79
-
80
-
81
-
82
-
83
-
84
-
85
-
86
-
87
-
88
-
89
-
90
-
91
-
92
-
93
-
94
-
95
-
96
-
97
-
98
-
99
-
100
 |
 |
