Toshiba 32HL85 Owners Manual - Page 32
Setting the HDMI audio mode
 |
View all Toshiba 32HL85 manuals
Add to My Manuals
Save this manual to your list of manuals |
Page 32 highlights
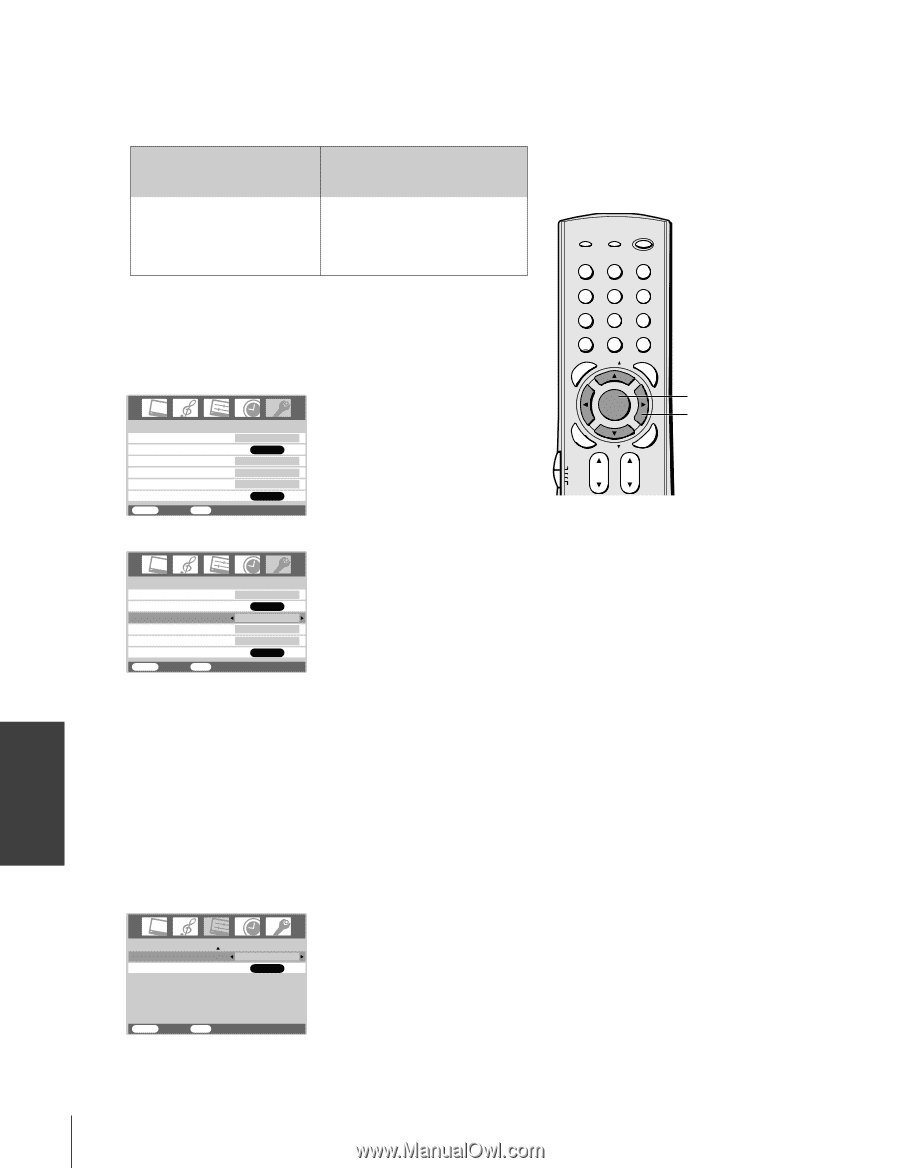
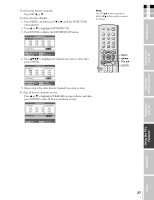
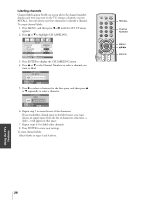
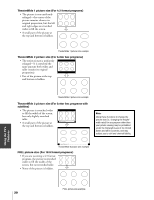
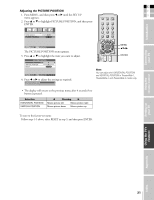
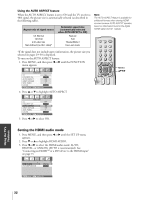
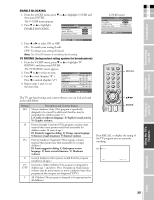
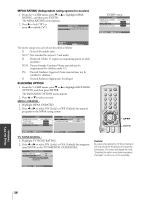
Using the AUTO ASPECT feature When the AUTO ASPECT feature is set to ON and the TV receives a 480i signal, the picture size is automatically selected (as described in the following table). Aspect ratio of signal source 4:3 Normal 16:9 Full 4:3 Letter box Not defined (no ID-1 data)* Automatic aspect size (automatically selected when AUTO ASPECT is ON) Natural Full TheaterWide 2 User-set mode *If the signal does not include aspect information, the picture size you selected on pages 29-30 is displayed. To turn on the AUTO ASPECT feature: 1. Press MENU, and then press x or • until the FUNCTION menu appears. FUNCTION CC FAVORITE CH AUTO ASPECT GRAY SCREEN SIDE PANEL LOCKS OFF ENTER ON ON 1 ENTER MENU BACK EXIT WATCH TV 2. Press y or z to highlight AUTO ASPECT. FUNCTION CC FAVORITE CH AUTO ASPECT GRAY SCREEN SIDE PANEL LOCKS OFF ENTER ON ON 1 ENTER MENU BACK EXIT WATCH TV 3. Press x or • to select ON. Note: The AUTO ASPECT feature is available for additional formats when viewing HDMI sources because AUTO ASPECT operates based on information found in the digital HDMI signal (not ID-1signal). FAVOTRIOTPE E PIC SIZE ENTEERNT TV/VIDEO RECALL POWER INFO 123 456 78 +10 100 0 MENU FAV 9 CHRTN ENT GUID MENU DVDMENU ER FAV CLE TV CBL/SAT CH VCR DVD VOL POP DIRECT CH MUTE SLEEP TV/VCR PAUSE STOP PLAY FREEZE SOURCE SPLIT REW FF SKIP / SEARCH CH SCAN SWAP REC POP CH LIGHT EXIT AR MENU yzx • Setting the HDMI audio mode 1. Press MENU, and then press x or • until the SET UP menu appears. 2. Press z or y to highlight HDMI AUDIO. 3. Press x or • to select the HDMI audio mode: AUTO, DIGITAL, or ANALOG (AUTO is recommended). See "Connecting an HDMITM or a DVI device to the HDMI input" on page 15. HDMI AUDIO PICTURE POSITION 2/2 DIGITAL ENTER MENU BACK EXIT WATCH TV Using the TV's Features 32
-
 1
1 -
2
-
3
-
4
-
5
-
6
-
7
-
8
-
9
-
10
-
11
-
12
-
13
-
14
-
15
-
16
-
17
-
18
-
19
-
20
-
21
-
22
-
23
-
24
-
25
-
26
-
 27
27 -
 28
28 -
 29
29 -
 30
30 -
 31
31 -
 32
32 -
 33
33 -
 34
34 -
 35
35 -
 36
36 -
 37
37 -
38
-
39
-
40
-
41
-
42
-
43
-
44
-
45
-
46
-
47
-
48
-
49
-
50
-
51
-
52
-
53
-
54
-
55
-
56
-
57
-
58
 |
 |