Toshiba 55VX700U User Manual - Page 49
Using the advanced picture, settings features
 |
View all Toshiba 55VX700U manuals
Add to My Manuals
Save this manual to your list of manuals |
Page 49 highlights
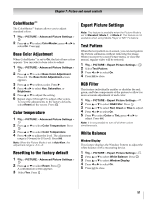
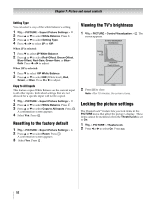
Chapter 7: Picture and sound controls Using the advanced picture settings features Note: Some of the Advanced Picture Settings features will not be available for adjustment when the Picture Mode is set to AutoView. Resolution+™ The Resolution+™ feature lets you adjust the levels for your desired picture settings and achieve a sharper picture. To set Resolution+: 1 Y > PICTURE > Advanced Picture Settings > . OK 2 Press B or b to select Resolution+. Press . OK 3 Press C or c to select On. 4 Press B or b to highlight Level. Press C or c to select either 1, 2, 3, 4, or 5 and press . OK Note: • When the Picture Mode is set to AutoView, the level range is from -2 to +2. • If the Picture Mode is set to Game or PC, Resolution+ is not available. • This feature may not work properly depending on the content. • Noise may appear on the image depending on the device connected to the TV (e.g. a device with a specific enhancer function). Dynamic Contrast Dynamic Contrast detects changes in picture quality that affect the appearance of your contrast settings and then automatically adjusts the video. 1 Y > PICTURE > Advanced Picture Settings > . OK 2 Press B or b to select Dynamic Contrast. 3 Press C or c to adjust the level. Press OK . The adjustment range is from 0 to 10. Note: When the Picture Mode is set to AutoView, the level range is from -5 to +5. DynaLight™ The DynaLight™ feature automatically strengthens the black coloring of dark areas in the video according to the level of darkness. 1 Y > PICTURE > Advanced Picture Settings > . OK 2 Press B or b to select DynaLight. 3 Press C or c to select On or Off. Press O. Static Gamma The static gamma feature lets you adjust the levels of black in the picture. To adjust the static gamma settings: 1 Y > PICTURE > Advanced Picture Settings > . OK 2 Press B or b to select Static Gamma. 3 Press C or c to adjust the level. Press . OK The adjustment range is within ±15 from center. Film Stabilization This feature helps to eliminate video shaking. 1 Y > PICTURE > Advanced Picture Settings > . OK 2 Press B or b to select Film Stabilization. 3 Press C or c to select Smooth, Standard or Off. Press O. Note: • If the Picture Mode is set to Game or PC, this feature will be set to Off automatically and grayed out. • If the Picture Mode is set to AutoView, select Auto, Smooth, Standard or Off. ClearFrame 120™ feature The ClearFrame 120 Hz anti-blur technology doubles the frame rate from 60 frames per second to 120 frames per second, virtually eliminating motion blur without adding flicker or reducing image brightness. 1 Y > PICTURE > Advanced Picture Settings > . OK 2 Press B or b to select ClearFrame 120. 3 Press C or c to select On. Press O. Note: If the Picture Mode is set to Game, this feature is not available. 49
-
 1
1 -
2
-
3
-
4
-
5
-
6
-
7
-
8
-
9
-
10
-
11
-
12
-
13
-
14
-
15
-
16
-
17
-
18
-
19
-
20
-
21
-
22
-
23
-
24
-
25
-
26
-
27
-
28
-
29
-
30
-
31
-
32
-
33
-
34
-
35
-
36
-
37
-
38
-
39
-
40
-
41
-
42
-
43
-
 44
44 -
 45
45 -
 46
46 -
 47
47 -
 48
48 -
 49
49 -
 50
50 -
 51
51 -
 52
52 -
 53
53 -
 54
54 -
55
-
56
-
57
-
58
-
59
-
60
-
61
-
62
-
63
-
64
-
65
-
66
-
67
-
68
-
69
-
70
-
71
-
72
-
73
-
74
-
75
-
76
-
77
-
78
-
79
-
80
-
81
-
82
-
83
-
84
-
85
-
86
-
87
-
88
-
89
-
90
-
91
-
92
-
93
-
94
-
95
-
96
-
97
-
98
-
99
-
100
 |
 |