Toshiba 57HLX82 Owners Manual - Page 34
Press MENU, and then press
 |
View all Toshiba 57HLX82 manuals
Add to My Manuals
Save this manual to your list of manuals |
Page 34 highlights
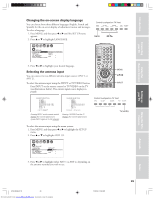
Introduction Connecting your TV Using the Remote Control 4. Press the Channel Number buttons to select a channel you want to label. CUSTOM T I MER 000 CC C1 FAVOR I TE CH1 FAVOR I TE CH2 CH L A B E L I NG CH I NPUT 6 V I DEO L A B E L LABEL CLEAR 5. Press z to highlight LABEL. 6. Repeatedly press x or • to select a character for the first space, and then press ENTER. CUSTOM T I MER CC FAVOR I TE CH1 FAVOR I TE CH2 CH L A B E L I NG V I DEO L A B E L 000 C1 CH I NPUT 06 LABEL A CLEAR 7. Repeat step 6 to enter the rest of the characters. For a blank space in the label name, choose an empty space from the list of characters; otherwise, a dash "-" will appear in the space. You must assign a character to all four spaces or the channel will not be labeled. 8. Repeat steps 4-7 for other channels. You can assign labels to a maximum of 32 channels. To erase a channel label: 1. Press MENU, and then press x or • until the CUSTOM menu appears. 2. Press y or z to highlight CH LABELING. 3. Press x or • to display the CH LABELING menu. 4. Press z to highlight CH INPUT, and then select the channel you want to clear using the Channel Number buttons. 5. Press z to highlight CLEAR. CUSTOM T I MER CC FAVOR I TE CH1 FAVOR I TE CH2 CH L A B E L I NG V I DEO L A B E L 000 C1 CH I NPUT 06 LABEL ABCD CLEAR 6. Press x or • to erase the channel label. 7. Repeat steps 4-6 to erase other channel labels. Channel Number MENU/ENTER yzx • Setting up your TV Using the TV's Features Appendix Index 34 57HLX82(E)32-40 34 Downloaded from www.Manualslib.com manuals search engine 10/29/02, 10:28 AM
-
 1
1 -
2
-
3
-
4
-
5
-
6
-
7
-
8
-
9
-
10
-
11
-
12
-
13
-
14
-
15
-
16
-
17
-
18
-
19
-
20
-
21
-
22
-
23
-
24
-
25
-
26
-
27
-
28
-
 29
29 -
 30
30 -
 31
31 -
 32
32 -
 33
33 -
 34
34 -
 35
35 -
 36
36 -
 37
37 -
 38
38 -
 39
39 -
40
-
41
-
42
-
43
-
44
-
45
-
46
-
47
-
48
-
49
-
50
-
51
-
52
-
53
-
54
-
55
-
56
-
57
-
58
-
59
-
60
-
61
-
62
-
63
-
64
-
65
-
66
-
67
-
68
-
69
-
70
-
71
-
72
 |
 |
