Toshiba D-R1 Owners Manual - Page 37
connected equipment.
 |
View all Toshiba D-R1 manuals
Add to My Manuals
Save this manual to your list of manuals |
Page 37 highlights
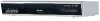
Introduction Recording Playback IP FRAME OPEN/CLOSE DVD TOP MENU MENU RETURN ANGLE SUBTITLE AUDIO CHANNEL V-REMOTE TIMESLIP INSTANT REPLAY INSTANT SKIP REC MENU EDIT MENU LIBRARY CONTENT MENU OW SK SL SEARCH ENTER /ADJUST PAUSE STOP PICTURE PLAY REC QUICK MENU REMAIN DISPLAY TIME BAR CHP DIVIDE DIMMER FL SELECT ZOOM P in P TV PROGRESSIVE TV/VIDEO CHANNEL VOLUME INPUT SELECT 1 Press INPUT SELECT repeatedly so that "L-1," "L-2," or "L-3" appears on the front panel display. INPUT SELECT Each time you press the button, the indicator changes. L-1: To record pictures from equipment connected to the INPUT 1 jacks on the rear panel. L-2: To record pictures from equipment connected to the INPUT 2 jacks on the front panel. L-3: To record pictures from equipment connected to the INPUT 3 jacks on the rear panel. 2 Start playback of the source content on the connected equipment. 3 Press REC of this recorder to start recording. REC 4 When recording is completed, press STOP. STOP Editing Library Function setup Others 37
-
 1
1 -
2
-
3
-
4
-
5
-
6
-
7
-
8
-
9
-
10
-
11
-
12
-
13
-
14
-
15
-
16
-
17
-
18
-
19
-
20
-
21
-
22
-
23
-
24
-
25
-
26
-
27
-
28
-
29
-
30
-
31
-
 32
32 -
 33
33 -
 34
34 -
 35
35 -
 36
36 -
 37
37 -
 38
38 -
 39
39 -
 40
40 -
 41
41 -
 42
42 -
43
-
44
-
45
-
46
-
47
-
48
-
49
-
50
-
51
-
52
-
53
-
54
-
55
-
56
-
57
-
58
-
59
-
60
-
61
-
62
-
63
-
64
-
65
-
66
-
67
-
68
-
69
-
70
-
71
-
72
-
73
-
74
-
75
-
76
-
77
-
78
-
79
-
80
-
81
-
82
-
83
-
84
-
85
-
86
-
87
-
88
-
89
-
90
-
91
-
92
-
93
-
94
-
95
-
96
-
97
-
98
-
99
-
100
-
101
-
102
-
103
-
104
-
105
-
106
-
107
-
108
-
109
-
110
-
111
-
112
-
113
-
114
-
115
-
116
-
117
-
118
-
119
-
120
-
121
-
122
-
123
-
124
-
125
-
126
-
127
-
128
-
129
-
130
-
131
-
132
-
133
-
134
-
135
-
136
-
137
-
138
-
139
-
140
-
141
-
142
-
143
-
144
 |
 |
