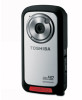
Toshiba PA3897U-1CAS Camileo BW10 - S User Guide - Page 11

Recording, Playback, Connecting to a TV, still image

Page 11 highlights

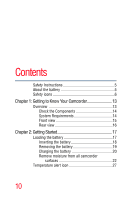
Contents 11 Inserting and removing a media card 27 Taking photos without a media card installed 29 To format a media card 29 Turning the camcorder on and getting started ........29 Accessing the MENU screen 30 Setting the date and time 32 Resetting the date and time 33 Starting again from the power save mode 33 Chapter 3: Recording 35 Recording a video clip 35 Changing the video settings 36 Taking still photos 37 Zooming in or out on a subject 38 Changing the photo settings 39 Capturing a still photo while recording a video clip 39 Saving one frame from a video clip as a still image 40 Chapter 4: Playback 41 Playing back video clips and still images 41 Deleting files 42 Video clip playback operation 42 Chapter 5: Connecting to a TV 44 Connecting the HDMI™ cable 44 Chapter 6: Connecting to a Computer 46 Copying files to a computer 46 Application software 48 Disconnecting the camcorder from the computer 48

  • 1
  • 2
  • 3
  • 4
  • 5
  • 6
  • 7
  • 8
  • 9
  • 10
  • 11
  • 12
  • 13
  • 14
  • 15
  • 16
  • 17
  • 18
  • 19
  • 20
  • 21
  • 22
  • 23
  • 24
  • 25
  • 26
  • 27
  • 28
  • 29
  • 30
  • 31
  • 32
  • 33
  • 34
  • 35
  • 36
  • 37
  • 38
  • 39
  • 40
  • 41
  • 42
  • 43
  • 44
  • 45
  • 46
  • 47
  • 48
  • 49
  • 50
  • 51
  • 52
  • 53
  • 54
  • 55
  • 56
  • 57
  • 58
  • 59
  • 60
  • 61
  • 62
  • 63
  • 64
  • 65
  • 66
  • 67
  • 68
  • 69
  • 70
  • 71
  • 72
  • 73
  • 74
  • 75
  • 76
  • 77
  • 78
  • 79
  • 80
  • 81
  • 82
  • 83
  • 84
  • 85
  • 86
  • 87
  • 88
  • 89
  • 90
  • 91
  • 92
  • 93
  • 94
  • 95
  • 96
  • 97
  • 98
  • 99
  • 100
  • 101
  • 102
  • 103
  • 104
  • 105
  • 106
  • 107
  • 108
  • 109
  • 110
  • 111
  • 112
  • 113
  • 114
  • 115
  • 116
  • 117
  • 118
  • 119

11
Contents
Inserting and removing a media card
......................
27
Taking photos without a media card
installed
......................................................
29
To format a media card
.....................................
29
Turning the camcorder on and getting started
........
29
Accessing the MENU screen
.............................
30
Setting the date and time
........................................
32
Resetting the date and time
..............................
33
Starting again from the power save mode
..............
33
Chapter 3: Recording
.................................................................
35
Recording a video clip
............................................
35
Changing the video settings
..............................
36
Taking still photos
...................................................
37
Zooming in or out on a subject
.........................
38
Changing the photo settings
.............................
39
Capturing a still photo while recording a
video clip
..........................................................
39
Saving one frame from a video clip as a
still image
...................................................
40
Chapter 4: Playback
...................................................................
41
Playing back video clips and still images
................
41
Deleting files
.....................................................
42
Video clip playback operation
.................................
42
Chapter 5: Connecting to a TV
..................................................
44
Connecting the HDMI™ cable
.................................
44
Chapter 6: Connecting to a Computer
.....................................
46
Copying files to a computer
....................................
46
Application software
.........................................
48
Disconnecting the camcorder from the
computer
....................................................
48