Toshiba PA3897U-1CAS Camileo BW10 - S User Guide - Page 32
Setting the date and time, Clock Set
 |
View all Toshiba PA3897U-1CAS Camileo BW10 - S manuals
Add to My Manuals
Save this manual to your list of manuals |
Page 32 highlights
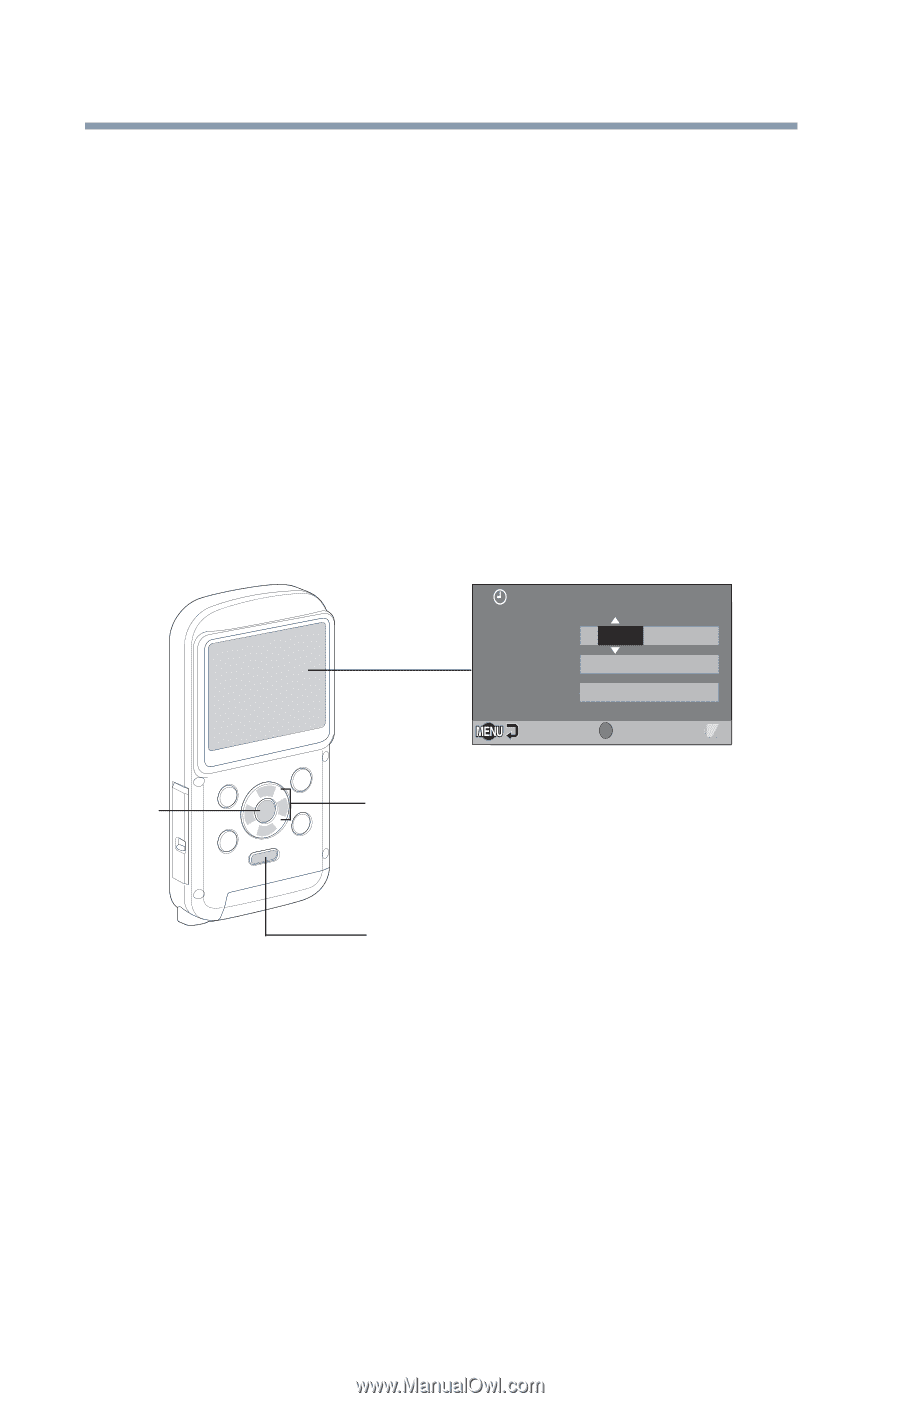
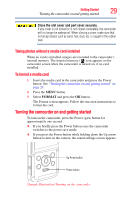
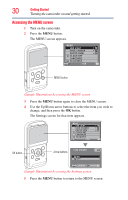
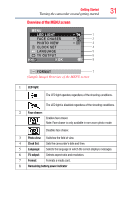
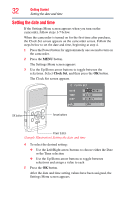
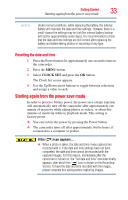
32 Getting Started Setting the date and time Setting the date and time If the Settings Menu screen appears when you turn on the camcorder, follow steps 1-7 below. When the camcorder is turned on for the first time after purchase, the Clock Set screen appears on the camcorder screen. Follow the steps below to set the date and time, beginning at step 4. 1 Press the Power button for approximately one second to turn on the camcorder. 2 Press the MENU button. The Settings Menu screen appears. 3 Use the Up/Down arrow buttons to toggle between the selections. Select Clock Set, and then press the OK button. The Clock Set screen appears. CLOCK SET DATE TIME DISP 2010/06/01 00:00 D / M / Y OK OK OK button Arrow buttons Power button (Sample Illustration) Setting the date and time 4 To select the desired setting: ❖ Use the Left/Right arrow buttons to choose either the Date or the Time selection ❖ Use the Up/Down arrow buttons to toggle between selections and assign a value to each 5 Press the OK button. After the date and time setting values have been assigned, the Settings Menu screen appears.
-
 1
1 -
2
-
3
-
4
-
5
-
6
-
7
-
8
-
9
-
10
-
11
-
12
-
13
-
14
-
15
-
16
-
17
-
18
-
19
-
20
-
21
-
22
-
23
-
24
-
25
-
26
-
 27
27 -
 28
28 -
 29
29 -
 30
30 -
 31
31 -
 32
32 -
 33
33 -
 34
34 -
 35
35 -
 36
36 -
 37
37 -
38
-
39
-
40
-
41
-
42
-
43
-
44
-
45
-
46
-
47
-
48
-
49
-
50
-
51
-
52
-
53
-
54
-
55
-
56
-
57
-
58
-
59
-
60
-
61
-
62
-
63
-
64
-
65
-
66
-
67
-
68
-
69
-
70
-
71
-
72
-
73
-
74
-
75
-
76
-
77
-
78
-
79
-
80
-
81
-
82
-
83
-
84
-
85
-
86
-
87
-
88
-
89
-
90
-
91
-
92
-
93
-
94
-
95
-
96
-
97
-
98
-
99
-
100
-
101
-
102
-
103
-
104
-
105
-
106
-
107
-
108
-
109
-
110
-
111
-
112
-
113
-
114
-
115
-
116
-
117
-
118
-
119
 |
 |