Uniden BCD996P2 English Manual - Page 21
Removing the Display Sticker, Connecting an Optional Antenna, Connecting an Earphone/Headphone,
 |
View all Uniden BCD996P2 manuals
Add to My Manuals
Save this manual to your list of manuals |
Page 21 highlights
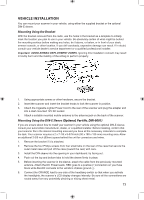
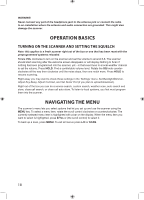
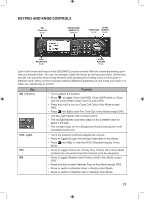
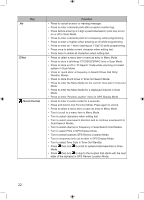
To begin the process, it is first necessary to remove the scanner's outer metal sleeve from the inner chassis. Unthread the four screws in the rear of the unit. Slide the cover toward the rear and off. Once the sleeve is removed, you will see threaded, metric machine screw holes on either side of the chassis cabinet. Uniden does not supply these screws. Their diameter, length, and screw type should be chosen by a qualified installer based on the internal vehicle bracket which will be used in securing the scanner chassis. Once the original radio is removed from the vehicle dash and the fit of the scanner is correct, be sure to connect all the power, audio, antenna, and any other cables or wires, to the scanner before the scanner is secured. The following illustration is a typical example of the ISO technique and the general side mounting screw holes often encountered. It does not actually represent the Uniden scanner nor your vehicle's mounting bracket. Only a professional installer will be able to determine the best and correct approach. Removing the Display Sticker Before you use the scanner for the first time, remove the protective plastic film over the display. Connecting an Optional Antenna The scanner's BNC connector makes it easy to connect a variety of optional antennas, including an external mobile antenna or outdoor base station antenna. Note: Always use 50-ohm, RG-58, or RG-8, BNC terminated coaxial cable to connect an outdoor antenna. If the antenna is over 50 feet from the scanner, use RG-8 low-loss dielectric coaxial cable. Cable loss increases with higher frequency. Connecting an Earphone/Headphone For private listening, you can plug a 1/8-inch (3.5 mm) mini-plug earphone or headphones (not supplied) into the headphone jack on the front of your scanner. This automatically disconnects the internal speaker. See the Earphone Warning for important information about using an earphone/ headphone. WARNING! Never connect anything other than the recommended amplified extension speaker to the scanner's headphone jack. Damage to the scanner might occur. Connecting an Extension Speaker In a noisy area, an optional amplified extension speaker, positioned in the right place, might provide more comfortable listening. Plug the speaker cable's 1/8-inch (3.5-mm) mini-plug into your scanner's back panel Ext. Sp. Jack. 17
-
 1
1 -
2
-
3
-
4
-
5
-
6
-
7
-
8
-
9
-
10
-
11
-
12
-
13
-
14
-
15
-
 16
16 -
 17
17 -
 18
18 -
 19
19 -
 20
20 -
 21
21 -
 22
22 -
 23
23 -
 24
24 -
 25
25 -
 26
26 -
27
-
28
-
29
-
30
-
31
-
32
-
33
-
34
-
35
-
36
-
37
-
38
-
39
-
40
-
41
-
42
-
43
-
44
-
45
-
46
-
47
-
48
-
49
-
50
-
51
-
52
-
53
-
54
-
55
-
56
-
57
-
58
-
59
-
60
-
61
-
62
-
63
-
64
-
65
-
66
-
67
-
68
-
69
-
70
-
71
-
72
-
73
-
74
-
75
-
76
-
77
-
78
-
79
-
80
-
81
-
82
-
83
-
84
-
85
-
86
-
87
-
88
-
89
-
90
-
91
-
92
-
93
-
94
-
95
-
96
-
97
-
98
-
99
-
100
-
101
-
102
-
103
-
104
-
105
-
106
-
107
-
108
-
109
-
110
-
111
-
112
 |
 |
