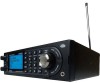
Uniden BCD996P2 English Manual - Page 62
Search, CTCSS, Set Lockout, Set Number Tag a, Set Modulation Conventional only, Set Attenuator
 |
View all Uniden BCD996P2 manuals
Add to My Manuals
Save this manual to your list of manuals |
Page 62 highlights
Conventional only: 1. At 'Set CTCSS/DCS' scroll to 1 of 5 options and press E/ . 2. Off - any signal opens squelch. Search - The scanner searches and displays any CTCSS or DCS tone with the transmission. CTCSS - Enter or scroll to the desired CTCSS tone you want present with the signal. Press E/ to save and exit. DCS - enter or scroll to the desired DCS tone you want present with the signal. Press E/ to save and exit. Set Lockout - Scroll to 'CTCSS or DCS' and press E/ . 3. Enter or scroll to the desired tone you want locked out. 4. Press E/ to save and exit. Note: you can also store a (blinking) CTCSS/DCS tone in when receiving a frequency in scan mode by pressing E/ . Set Number Tag allows you to number a channel. The default setting is no number tag (blank). See also Using Number Tags. 1. Scroll to 'Set Number Tag' and press E/ . 2. Enter the number tag (0-999) (Press .No to clear the display) and press E/ to save and exit. Set Modulation (Conventional only) this setting selects the modulation used for the channel. The default setting is Auto (NFM for FM channels). 1. Scroll to 'Set Modulation' and press E/ . 2. Scroll to Auto, AM, NFM, FM, WFM, or WFM Broadcast and press E/ to save and exit. Note: You can also toggle modulation for a conventional channel in scan hold mode by pressing then 9(MOD). Set Attenuator (Conventional only) this setting controls whether the scanner attenuates signals on The channel by about 20 dB. The default setting is Off. 1. Scroll to 'Set Attenuator' and press E/ . 2. Scroll to On or Off and press E/ to save and exit. Note: You can also toggle attenuation for a conventional channel in scan hold mode by pressing then 7(ATT). Set Priority this setting controls whether the scanner treats the channel as a priority channel while scanning. The default setting is off. See also Priority Scan/Priority ID Scan/Priority Plus Scan. 1. Scroll to 'Set Priority' and press E/ . 2. Scroll to On or Off and press E/ to save and exit. Note: To use Priority ID Scan you must also enable Priority ID Scan for each system. Set Alert this setting controls when and how the scanner alerts you if the channel becomes active. 1. Scroll to 'Set Alert' and press E/ . 2. Scroll to 'Set Alert Tone' and press E/ . 58
-
 1
1 -
2
-
3
-
4
-
5
-
6
-
7
-
8
-
9
-
10
-
11
-
12
-
13
-
14
-
15
-
16
-
17
-
18
-
19
-
20
-
21
-
22
-
23
-
24
-
25
-
26
-
27
-
28
-
29
-
30
-
31
-
32
-
33
-
34
-
35
-
36
-
37
-
38
-
39
-
40
-
41
-
42
-
43
-
44
-
45
-
46
-
47
-
48
-
49
-
50
-
51
-
52
-
53
-
54
-
55
-
56
-
 57
57 -
 58
58 -
 59
59 -
 60
60 -
 61
61 -
 62
62 -
 63
63 -
 64
64 -
 65
65 -
 66
66 -
 67
67 -
68
-
69
-
70
-
71
-
72
-
73
-
74
-
75
-
76
-
77
-
78
-
79
-
80
-
81
-
82
-
83
-
84
-
85
-
86
-
87
-
88
-
89
-
90
-
91
-
92
-
93
-
94
-
95
-
96
-
97
-
98
-
99
-
100
-
101
-
102
-
103
-
104
-
105
-
106
-
107
-
108
-
109
-
110
-
111
-
112
 |
 |
