Viking VIPR161SS Installation Instructions - Page 9
Installation Of Remote Control Switch
 |
View all Viking VIPR161SS manuals
Add to My Manuals
Save this manual to your list of manuals |
Page 9 highlights
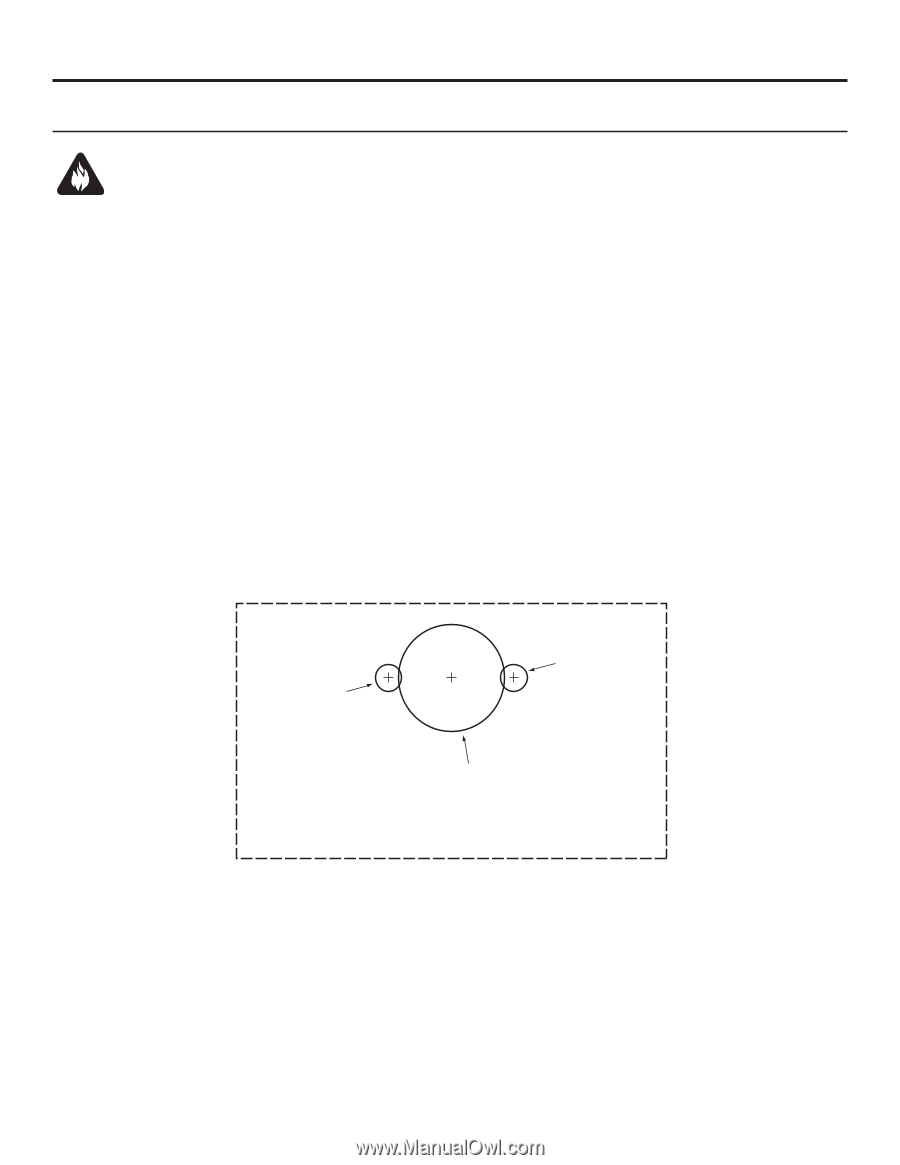
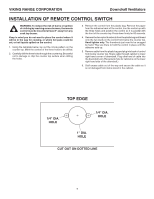
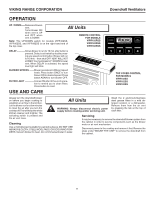
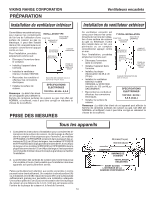
VIKING RANGE CORPORATION Downdraft Ventilators INSTALLATION OF REMOTE CONTROL SWITCH WARNING: To reduce the risk of burns or ignition of clothing by reaching across burners, the remote control must be mounted at least 4" away from any cook top burner. Keep in mind you do not want to place the control where it will be in the way for cooking, or where hot pans could be set, or hot liquids spilled on the control. 1. Using the template below, lay out the 3-hole pattern on the counter top. Mark the centers of the three holes to be drilled. 2. Carefully drill the three holes through the counter top.Be careful not to damage or chip the counter top surface when drilling the holes. 3. Remove the control from the plastic bag. Remove the paper from the adhesive back of the control, line the control up with the three holes and position the control so it is parallel with the front of the counter top. Press down firmly for 60 seconds. 4. Remove the two nylon thumbnuts from the plastic bag and thread onto the two studs on the control from below the counter top. Hand tighten only. The thumbnuts just need to be snugged by hand. They are there to hold the control in place until the adhesive sets up. 5. Remove cable from the plastic bag and plug into back of control from below counter top. Route cable through cabinet to lower right hand corner of downdraft. Plug other end of cable into the downdraft unit. (Receptacle hole for cabinet is on the lower right hand side of the downdraft.) 6. Stuff excess cable out of the way and secure the cable so it is not damaged from items stored in the cabinet. TOP EDGE 1/4" DIA. HOLE 1/4" DIA. HOLE 1" DIA. HOLE CUT OUT ON DOTTED LINE 9
-
 1
1 -
2
-
3
-
 4
4 -
 5
5 -
 6
6 -
 7
7 -
 8
8 -
 9
9 -
 10
10 -
 11
11 -
 12
12 -
 13
13 -
 14
14 -
15
-
16
-
17
-
18
-
19
-
20
-
21
-
22
-
23
-
24
-
25
-
26
-
27
-
28
-
29
-
30
-
31
-
32
-
33
-
34
-
35
-
36
 |
 |