Whirlpool 24-Inch Installation Instructions - Page 19
foranimated - clip ins
 |
View all Whirlpool 24-Inch manuals
Add to My Manuals
Save this manual to your list of manuals |
Page 19 highlights
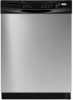
RemovtoeweflromdishwashReer.insttahllelowedr ishrack. Ifneedesde, ewebsitfeoranimaterdepresentation ofthisstepV. isiwt ww.whklpool.com/anchuonridnegFr AQ tab. Complete Installation Hold the two panels together and place them against dishwasher leg. Using a Phillips or 1A"screwdriver, reinstall the screws through the holes in the access panel and the slots in the lower panel, Check that the lower edge of the lower panel contacts the floor. Adjust if necessary. Check that grounding clip is attached to the lower panel. Position the lower panel behind the access panel. On some models there is insulation on the access panel which must fall behind the insulation on the lower panel. Tighten access panel screws. 19
-
 1
1 -
2
-
3
-
4
-
5
-
6
-
7
-
8
-
9
-
10
-
11
-
12
-
13
-
 14
14 -
 15
15 -
 16
16 -
 17
17 -
 18
18 -
 19
19 -
 20
20 -
 21
21 -
 22
22 -
 23
23 -
 24
24 -
25
-
26
-
27
-
28
-
29
-
30
-
31
-
32
-
33
-
34
-
35
-
36
-
37
-
38
-
39
-
40
 |
 |

Remove
towel
fromdishwasher.
Reinstall
thelower
dishrack.
Ifneeded,
seewebsite
foranimated
representation
ofthisstep.
Visit
www.whklpool.com/anchoring
under
FAQ
tab.
Complete
Installation
Check that grounding
clip
is attached
to the
lower panel.
Position
the lower
panel behind
the access panel. On some
models
there is insulation
on the access panel which
must
fall behind
the insulation
on the lower
panel.
Hold the two
panels together
and place them
against
dishwasher
leg. Using a Phillips
or 1A"screwdriver,
reinstall
the screws through
the holes in the access panel and the
slots in the lower
panel,
Check that the
lower
edge of the
lower
panel
contacts
the floor.
Adjust
if necessary.
Tighten
access
panel
screws.
19