Yamaha AW4416 Tutorial
Yamaha AW4416 Manual
 |
View all Yamaha AW4416 manuals
Add to My Manuals
Save this manual to your list of manuals |
Yamaha AW4416 manual content summary:
- Yamaha AW4416 | Tutorial - Page 1
PROFESSIONAL AUDIO WORKSTATION Tutorial E - Yamaha AW4416 | Tutorial - Page 2
Tutorial-AW4416 Professional Audio Workstation AW4416 Professional Audio Workstation Showing a Yamaha AW4416 to a recording engineer, say, 20 years ago, would have a similar effect to showing an interplanetary probe to Galileo. After the initial shock both parties would probably nod their heads and - Yamaha AW4416 | Tutorial - Page 3
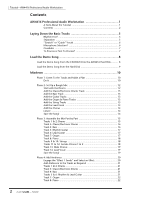
AW4416 Professional Audio Workstation 1 A Note About the Tutorial 1 Contents 2 Laying Down the Basic Tracks 5 Rhythm First 5 Separation 5 "Scratch" or "Guide" Vocals 6 Microphone Selection 6 Overdubs 7 To Process or Not To Process 7 Load the Demo Song 8 Load the Demo Song From the CD - Yamaha AW4416 | Tutorial - Page 4
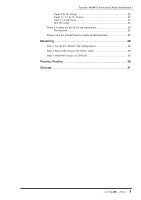
Tutorial-AW4416 Professional Audio Workstation Tracks 9 & 10: Strings 22 Tracks 11, 12, & 13: Chorus 22 Track 14: Lead Vocal 22 Save the Song 23 Phase 5: Finalize the Mix & Set Up Automation 24 The Automix 25 Phase 6: Use the Virtual Tracks to Create an Alternate Mix 27 Mastering 28 Step 1: - Yamaha AW4416 | Tutorial - Page 5
Tutorial-Laying Down the Basic Tracks Laying Down the Basic Tracks Although the basic tracks you'll use to assemble the "So Fine" mix have already been recorded for you (of course you can add your own tracks, if you like), let's take a moment to discuss the initial recording process. The basic steps - Yamaha AW4416 | Tutorial - Page 6
vocal track can also be a useful guide while laying down other overdubs such as guitar or keyboard solos. DON'T rely on the scratch vocal track to record chorus parts, is probably all you'll ever need for most recording. And since the AW4416 provides switchable phantom power on inputs 1 and 2, - Yamaha AW4416 | Tutorial - Page 7
dynamic range. By reducing transient peaks you can effectively record the main body of the signal at a higher level and thus, in the case of digital media, increase the resolution of the reproduced sound while reducing potential problems with system noise. Bass guitar, electric guitar, vocals - Yamaha AW4416 | Tutorial - Page 8
onto the AW4416 hard disk from the supplied CD-ROM. This tutorial assumes that you already have a CD-RW drive configured for use with your AW4416. See the Operation Guide for information on installing and connecting an external CD-RW drive. Load the Demo Song From the CD-ROM Onto the AW4416 Hard Disk - Yamaha AW4416 | Tutorial - Page 9
Tutorial-Load the Demo Song Load the Demo Song from the Hard "NO" and press [ENTER] to begin the load operation. 4. When the progress window disappears, the demo song has been loaded playback. If you want to hear the pre-mixed version of "So Fine" before mixing it yourself ... Actually, all you have to - Yamaha AW4416 | Tutorial - Page 10
EQ or effects? Here's where automation might make the job a lot easier. • Remember that the points given here are only a guide, and that every piece of music is different. In fact, planning the mix is probably the most creative part of the entire production process. ❒ Do It OK, the tracks are loaded - Yamaha AW4416 | Tutorial - Page 11
track of recorder track 14. Later on you'll use these alternate takes to build a mix based around a male rather than female lead vocal part. 1 2 3 4 5 6 7 8 V.Trk 1 Drums Left Drums Right Claves & E.Drm Bass Rthm Guitar Lead Guitar Organ Piano V.Trk 2 9 10 11 12 13 14 15 16 - Yamaha AW4416 | Tutorial - Page 12
engage repeat playback (see page 118 of the operation guide for details). ❒ Start with the Drums Use the channel [ON] keys to turn off all tracks except the stereo drums on 1 and 2 (leave the STEREO track on, too). Since the drums are recorded in stereo on tracks 1 and 2, and you'll want to adjust - Yamaha AW4416 | Tutorial - Page 13
the maximum values. In the case of the "So Fine" demo, however, the drums were recorded "live" in the studio with proper stereo imaging (i.e. this is not a sampler or drum module), and sound fine panned full left and right. Go ahead and set the left and right drum track pan values to L16 and - Yamaha AW4416 | Tutorial - Page 14
track, didn't you! Well we won't, and the reason is simply that the chorus parts really must be heard in relation to the lead vocal in order to set appropriate levels. Turn ON channel 14, leave the pan control part during the introduction, and this might require a bit of automation at the final mix - Yamaha AW4416 | Tutorial - Page 15
page 96 of the operation guide for details). The reason for this is that during this phase of the mix you'll almost always want to hear the tracks with EQ, dynamics, and other effects applied. Normal solo monitoring lets you hear the tracks "dry", and that won't help you here. ❒ Tracks 1 & 2: Drums - Yamaha AW4416 | Tutorial - Page 16
drums track: THRESH. -24 RATIO 10:1 OUT GAIN 0.0 ATTACK 29 RELEASE 6 KNEE hard ❒ Track 4: Bass The bass track is controls to make the following EQ settings for the bass track: LOW L-MID H-MID HIGH Q 6.3 7 8 - F 66.0 223 4.75 kHz - G +2.5 -4.5 +6.0 - 5. Press the MIXER - Yamaha AW4416 | Tutorial - Page 17
Tutorial-Mixdown ❒ Track 5: Rhythm Guitar The rhythm guitar track needs to be a little "chunkier" to achieve the classic R&B type of sound we're after. A little EQ and compression will accomplish that feat, and the compression will also help to even out dynamic variations that cause the guitar part - Yamaha AW4416 | Tutorial - Page 18
it a touch more presence so that it will come through in the mix a bit more. ❍ Piano EQ LOW L-MID H-MID HIGH Q L.SHELF 8.0 - H.SHELF F 74 21 - 7.55 kHz G -3.5 -4.0 - +2.0 ❒ Tracks 9 & 10: Strings If we'd recorded real strings we might have needed a bit of processing here, but - Yamaha AW4416 | Tutorial - Page 19
❍ Female Chorus 2 Compression THRESH. -16 RATIO 2.5:1 OUT GAIN +2.0 ATTACK 22 Tutorial-Mixdown RELEASE 226 KNEE 4 ❒ Track 13: Male Chorus The quality of this singer's voice makes EQ unnecessary in this situation, but some compression will be helpful to help the blend with the female chorus. - Yamaha AW4416 | Tutorial - Page 20
the FADER MODE [AUX7] key. The faders will now function as auxiliary sends for the corresponding tracks. In the AW4416 AUX 7 is pre-assigned to internal effect processor 1 and AUX 8 is pre-assigned to effect processor 2. We'll only use the AUX 7 sends for this example. 2. Press the [F2] function key - Yamaha AW4416 | Tutorial - Page 21
's perfectly OK to leave the drums totally dry, too, depending on the overall effect you're after. For "So Fine" we'll add a barely-noticeable amount of reverb to help define the recording's "space". Move the AUX 7 faders for tracks 1 & 2 (they're paired, remember, so you only have to move one) up to - Yamaha AW4416 | Tutorial - Page 22
Tutorial-Mixdown ❒ Track 7: Organ Instruments like organ always present a mix. You'll probably need to add a touch of reverb to integrate the instrument into the overall space of the recording, but only a touch! Organ reverb at -20. ❒ Track 8: Piano The amount of reverb you add to piano track - Yamaha AW4416 | Tutorial - Page 23
Tutorial-Mixdown ❒ Save the Song! We can't emphasize enough how important it is to keep saving your work at relatively short intervals. Accidents do happen, and if after several hours of hard work your AW4416 is accidentally unplugged, or there's a power failure, or your pet cat decides to do a mix - Yamaha AW4416 | Tutorial - Page 24
with relative ease. For the "So Fine" automix we've used a combination of fader, channel ON/OFF, and pan automation. Please refer to the AW4416 operation guide for details on how to record and edit automation. In this section we'll simply describe the changes we made and why we thought they were - Yamaha AW4416 | Tutorial - Page 25
"gating" (a type of dynamics processing in which signals below a specified level are cut off - the AW4416 dynamics processors can do this). But since the noise is effectively masked by the other tracks during denser parts of the song, we'll simply use channel ON/OFF automation for the "So Fine" demo - Yamaha AW4416 | Tutorial - Page 26
the lead vocal level to even out the dynamics. ❍ 00:02:57 Track 13 is boosted in preparation for the male rap part on the outro. Track 3 contains the electronic drum part used on the outro, so this track is also boosted. The strings tracks (9 and 10) play an important role on the outro, so they - Yamaha AW4416 | Tutorial - Page 27
to the "Mastering" section that follows. Tracks 9 and 10 of the "So Fine" demo contain alternative string parts, and track 14 contains an alternative male lead vocal part. Switch to virtual tracks 2 on these tracks (i.e. 9-2, 10-2, and 14-2) as follows: 1. Press the RECORDER [TRACK] key. 2. Press - Yamaha AW4416 | Tutorial - Page 28
songs, and deciding on the amount of space to leave between tracks. For our discussion here we'll concentrate on mastering and "burning" the song to a CD-R disk which can then be played in just about any standard CD player. THE IMPORTANCE OF ACCURATE MONITORING One of the most critical factors - Yamaha AW4416 | Tutorial - Page 29
requires that your song be recorded to the stereo track before it can be written to a CD. So once you're satisfied with the master EQ and/or compression settings, record the song to the AW4416 stereo track, as follows: 1. Press the [ST] key to engage the STEREO track record mode (the key will flash - Yamaha AW4416 | Tutorial - Page 30
-R Disk This procedure is described in detail in the AW4416 operation guide (page 255), so we won't go into it here. But now you know how the entire process works - from the basic tracks to CD. Practice, Practice ... Really. Mixing and mastering are skills which, like playing an instrument, can only - Yamaha AW4416 | Tutorial - Page 31
microphones have built-in preamplifiers that, naturally, require some sort of power to operate. Power can be provided by an external power supply (not too common these days), batteries, or phantom power from the console. It's called "phantom" power because it sort of sneaks into the microphone from - Yamaha AW4416 | Tutorial - Page 32
Tutorial-Glossary sound you don't want to pick up. ❒ Cardioid Pattern This refers to a widely-used type of response pattern for directional microphones. sound of an instrument or group of instruments. Overheads are often used in addition to close-miking when recording drums. Microphones set up this - Yamaha AW4416 | Tutorial - Page 33
Bass: Finn Day-Lewis Drums: Andrew Small Recorded at Protocol Studios and Darren's Studios, London. Mixed at Transmedia Services Ltd, Bedford, UK. Special thanks to Dreamhire, John Henry's Hire, HHB Communications and Digital Village for their support. Additional mixing and production by Kent Ibbott - Yamaha AW4416 | Tutorial - Page 34
V678610 R1 1 IP 36 00 08 7000 AP Printed in Japan YAMAHA CORPORATION Pro Audio & Digital Musical Instrument Division P.O. Box 3, Hamamatsu, 430-8651, Japan
-
 1
1 -
 2
2 -
 3
3 -
 4
4 -
 5
5 -
 6
6 -
 7
7 -
8
-
9
-
10
-
11
-
12
-
13
-
14
-
15
-
16
-
17
-
18
-
19
-
20
-
21
-
22
-
23
-
24
-
25
-
26
-
27
-
28
-
29
-
30
-
31
-
32
-
33
-
34
 |
 |

PROFESSIONAL AUDIO WORKSTATION
E
Tutorial