Yamaha P-250 Owner's Manual
Yamaha P-250 Manual
 |
View all Yamaha P-250 manuals
Add to My Manuals
Save this manual to your list of manuals |
Yamaha P-250 manual content summary:
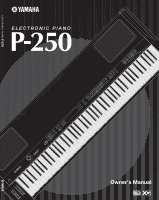
- Yamaha P-250 | Owner's Manual - Page 1
EDIT EQ MASTER EXIT P-250 PIANO ELECTRONIC SONG KEYBOARD BALANCE SONG MIN MASTER VOMLAUXME A PANEL LOCK C MIDI OUT UP EX.TRACKS FILE SONG SETTING SONG DOWN TEMPO TRACK1 TRACK2START/STOP REC TOP SELECT SONG SONG NEW SYNCHRO SSTOANRGT Owner's Manual MODULATION PITCH - Yamaha P-250 | Owner's Manual - Page 2
listed in the safety instructions section. CAUTION RISK OF ELECTRIC SHOCK DO NOT OPEN CAUTION: TO REDUCE THE RISK OF ELECTRIC SHOCK. DO NOT REMOVE COVER (OR BACK). NO USER-SERVICEABLE PARTS INSIDE. REFER SERVICING TO QUALIFIED SERVICE PERSONNEL. See the bottom of the keyboard enclosure for graphic - Yamaha P-250 | Owner's Manual - Page 3
user-serviceable parts. If it should appear to be malfunctioning, discontinue use immediately and have the instrument inspected by qualified Yamaha service personnel. Water warning • Do not expose the instrument to rain, use following: Power supply/Power cord • When removing the electric plug from - Yamaha P-250 | Owner's Manual - Page 4
power cord from the AC outlet. Then, have the instrument inspected by qualified Yamaha service personnel. • Do not place vinyl, plastic or rubber objects on the instrument since they might discolor the panel or keyboard. • Do not rest your weight, or place heavy objects on the instrument. Do not use - Yamaha P-250 | Owner's Manual - Page 5
Introduction Thank you for purchasing the P-250 Electronic Piano. The P-250 is a product of Yamaha's extensive experience in creating fine musical instruments. Its beautiful sound and versatile editing functions enable you to use the P-250 in virtually any situation, ranging from live performance to - Yamaha P-250 | Owner's Manual - Page 6
Accessories and Options Supplied Accessories AC power cord FC3 foot pedal Music rest Owner's manual Data List CD-ROM (TOOLS for P-250) TOOLS for P-250 Installation Guide Options Yamaha FC3 foot pedal Yamaha FC4/FC5 foot switch Yamaha FC7 foot controller Yamaha LP-3/LG-100 keyboard stand Yamaha - Yamaha P-250 | Owner's Manual - Page 7
3 Introduction 5 How to Use this Manual 5 Accessories and Options 6 Features 6 Basic Operation 13 Names and Functions 14 Top Panel 14 Rear Panel Controls 15 Setting Up 16 Installing the Accessories 16 Music rest 16 Pedal 16 Before Powering Up 16 Powering Up 16 Connecting to External - Yamaha P-250 | Owner's Manual - Page 8
Performance 27 P-250 Design 28 Voice 28 Performances 30 Performance parameters 30 Performance file 32 Songs 33 Song file 33 About P-250 Memory 33 Storage the expression effect 39 Using Panel Lock 39 Toggling MIDI Transmission On/Off 40 Transmitting MIDI Panic Signals 40 Performance - Yamaha P-250 | Owner's Manual - Page 9
New Song 47 Recording 47 Re-recording part of a song 48 Other Recording Techniques between playback and the sound of your playing by using the [SONG BALANCE] slider 49 Recording in Dual Voice in Detail [VOICE EDIT 65 Basic voice editing using [VOICE EDIT 65 Setting the octave* [Octave 65 - Yamaha P-250 | Owner's Manual - Page 10
[HarmonicContent (Harmonic 68 Adjusting the low-range frequency of the part EQ* [EQ LowFreq.(EQ L.Freq 68 Adjusting the high-range frequency of the part EQ* [EQ HighFreq.(EQ H.Freq 68 Adjusting the low range resonance of the Master Equalizer [HighQ 72 MIDI [MIDI SETTING 73 10 P-250 Appendix - Yamaha P-250 | Owner's Manual - Page 11
Table of Contents About MIDI 73 [MIDI] connector 73 [TO HOST] connector 73 [USB] connector 73 Setting the MIDI transmit channel [MidiOutChannel 74 Setting the MIDI receive channel [MidiInChannel 74 Turning the Local Control On/Off [LocalControl 74 Specifying keyboard performance or song data - Yamaha P-250 | Owner's Manual - Page 12
Operation Table of Contents Listening and playing 94 Using the controllers 94 Changing the sound 94 Changing the pitch 94 Adjusting the volume Level 95 Recording, playing, and saving a song 95 Using, editing, and saving a performance 95 Connecting the P-250 to other devices 95 If you 95 - Yamaha P-250 | Owner's Manual - Page 13
how to connect and set up your P-250 and use its basic functions. It also describes the concept and structure of the P-250 in plain language. Names and Functions 14 Setting Up 16 Connecting to External Devices 17 P-250 Quick Guide 24 P-250 Design 28 Basic Operation 34 Performance Operation - Yamaha P-250 | Owner's Manual - Page 14
OUTPUT USB TO HOST USB Mac PC-2 MIDI HOST SELECT THRU OUT MIDI 1 PITCH 3 POWER ON OFF 2 MODULATION 4 5 SONG KEYBOARD MIN page 62 B [MIDI OUT page 40 C [PANEL LOCK page 39 D TEMPO[DOWN][UP page 51 E LCD buttons A[-]/[+]/ B[-(NO)]/ [+(YES)]/C[-]/[+]/D page 16 14 P-250 F LCD page 16 - Yamaha P-250 | Owner's Manual - Page 15
HIGH MASTER EQUALIZER U ELECTRONIC PIANO P-250 W [AC INLET page 16 X ASSIGNABLE FOOT PEDAL [1 (SUSTAIN)][2 (SOSTENUTO)] [3 (SOFT)][4 (AUX page 23 Y MIDI[IN][OUT][THRU] ..page 18-20,22 Z [HOST SELECT page 18-20,22 ■ Rear Panel Controls [ [TO HOST page 20 \ [USB page 19 ] OUTPUT [R][L/MONO - Yamaha P-250 | Owner's Manual - Page 16
Up ■ Installing the Accessories Music rest To attach the music rest, insert its pins into the holes on the P-250's rear panel, as shown in the diagram below. 3 Plug the other end of the power cable into an AC outlet. ■ Powering Up 1 Turn the power ON by pressing the [POWER] switch. Pedal Connect - Yamaha P-250 | Owner's Manual - Page 17
250 to other electronic components, first set all volume levels to minimum (0), then turn off the power to all components. As a standard practice, before you turn the power on or off to any component, set all volume levels to minimum (0). Otherwise, electrical [L] P-250 MUSIC PRODUCTION SYNTHESIZER - Yamaha P-250 | Owner's Manual - Page 18
from the P250's MIDI OUT connector. Controlling an external device from the P-250 HOST SELECT MIDI PC-2 Mac USB MIDI [OUT] MIDI [IN] P-250 MUSIC PRODUCTION SYNTHESIZER Integrated Sampling Sequencer Real-time External Control Sur face Modular Synthesis Plug-in System External MIDI keyboard or - Yamaha P-250 | Owner's Manual - Page 19
and the P-250. The YAMAHA USB MIDI Driver can be installed from the included "TOOLS for P-250" CD-ROM. The YAMAHA USB MIDI Driver supports the following OS versions: Windows 98, Windows 98SE, Windows Me, Windows 2000, Windows XP Mac OS 8.6 through 9.2.1 TIP You will need MIDI application software - Yamaha P-250 | Owner's Manual - Page 20
250 is on • Turning the power to the P-250 on or off, starting up your computer, or installing the driver while a large amount of data is being transferred 2 Serial connection (computer's serial port to P-250 [TO HOST] connector) • Using the computer's MIDI interface HOST SELECT MIDI PC-2 Mac USB - Yamaha P-250 | Owner's Manual - Page 21
use one of the following serial cables: Windows (with a 9-pin D-sub serial port) 8-pin mini DIN plug → D-sub 9-pin plug (Yamaha 2 (RxD) 5 (GND) D-sub 9-pin 3 (TxD) Macintosh System peripheral plug → 8-pin plug (Yamaha CCJ-MAC or equivalent) mini DIN 1 8-pin 2 3 4 5 6 7 8 2 (HSK i) mini DIN 250 21 - Yamaha P-250 | Owner's Manual - Page 22
following setting as a guideline; specific instructions may differ depending on your computer and the software used. MIDI "Echo" is enabled on the software/computer P-250 USB IN OUT Computer with application software Tone Generator Local Off Keyboard MIDI setting "LocalControl" : off OUT IN - Yamaha P-250 | Owner's Manual - Page 23
panel ASSIGNABLE FOOT PEDAL 1 2 3 4 IN SUSTAIN SOSUTENUTO SOFT AUX MIDI OUT T Connecting to External Devices ■ Connecting headphones You can connect headphones TIP Optional pedals: Yamaha FC3 foot pedal Yamaha FC7 foot controller Yamaha FC4 foot switch Yamaha FC5 foot switch P-250 23 - Yamaha P-250 | Owner's Manual - Page 24
use the [MASTER VOLUME] dial. To adjust the volume balance between song playback and keyboard, use Piano (stereo sampling) GRANDPIANO2 .... Mono Piano (mono sampling) E.PIANO1 mezzo piano 250 POWER ON OFF SONG KEYBOARD MIN MAX MASTER VOLUME SONG BALANCE TRACK1 TRACK2 EX.TRACKS SONG FILE MIDI - Yamaha P-250 | Owner's Manual - Page 25
contain song data recorded at a free tempo. P-250 Quick Guide Adjusting the tempo You can use the TEMPO [DOWN]/[UP] buttons to adjust the CHORUS PERFORMANCE MIDI SETTING MASTER EQ EDIT PERFORM. FILE OTHER SETTING LOW LO-MID MID HI-MID HIGH MASTER EQUALIZER ELECTRONIC PIANO P-250 P-250 25 - Yamaha P-250 | Owner's Manual - Page 26
250 Quick Guide ■ Selecting, Editing, and Storing a Voice The P-250 features a large number of high grade piano is off. (See page 37.) 7 Use the Master Equalizer. By moving the MASTER USB TO HOST USB Mac PC-2 MIDI THRU O HOST SELECT M 26 P-250 POWER 8 ON OFF PITCH MODULATION SONG KEYBOARD - Yamaha P-250 | Owner's Manual - Page 27
7 8 ORGAN 1 ORGAN 2 STRINGS CHOIR SYNTH. PAD GUITAR BASS XG VARIATION 9 10 11 12 13 14 15 16 VOICE/PERFORMANCE A B REVERB CHORUS PERFORMANCE MIDI SETTING MASTER EQ EDIT PERFORM. FILE OTHER SETTING 7 LOW LO-MID MID HI-MID HIGH MASTER EQUALIZER ELECTRONIC PIANO P-250 P-250 27 - Yamaha P-250 | Owner's Manual - Page 28
[VOICE EDIT] button. These voices are used for the Left part. XG Fretless Bass Phaser E.Piano 1 LeftLayer part Mellow Piano 1 Rock Piano Honky Tonk Piano Grand Piano 2 Grand Piano 1 Grand Piano 1 Grand Piano 1 Grand Piano 1 XG Grand Piano 1 Each combination of voices (45 preset voices - Yamaha P-250 | Owner's Manual - Page 29
Tonk Piano Grand Piano 2 Grand Piano 1 Grand Piano 1 Grand Piano 1 Grand Piano 1 XG Grand Piano 1 Each combination of voices (45 preset voices and XG voices) has unique parameter settings in the [VOICE EDIT] menu. These combined voices are used for the Main part and the Layer part. P-250 29 - Yamaha P-250 | Owner's Manual - Page 30
Basic Operation P-250 Design ■ Performances On the P-250, a "performance" refers to a group of settings that control the tone generator, MIDI, and so on. You the low-range frequency of the part EQ *1 Adjusting the high-range frequency of the part EQ *1 VibeRotorSpeed VibeRotorOnOff RotarySpeed Dry - Yamaha P-250 | Owner's Manual - Page 31
Local control on/off LocalControl 74 Specifying keyboard performance or song data to be transmitted via MIDI MidiOutSelect 74 [OTHERSETTING] Selecting a touch response TouchResponse 76 (partial) Selecting a tuning curve for a piano voice PianoTuningCurve 76 Selecting a scale Scale 77 - Yamaha P-250 | Owner's Manual - Page 32
store the edited performance file in memory (as described later). For more information on using the performance file, see "Handling Performance Files [PERFORM.FILE]" (page 42). A 19). Performance file A16 B16 A0A10A20A304 B0B10B20B304 Performance VOMICaEinEDLaIyTer on MIDI Setting 32 P-250 - Yamaha P-250 | Owner's Manual - Page 33
keyboard performance, as well as to recall and play back the internal demo songs. The P-250 features sixteen recording tracks, which enable you to record different parts 250 to a computer. The following song data can be played on the P-250: • Sequence Format SMF (Standard MIDI the power to the P-250 - Yamaha P-250 | Owner's Manual - Page 34
Basic Operation SONG KEYBOARD MIN MAX MASTER VOLUME SONG BALANCE TRACK1 TRACK2 EX.TRACKS SONG FILE MIDI OUT PANEL LOCK A SONG SELECT TOP START/STOP REC SONG SETTING DOWN UP NEW SONG SYNCHRO START SONG C TEMPO B NO YES D CONTRAST EXIT G.PIANO 1 G.PIANO 2 E.PIANO1 E.PIANO2 E.PIANO3 - Yamaha P-250 | Owner's Manual - Page 35
SONG KEYBOARD MIN MAX MASTER VOLUME SONG BALANCE TRACK1 TRACK2 EX.TRACKS SONG FILE MIDI OUT PANEL LOCK A SONG SELECT TOP START/STOP REC SONG SETTING DOWN UP NEW SONG SYNCHRO START SONG C TEMPO Dual mode using voices from the same group 3 B NO YES D CONTRAST EXIT G.PIANO 1 G.PIANO - Yamaha P-250 | Owner's Manual - Page 36
respectively. For example, you can play a bass part using the Wood Bass voice with your left hand, and play a melody with your right hand. 4 5 3, 4 2, 4, 5, 6 1 SONG KEYBOARD MIN MAX MASTER VOLUME SONG BALANCE TRACK1 TRACK2 EX.TRACKS SONG FILE MIDI OUT PANEL LOCK A SONG SELECT TOP START - Yamaha P-250 | Owner's Manual - Page 37
CHORUS PERFORMANCE MIDI SETTING MASTER EQ EDIT PERFORM. FILE OTHER SETTING Basic Operation ■ Effect Structure The P-250 features system effects and insertion effects. System effects The system effects are applied to all parts globally. The amount of effect can be set per part. The P250 system - Yamaha P-250 | Owner's Manual - Page 38
of the P-250 sound so that it will stand out from an ensemble. Or, you can boost the lower range to create a dynamic sound. Use the master equalizer by performance recall or MIDI song playback. Pitch bend wheel Use the pitch bend wheel to bend notes up or down while playing the keyboard to add a - Yamaha P-250 | Owner's Manual - Page 39
Basic Operation ■ Using Pedals The P-250 features four pedal jacks. Different pedals can be used for various purposes, as described below. See page 23 for information on connecting the pedals. NOTE This section explains how to use the pedals based on the default settings after the power is turned - Yamaha P-250 | Owner's Manual - Page 40
[MIDI OUT] SONG KEYBOARD MIN MAX MASTER VOLUME SONG BALANCE TRACK1 TRACK2 EX.TRACKS SONG FILE MIDI OUT PANEL LOCK A SONG SELECT TOP START/STOP REC SONG SETTING DOWN UP NEW SONG SYNCHRO START SONG C TEMPO Transmitting MIDI panic signals [MIDI OUT] B NO YES D CONTRAST EXIT G.PIANO - Yamaha P-250 | Owner's Manual - Page 41
KEYBOARD MIN MAX MASTER VOLUME SONG BALANCE TRACK1 TRACK2 EX.TRACKS SONG FILE MIDI the [EXIT] button, then use the VARIATION [†]/[π] buttons to switch parts, press the A [+] button in the performance screen. A0A10A20A304 B0B10B20B304 Performance VOMICaEinEDLaIyTer on MIDI Setting P-250 - Yamaha P-250 | Owner's Manual - Page 42
page 82 for an explanation of each message, the appropriate actions to take, and troubleshooting information. 23 34 3 1, 2 SONG KEYBOARD MIN MAX MASTER VOLUME SONG BALANCE TRACK1 TRACK2 EX.TRACKS SONG FILE MIDI OUT PANEL LOCK A SONG SELECT TOP START/STOP REC SONG SETTING DOWN UP NEW - Yamaha P-250 | Owner's Manual - Page 43
using the "RenameFile" parameter (page 45). 3-1 Select a performance. Use MIDI PER") using the procedure using the cursor (a small underline), use the C [-]/[+] buttons. [+] buttons simultaneously. You can use up to 20 characters to used to display the performance name on-screen using - Yamaha P-250 | Owner's Manual - Page 44
supplement for Step 3 on page 42. CAUTION Do not turn off the power to the P-250 while the screen displays "Executing." Otherwise, the data currently held in storage memory may be lost. 3-1 Select a performance file. Use the C [-]/[+] buttons to select the desired performance file to load. 3-2 Execute - Yamaha P-250 | Owner's Manual - Page 45
Use the C [-]/[+] buttons to select a performance file. 3-2 Execute the operation. Press the B [+(YES)] button located next to "Execute?-->." Follow the instructions Step 3 on page 42. CAUTION Do not turn off the power to the P-250 while the screen displays "Executing." Otherwise, the data currently - Yamaha P-250 | Owner's Manual - Page 46
using the P-250 recording function. You can, for example, play back what you played on the keyboard.You can also record just one part, then practice the other part while playing back the recorded the part the appropriate actions to take, and troubleshooting information. TIP An alternative way to - Yamaha P-250 | Owner's Manual - Page 47
also use the slider to YES D CONTRAST EXIT G.PIANO 1 G.PIANO 2 E.PIANO1 E.PIANO2 MIDI SETTING MASTER EQ EDIT PERFORM. FILE OTHER SETTING To select a track from Track 3 through 16: Hold down the [REC] button, then use the keyboard. keyboard. TIP When you press the [REC] button, recording pauses - Yamaha P-250 | Owner's Manual - Page 48
the power to the P-250, the recorded performance data will be lost. If you wish to keep the recording, save the data using part of a song This section explains how to record part of a song again. 1 Pause the song at the beginning of the part you wish to re-record. To move through the measures, use - Yamaha P-250 | Owner's Manual - Page 49
songs [P-001-016], commercially-available music data, or your old recorded ." 1 Select the song you wish to edit by using the SONG SELECT [ ]/[ ] buttons. TIP For parts and your current performance. 1 Move the [SONG BALANCE] slider to the left or right to make the adjustment. SONG KEYBOARD - Yamaha P-250 | Owner's Manual - Page 50
250 records each voice onto a separate track. The following table shows how tracks are assigned to each voice. CAUTION When you record multiple parts 16, TRACKs 1, 2, and 3 are used. TIP A switch between Dual and Split for note data including "Octave" and "Transpose", after recording. * You can change - Yamaha P-250 | Owner's Manual - Page 51
play the keyboard while the P-250 is playing back a song. You can also play the notes in a voice different from the playback voice by selecting a voice from the panel. In this case, to adjust the volume balance between the song playback and the sound you are playing on the keyboard, use the [SONG - Yamaha P-250 | Owner's Manual - Page 52
Song Playback Adjusting the tempo You can use the TEMPO [DOWN]/[UP] buttons 250 is playing or stopped, pressing these track buttons turns off the indicators, and the data on those tracks will not be played. Press the track buttons repeatedly to toggle track playback on and off. You can play the part - Yamaha P-250 | Owner's Manual - Page 53
page 82 for an explanation of each message, the appropriate actions to take, and troubleshooting information. 1 2 3 3 SONG KEYBOARD MIN MAX MASTER VOLUME SONG BALANCE TRACK1 TRACK2 EX.TRACKS SONG FILE MIDI OUT PANEL LOCK A SONG SELECT TOP START/STOP REC SONG SETTING DOWN UP NEW SONG - Yamaha P-250 | Owner's Manual - Page 54
the P-250 while the screen displays "Executing." Otherwise, the data currently held in storage memory may be lost. 4-1 Select a song to delete. Use the C [-]/[+] buttons to select a song. 4-2 Execute the operation. Press the B [+(YES)] button located next to "Execute?-->." Follow the instructions on - Yamaha P-250 | Owner's Manual - Page 55
on page 53. CAUTION Do not turn off the power to the P-250 while the screen displays "Executing." Otherwise, the data use the D [-]/[+] buttons. Character list International Japanese TIP The [CharacterCode] setting is also reflected in the display of the performance and performance file names. P-250 - Yamaha P-250 | Owner's Manual - Page 56
Edit Operation MEMO 56 P-250 - Yamaha P-250 | Owner's Manual - Page 57
58 Settings for Song Recording and Playback [SONG SETTING 62 Editing a Voice in Detail [VOICE EDIT 65 Adjusting the Master Equalizer [MASTER EQ EDIT 71 MIDI [MIDI SETTING 73 Other Settings [OTHER SETTING 76 - Yamaha P-250 | Owner's Manual - Page 58
Operation You can set various parameters to make the best use of P-250 functions. For a basic procedure to make these settings an asterisk (*) to the Main part and Layer part voices. In Split Dual mode, assign them to the Main, Layer, Left, and LeftLayer part voices. Operation Setting the octave* - Yamaha P-250 | Owner's Manual - Page 59
MIDI [MIDI SETTING] Operation Setting the MIDI transmit channel Setting the MIDI receive channel Turning the Local control on/off Specifying keyboard performance or song data to be transmitted via MIDI Specifying the type of data received via MIDI tuning curve for a piano voice Selecting a Transpose - Yamaha P-250 | Owner's Manual - Page 60
79 Setting the Master Equalizer lock EqualizerLock 79 Selecting items saved at shutdown MemoryBackUp 79 Restoring the normal (default) settings FactorySet 79 Edit Operation 60 P-250 - Yamaha P-250 | Owner's Manual - Page 61
KEYBOARD MIN MAX MASTER VOLUME SONG BALANCE TRACK1 TRACK2 EX.TRACKS SONG FILE MIDI or part. Some parameters or parts lead you to more options. Use the [+(YES)] button again. The P250 displays "Executing" and writes the B [+(YES)] button. If the P-250 does not display the previous screen three - Yamaha P-250 | Owner's Manual - Page 62
KEYBOARD MIN MAX MASTER VOLUME SONG BALANCE TRACK1 TRACK2 EX.TRACKS SONG FILE MIDI OUT PANEL LOCK A SONG SELECT TOP START/STOP REC SONG SETTING DOWN UP NEW SONG SYNCHRO START SONG C TEMPO B NO YES D CONTRAST EXIT G.PIANO 1 G.PIANO 100% by using the C triplets 62 P-250 Swing rate - Yamaha P-250 | Owner's Manual - Page 63
data) may be displayed. NOTE Save the edited song data to memory using the "SaveToMemory" (page 54) parameter. Press the B [-(NO)]/[+(YES , the count down starts, followed by the repeated playback of the specified part until you press the [TOP] button. • If you select "Repeat Off only "Off". P-250 63 - Yamaha P-250 | Owner's Manual - Page 64
[ClickOnOff] • When you start playback, the P-250 plays the currently-selected song, then starts repeat playback panel ■ Setting the click time signature [TimeSignature] Use the D [-]/[+] buttons to select one of the of denoting the meter of a piece of music. Press the C [-]/[+] buttons to set the - Yamaha P-250 | Owner's Manual - Page 65
KEYBOARD MIN MAX MASTER VOLUME SONG BALANCE TRACK1 TRACK2 EX.TRACKS SONG FILE MIDI OUT PANEL LOCK A SONG SELECT TOP START/STOP REC SONG SETTING DOWN UP NEW SONG SYNCHRO START SONG C TEMPO B NO YES D CONTRAST EXIT G.PIANO 1 G.PIANO using editing (Main part or Layer part) Press the - Yamaha P-250 | Owner's Manual - Page 66
than Hall1 Stage Reverberation parts "Left" and "Left X Layer." Press the D [-]/[+] buttons to select one of the following: Chorus .......... Adds a rich spread to the sound. Celeste .......... Adds a swell and spread to the sound. Flanger Adds an ascending or descending jet sweep. 66 P-250 - Yamaha P-250 | Owner's Manual - Page 67
: Voice for editing (Main part or Layer part) Press the D [-]/[+] buttons electric motor. This parameter is displayed only if VibeRotor is selected for the "Ins.Type" parameter. This parameter enables you to set the speed of vibrato when you select the Vibraphone voice and use deep dimension to 250 67 - Yamaha P-250 | Owner's Manual - Page 68
* [Brightness] Use the D 250 has two types of equalizer: five-band Master Equalizer (Master EQ) and two-band Part Equalizer (part EQ). Refer to pages 38 and 71 for more information on the Master Equalizer. 68 P-250 keyboard (how hard you play). In Dual mode: Voice for editing (Main part or Left part - Yamaha P-250 | Owner's Manual - Page 69
MIDI transmit only) Off No function is assigned. TIP Recommended pedals: For the Sustain, SustainCont, Sostenuto, and Soft functions, use FC3, FC4/FC5, FC7 pedals. For other functions, use Left part note being played. LeftLayer Volume ..........Changes the volume level of the LeftLayer part note - Yamaha P-250 | Owner's Manual - Page 70
set to the same fixed value. ■ Turning the Internal tone generator on/off* [InternalTG] Press the D[-]/[+] buttons to turn the Internal Voice on/ off. 70 P-250 - Yamaha P-250 | Owner's Manual - Page 71
Regardless of the method you use, the latest gain setting is effective. [MASTER EQ EDIT] TRACK1 TRACK2 EX.TRACKS SONG FILE MIDI OUT PANEL LOCK A TOP START/STOP REC SONG SETTING DOWN UP SYNCHRO START SONG C TEMPO B NO YES D CONTRAST EXIT G.PIANO 1 G.PIANO 2 E.PIANO1 E.PIANO2 E.PIANO3 CLAVI - Yamaha P-250 | Owner's Manual - Page 72
the Q for each band (0.1-12.0). TIP If you set the Q to a lower value and the gain to a higher value, the sound may distort. In this case, raise the Q or lower the gain. TIP If you set the "EqualizerLock" parameter (accessed via the [OTHER SETTING] button to "ON," the Master Equalizer settings - Yamaha P-250 | Owner's Manual - Page 73
MIDI MIDI (Musical Instrument Digital Interface) is a standard format for data transmission and reception. It enables the transfer of performance data and commands between MIDI devices and personal computers. Using MIDI, you can control a connected MIDI device from the P-250, or control the P-250 - Yamaha P-250 | Owner's Manual - Page 74
including demo songs) is sent via MIDI. MIDI IN TO HOST USB (When the channel setting is other than Song or Off) Port A Port B Sound source A Channels 1-16 Sound source B Channels 17-32 Played from the keyboard Used for song playback Used for song playback [MidiInChannel] is a performance - Yamaha P-250 | Owner's Manual - Page 75
type of data transmitted via MIDI [TransmitParameter] This parameter enables you to specify the MIDI data type the P-250 will transmit. Edit Operation Press connected sequencer. Before you record your playing on the keyboard to a connected sequencer, it is useful if you first send and record (at the - Yamaha P-250 | Owner's Manual - Page 76
keys). ■ Fine-tuning the pitch [Tune] You can fine tune the pitch of the entire instrument. This function is useful when you play the P-250 along with other instruments or CD music. Press the D[-]/[+] buttons to select one of the following: Light With this setting, a soft touch can produce a loud - Yamaha P-250 | Owner's Manual - Page 77
music. You can experience the tunings of these genres. ■ Setting the key [Transpose] The P-250's Transpose function makes it possible to shift the pitch of the entire keyboard major chords using these scales produce a beautiful, pure sound. They are sometimes used for chorus parts. Pythagorean This - Yamaha P-250 | Owner's Manual - Page 78
pedals turn on the effects when pressed, and others turn them off. Use this parameter to reverse this mechanism. Press the D [-]/[+] buttons to is sustained (a) while you press the keys on the keyboard ("PianoLike") or (b) while you press and hold down a performance parameter (page 30). 78 P-250 - Yamaha P-250 | Owner's Manual - Page 79
is recalled or during MIDI or song playback. Press the C [-]/[+] buttons to select the desired item (Transpose, Equalizer, ReverbOnOff, white key on the right end (C7) of the keyboard, then press the [POWER] switch to turn on the power to the P-250. The files saved in storage memory are not erased - Yamaha P-250 | Owner's Manual - Page 80
MEMO 80 P-250 Appendix - Yamaha P-250 | Owner's Manual - Page 81
Appendix Appendix includes a list of voice and performance presets, reference materials, a Troubleshooting section and an Index. Message List 82 Troubleshooting 86 Midi Data Compatibility 88 Preset Voice List 90 Preset Performance List 92 Application Index 94 Index 96 P-250 81 Appendix - Yamaha P-250 | Owner's Manual - Page 82
is displayed following the message "Executing." The P250's internal processing is complete. You may is incorrect when you load a performance file using the "LoadFromMem." function. "Duplicate song name or hold down the C7 key and turn on the power to the P-250 (page 79). The normal (factory default) - Yamaha P-250 | Owner's Manual - Page 83
the P-250, then check that the driver and MIDI application on your computer are functioning correctly. When using the P-250 by itself ... This message may appear if a cable is left connected to the [TO HOST] or [USB] connector on the P-250. In this case, turn off the power of the P-250, disconnect - Yamaha P-250 | Owner's Manual - Page 84
After you load an internally-protected song, such as commerciallyavailable music data, into the P-250's current memory or storage memory, you tried to save the will appear if a problem is found with the song data when you select a song or while the song is playing. In this case, reselect the song, - Yamaha P-250 | Owner's Manual - Page 85
. Then try transmitting the data once again. You used a period or space at the beginning of a song name or file name, or you tried to edit a song name or file name that includes unsupported characters. The P-250 could not process the name. The P250 will display the previous screen in three seconds - Yamaha P-250 | Owner's Manual - Page 86
Troubleshooting Problem The P-250 does not turn on. A click or pop is heard when the power is turned on or off. Noise is heard from the P-250 speakers. The overall volume is too low, or there is no sound at all. The keyboard volume is lower than the song playback volume. The speakers do not turn - Yamaha P-250 | Owner's Manual - Page 87
Troubleshooting Problem Performance in Dual or Split mode is not recorded. Track data is lost unexpectedly. I cannot change the time signature in the song after recording. The song title is not correct. When I turn on the power to the P-250 may be different than that used when you named the song. - Yamaha P-250 | Owner's Manual - Page 88
software is recorded as Format 0. • The P-250 is compatible with both Format 0 and Format 1. • Performance data recorded on the P-250 is saved in SMF Format 0 in memory. ■ ESEQ This sequence format is compatible with many of Yamaha's MIDI devices, including P-250 series instruments. • The P-250 - Yamaha P-250 | Owner's Manual - Page 89
or models. • Many MIDI devices are compatible with GM System Level 1, as is most commercially avail- able software. • The P-250 is compatible with GM System Level 1. ■ XG (logo ) This logo (XG logo) appears on tone generators and music data that supports "XG." XG is Yamaha's tone generator - Yamaha P-250 | Owner's Manual - Page 90
piano of a different type than E.Piano 1, often used in rock and popular music. × × An electric piano sound with a vintage character, and reverb as the only effect. × × The sound of an electric piano distorted by an amp simulator effect. Ideal for rock music. This is the voice of a keyboard - Yamaha P-250 | Owner's Manual - Page 91
used in baroque × music together with grand piano sounds or electric piano sounds. Choir playing together with grand piano sounds or electric piano sounds. You can enjoy used for jazz walking-bass lines. × × × The sound of an electric bass. Frequently used in jazz, rock, and popular music - Yamaha P-250 | Owner's Manual - Page 92
rapid passages to ballads. Widely-used layered sound with piano and electric piano. Ideal for 80's pop. Widely-used layered sound with piano and DX electric piano. Enjoy harmonies with the sparkling electric piano. Another type of layered piano and DX electric piano. Piano layered with soft strings - Yamaha P-250 | Owner's Manual - Page 93
name Type Main Sounds used Layer Left A09 E.Piano+ SlowStr Dual ChorusE.P. SlowStrings A10 E.Piano+ Vintage E.P. Dual a dual-manual organ. Play chords in the left hand, and solo with the right. Play chords in the left hand on an electric piano with phaser applied, and piano solo in the - Yamaha P-250 | Owner's Manual - Page 94
part played by the keyboard MIDI SETTING]-[MidiOutChannel] on page 74 • Selecting the velocity response (touch sensitivity OTHER SETTING]-[TouchResponse] on page 76 ■ Using pitch offset between two Dual parts VOICE EDIT]-[Detune] on page 66 • Transposing OTHER SETTING]-[Transpose] on page 77 • - Yamaha P-250 | Owner's Manual - Page 95
" on page 51 • Switching individual parts on and off for playback Turning Track FILE]-[CharacterCode] on page 55 ■ Using, editing, and saving a performance 55 ■ Connecting the P-250 to other devices • Message List" on page 82 • Experience problems Troubleshooting" on page 86 • Want to return to - Yamaha P-250 | Owner's Manual - Page 96
Accessories 6 Adding Data to an Existing Song 49 Adjusting the Tempo 52 Adjusting the Volume Balance Between Playback and Performance 49 AmpSimulator 67 Appendix 81 Assigning a Function to the [SONG BALANCE] Slider 79 Assigning the Start/Stop Function to a Pedal 78 Attaching the Music Midi Equipment - Yamaha P-250 | Owner's Manual - Page 97
30 Performances 30 Phaser 67 [PHONES] Jack 17 PhraseMark 63 Piano Voice Tuning Curve 76 PianoTuningCurve 76 Pitch Bend 38 Pitch Bend 66 Power 16 Preset Performance List 92 Preset Voice List 90 Pythagorean 77 Q Quantize 62 Quick Guide 24 QuickPlay 62 R Rear Panel 15 Received Data Type via MIDI 75 - Yamaha P-250 | Owner's Manual - Page 98
76 Tuning Curve for a Piano Voice 76 Turning the Vibraphone Vibrator On/Off 67 Turning Track Playback On/Off 52 Type of Data Received via MIDI 75 Type of Data Transmitted via MIDI 75 Type of Pedal 78 Types of data recorded 50 U [USB] Connector 19, 73 USB driver 19 Using Foot Pedal 39 Using pedal 39 - Yamaha P-250 | Owner's Manual - Page 99
this type of product to any power supply or adapter other than one described in the owners manual, on the name plate, or specifically recommended by Yamaha. 12. Electrical/electronic products should be serviced by a quali- fied service person when: a. The power supply cord has been damaged; or - Yamaha P-250 | Owner's Manual - Page 100
electronic devices. This equipment generates/ uses radio frequencies and, if not installed and used according to the instructions found in the users manual • This applies only to products distributed by Yamaha-Kemble Music (U.K.) Ltd. CAUTION: TO PREVENT ELECTRIC SHOCK, MATCH WIDE BLADE OF PLUG TO - Yamaha P-250 | Owner's Manual - Page 101
Yamaha Music Latin KINGDOM Yamaha-Kemble Music (U.K.) NORWAY Norsk filial av Yamaha Scandinavia AB Grini Næringspark Yamaha Corporation, Asia-Pacific Music Marketing Group Nakazawa-cho 10-1, Hamamatsu, Japan 430-8650 Tel: +81-53-460-2312 HEAD OFFICE Yamaha Corporation, Pro Audio & Digital Musical - Yamaha P-250 | Owner's Manual - Page 102
only) http://www.yamahasynth.com/ Yamaha Manual Library http://www2.yamaha.co.jp/manual/english/ This document is printed on recycled chlorine free (ECF) paper with soy ink. M.D.G., Pro Audio & Digital Musical Instrument Division, Yamaha Corporation © 2002 Yamaha Corporation V960150 309APAP1.3-04C0
-
 1
1 -
 2
2 -
 3
3 -
 4
4 -
 5
5 -
 6
6 -
 7
7 -
8
-
9
-
10
-
11
-
12
-
13
-
14
-
15
-
16
-
17
-
18
-
19
-
20
-
21
-
22
-
23
-
24
-
25
-
26
-
27
-
28
-
29
-
30
-
31
-
32
-
33
-
34
-
35
-
36
-
37
-
38
-
39
-
40
-
41
-
42
-
43
-
44
-
45
-
46
-
47
-
48
-
49
-
50
-
51
-
52
-
53
-
54
-
55
-
56
-
57
-
58
-
59
-
60
-
61
-
62
-
63
-
64
-
65
-
66
-
67
-
68
-
69
-
70
-
71
-
72
-
73
-
74
-
75
-
76
-
77
-
78
-
79
-
80
-
81
-
82
-
83
-
84
-
85
-
86
-
87
-
88
-
89
-
90
-
91
-
92
-
93
-
94
-
95
-
96
-
97
-
98
-
99
-
100
-
101
-
102
 |
 |

POWER
8
7
6
5
1
2
3
4
P-250
ELECTRONIC PIANO
HIGH
MASTER EQUALIZER
MIDI SETTING
CHORUS
REVERB
SPLIT
XG
BASS
PERFORM. FILE
MASTER EQ EDIT
VARIATION
PERFORMANCE
VOICE EDIT
VIBES
HARPSI.
OTHER SETTING
CONTRAST
GUITAR
SYNTH.PAD
E.PIANO3
CLAVI.
ORGAN 1
G.PIANO 1
ORGAN 2
G.PIANO 2
STRINGS
E.PIANO1
CHOIR
E.PIANO2
VOICE/PERFORMANCE
16
15
14
13
9
B
A
10
11
12
EXIT
B
YES
NO
D
TEMPO
A
C
PANEL LOCK
MIDI OUT
DOWN
UP
SONG
EX.TRACKS
SONG FILE
TRACK1
TOP
SONG SELECT
REC
START/STOP
SYNCHRO START
NEW SONG
TRACK2
SONG SETTING
SONG BALANCE
KEYBOARD
SONG
MASTER VOLUME
MIN
MAX
MODULATION
PITCH
ON
OFF
USB
HOST SELECT
MIDI
ASSIGNABLE FOOT PEDAL
AC INLET
MIDI
THRU
OUT
IN
AUX
4
SOSUTENUTO
2
SUSTAIN
1
SOFT
3
PC-2
TO HOST
USB
Mac
OUTPUT
R
L/MONO
INPUT
R
L/MONO
HI-MID
LOW
LO-MID
MID
ELECTRONIC PIANO
ELECTRONIC PIANO
Owner's Manual