Yamaha PSR-350 Owner's Manual
Yamaha PSR-350 Manual
 |
View all Yamaha PSR-350 manuals
Add to My Manuals
Save this manual to your list of manuals |
Yamaha PSR-350 manual content summary:
- Yamaha PSR-350 | Owner's Manual - Page 1
- Yamaha PSR-350 | Owner's Manual - Page 2
or; a cart, rack, or stand that is recommended by Yamaha. If a cart, etc., is used, please observe all safety markings and instructions that accompany the accessory product. SPECIFICATIONS SUBJECT TO CHANGE: The information contained in this manual is believed to be correct at the time of printing - Yamaha PSR-350 | Owner's Manual - Page 3
data that is lost or destroyed. Always turn the power off when the instrument is not in use. Make sure to discard used batteries according to local regulations. * The illustrations and LCD screens as shown in this owner's manual are for instructional purposes only, and may be different from the ones - Yamaha PSR-350 | Owner's Manual - Page 4
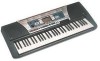
of the Yamaha PSR-350 PortaTone! You now own a portable keyboard that combines advanced functions, great sound and exceptional ease-of-use in a highly compact package. Its outstanding features also make it a remarkably expressive and versatile instrument. Read this Owner's Manual carefully while - Yamaha PSR-350 | Owner's Manual - Page 5
• Turning On the Power 8 • Accessory Jacks 9 Quick Guide 10 Step 1 Voices 10 Step 2 Songs 12 Step 3 Music Database 14 Step 4 Lesson 16 Panel Display Indications 18 Portable Grand 20 • Playing the Portable Grand 20 • Using the Metronome 20 DJ 22 • Playing the DJ 22 Playing Voices 23 - Yamaha PSR-350 | Owner's Manual - Page 6
!4 !5 @7 q Power switch ([STANDBY/ON]) w [MASTER VOLUME] dial This determines the overall volume of the PSR-350. e [DEMO] button This is used to play the Demo songs. (See page page 55.) !3 [PORTABLE GRAND] button This instantly calls up the Grand Piano voice, plus a special piano song and style. ( - Yamaha PSR-350 | Owner's Manual - Page 7
a special Chord track). (See page 59.) They are also used for clearing recorded data of all or specific tracks of a User song. (See pages 61, 62.) @5 MUSIC DATABASE button This calls up the optimum panel settings for selected music genre. (See page 49.) @6 REGISTRATION MEMORY buttons These are - Yamaha PSR-350 | Owner's Manual - Page 8
recommended by Yamaha) to power your instrument from the AC mains. The use of other adaptors may result in irreparable damage to both the adaptor and the PSR350. • Unplug the AC Power Adaptor when not using the PSR-350, or during electrical storms. • Never mix old and new batteries or different - Yamaha PSR-350 | Owner's Manual - Page 9
footswitch while turning the power on. Doing this changes the recognized polarity of the footswitch, resulting in reversed footswitch operation. s Using the MIDI Terminals The PSR-350 also features MIDI terminals, allowing you to interface the PSR350 with other MIDI instruments and devices. (For - Yamaha PSR-350 | Owner's Manual - Page 10
001 q zq Playing the Piano Simply by pressing the [PORTABLE GRAND] button, you can automatically reset the entire PSR-350 for piano play. z Press the [PORTABLE GRAND] button. 000 GrandPno Playing along with the Metronome z Press the [METRONOME] button. x Play the keyboard. Want to find out - Yamaha PSR-350 | Owner's Manual - Page 11
PSR-350 has a huge total of 618 dynamic and realistic instrument voices. Let's try a few of them out now... q Press the [VOICE] button. w Select a voice. 000 GrandPno 002 BritePno e Play the keyboard. Want to find out more? See page 23. Playing with the DJ Feature The exciting new DJ Music Box - Yamaha PSR-350 | Owner's Manual - Page 12
x Select a song. 002 Beauty&B • The PSR-350 also has a Demo Cancel function that allows you to disable Demo playback. To enable Demo Cancel, simultaneously hold down the [DEMO] button and turn on the power. To restore the Demo capabilities, simply turn the power off and on again. c Start (and stop - Yamaha PSR-350 | Owner's Manual - Page 13
desired User song for recording. 101 Filename Want to find out more? See page 71. q Song List No. Song Name Demo 001 043 From "The Magic Flute" 044 Symphonie Nr.9 045 Piano Sonate Op.27-2 "Mondschein" 046 Liebesträume Nr.3 Auld Lang Syne 090 American Patrol DJ 091 DJ Game 092 Ragga 093 Digital Rock - Yamaha PSR-350 | Owner's Manual - Page 14
don't know what settings to make, simply select the genre from the Music Database - and the PSR-350 makes all the right settings for you! • For more infomation on playing proper chords for the auto accompaniment, see "Using Auto Accompaniment - Multi Fingering" on page 43 and "Looking up Chords in - Yamaha PSR-350 | Owner's Manual - Page 15
Step 3 Music Database Looking up Chords in the Dictionary The c Play a chord with your left hand. The auto accompaniment starts as soon as you play the Accompaniment section keyboard. For more on chords, see "Looking up Chords in the Dictionary" above. v Stop the auto accompaniment. Want - Yamaha PSR-350 | Owner's Manual - Page 16
Guide Step 4 Lesson x x 000 GrandPno 001 v z z Using the Lesson Feature Songs 021 to 100 are specially designed for use 2 - Waiting In this lesson step, the PSR-350 waits for you to play the correct notes Select one of the Lesson songs. For instructions on selecting songs, see page 63. - Yamaha PSR-350 | Owner's Manual - Page 17
keyboard is unimportant. The PSR-350 checks your timing and how rhythmically "tight" your playing is. r1 Timing The PSR-350 TAP] button. 120 TEMPO r3 MinusOne x Use the numeric keypad to set the desired The PSR-350 also has a convenient Tap Tempo function that allows you to "tap" a new tempo - Yamaha PSR-350 | Owner's Manual - Page 18
y Beat marks u Chord !3 Sync Stop indicator !4 Accompaniment On indicator e Notation r Keyboard o Song track indicators !5 Octave indicator q Indicators These indicate the operating condition of the PSR-350 as shown below: Using the numeric keypad selects voice numbers. Pressing the [START/STOP - Yamaha PSR-350 | Owner's Manual - Page 19
section of the keyboard when the power is too low to ensure proper operation. (See page 8.) !1 Harmony indicator This appears when the Harmony effect is turned on. (See page 32.) Music Stand Insert the bottom edge of the included music stand into the slot located at the top rear of the PSR-350 - Yamaha PSR-350 | Owner's Manual - Page 20
#061 (Für Elise) and style #097 (Stride). The Portable Grand setting is designed also for playing with the special Pianist styles (#097 - #106). When auto accompaniment is turned on, these provide piano-only accompaniment in a variety of music styles. Using the Metronome 1 Call up the Tempo setting - Yamaha PSR-350 | Owner's Manual - Page 21
the [METRONOME] button. Portable Grand Indicates the beat number adjust the volume of the Metronome sound independently of the other PSR-350 sounds. The volume range is 000 - 127. 1 Call Change the value. Use the numeric keypad to set the desired Metronome Volume value, or use the [+]/[-] buttons - Yamaha PSR-350 | Owner's Manual - Page 22
contemporary dance music. Playing the DJ 1 Press the [DJ] button. 000 DJ Set1 Doing this automatically resets the entire instrument for playing the specially programmed DJ song and voice. 2 Turn on the Lesson feature, and select a Lesson step. Lesson steps 1 - 3 can be used with DJ play. Press - Yamaha PSR-350 | Owner's Manual - Page 23
DJ voices and drum kits. The PSR-350 also has a Dual Voice function that lets you combine two different voices in a layer, and play the two together across the keyboard Voice mode is selected 2 Select the desired voice number. Use the numeric keypad. The voices and their numbers are shown on - Yamaha PSR-350 | Owner's Manual - Page 24
as #042 or #006), the initial zeroes may be omitted. In this case, there is a short pause before the indication appears. 109 DXEP/Hrm s Using the [+]/[-] buttons Press the [+] button to select the next voice number, and press the [-] button to select the previous voice. Holding down either button - Yamaha PSR-350 | Owner's Manual - Page 25
117 - 128) No. When one of the 12 Drum Kit voices are selected you 117 can play different drums and percussion instruments on 118 the keyboard. 119 120 121 117 Std.Kit1 122 123 124 125 126 127 128 Name Standard Kit 1 Standard Kit 2 Room Kit Rock Kit Electronic Kit Analog - Yamaha PSR-350 | Owner's Manual - Page 26
Playing Voices 3 Set the parameter's value. Use the numeric keypad or the [+]/[-] buttons. (Refer to the parameter list below.) • The Dual Voice function is not available in the Lesson. The parameters below - Yamaha PSR-350 | Owner's Manual - Page 27
the pitch of the songs. This allows you to easily match the pitch of the PSR-350 to other instruments or singers, or play in a different key without changing your fi " appears in the display. • The Transpose function has no effect on the DJ voices (#609 #618) or the Drum Kits voices (#117 - #128). - Yamaha PSR-350 | Owner's Manual - Page 28
Tuning value 000 TUNING • The Tuning settings have no effect on the Drum Kit voices (#117 - #128). Indicates Tuning is selected 2 Change the value. Use the numeric keypad to set the desired Tuning value (-100 - +100). To tune the pitch down, simultaneously press and hold the [-] button, and - Yamaha PSR-350 | Owner's Manual - Page 29
Touch function is on Touch Sensitivity lets you set how the PSR-350 responds to your playing strength, allowing you to customize this expressive in the display. Current Touch Sensitivity setting 2 Medium 2 Change the value. Use the numeric keypad or [+]/[-] buttons to set the desired setting: 1, 2, - Yamaha PSR-350 | Owner's Manual - Page 30
and number. 1 Hall1 • Twelve additional Reverb Types are available when controlling the PSR-350 from a MIDI device. (For details, See page 100.) Indicates Reverb is selected 2 Set the Reverb Type, if desired. Use the numeric keypad or [+]/[-] buttons to set the desired Reverb Type. (For a list - Yamaha PSR-350 | Owner's Manual - Page 31
and chorus effects, plus a wealth of other useful and dynamic effects for enhancing and changing the sound 39. • Each voice of the PSR-350 has its own independent DSP setting. • Fifty-one additional DSP Types are available when controlling the PSR-350 from a MIDI device. (For details, see - Yamaha PSR-350 | Owner's Manual - Page 32
played in the Accompaniment section of the keyboard. • The speed of the Trill, Tremolo, and Echo effects depends on the Tempo setting (page 34). • Each voice of the PSR-350 has its own independent Harmony setting. 3 Set the Harmony Type, if desired. Use the numeric keypad or [+]/[-] buttons to set - Yamaha PSR-350 | Owner's Manual - Page 33
. Characteristic sound of a guitar amplifier/speaker. Equalizer effect that boosts both high and low frequencies, as is typical in most disco music. Equalizer effect that cuts both high and low frequencies, to simulate the sound heard through a telephone receiver. Equalizer with three separate - Yamaha PSR-350 | Owner's Manual - Page 34
the single-note melody played in the right hand. These types only sound when chords are played in the auto accompaniment section of the keyboard. Types 6 - 26 are rhythm-based effects and add embellishments or delayed repeats in time with the auto accompaniment. These types sound whether the auto - Yamaha PSR-350 | Owner's Manual - Page 35
keyboard into two sections: The upper is used for playing a melody line, and the lower (set by default to keys F#2 and lower) is for the auto accompaniment function. The PSR-350 the display. The PSR-350 can also be used with the included disk or commercially available Style File data, allowing you - Yamaha PSR-350 | Owner's Manual - Page 36
Auto Accompaniment Playing the Accompaniment The panel buttons below function as accompaniment controls. Pressing this button alternately enables and cancels the bass and chord accompaniment. (See below.) Pressing this button alternately enables and cancels the Sync Start function. (See page 37.) - Yamaha PSR-350 | Owner's Manual - Page 37
is playing by tapping the [TEMPO/TAP] button twice at the desired tempo. s Using Sync Start The PSR-350 also has a Sync Start function that allows you to start the rhythm/accompaniment by simply pressing a key on the keyboard. To use Sync Start, first press the [SYNC START] button (the beat marks all - Yamaha PSR-350 | Owner's Manual - Page 38
Each style has its own two- or four-measure Intro section. When used with the auto accompaniment, many of the Intro sections also include special section and accompaniment by playing any key on the keyboard. (When auto accompaniment is on, play a key or chord in the auto accompaniment section of - Yamaha PSR-350 | Owner's Manual - Page 39
continues. When you release it, the accompaniment stops. You can also use this feature to create exciting rhythmic stutter effects, chord hits, and accents auto accompaniment section of the keyboard. • Chords played in the auto accompaniment section of the keyboard are also detected and played when - Yamaha PSR-350 | Owner's Manual - Page 40
This convenient feature lets you stop (or pause) the auto accompaniment by releasing your fingers from the auto accompaniment section of the keyboard. Playing the chord again restarts the auto accompaniment. This is ideal for putting dynamic breaks in your performance - for example, stopping the - Yamaha PSR-350 | Owner's Manual - Page 41
selecting a different style. (The set tempo remains, however, when switching styles during playback.) • You can also use the convenient Tap Tempo function to change the tempo by "tapping" a new one in real time. (See page 37.) Accompaniment Sections (Main A/B and Fill-ins) While the accompaniment - Yamaha PSR-350 | Owner's Manual - Page 42
Accompaniment Volume value 100 ACMP VOL Indicates Accompaniment Volume is selected 2 Change the value. Use the numeric keypad to set the desired Accompaniment Volume value (000 - 127). You can also use the [+]/[-] buttons to increase or decrease the value. Holding down either button continuously - Yamaha PSR-350 | Owner's Manual - Page 43
of the accompaniment by playing keys in the auto accompaniment section of the keyboard using either the "Single Finger" or "Fingered" method. With Single Finger all the notes of the chord. Whichever method you use, the PSR-350 "understands" what chord you indicate and then automatically generates - Yamaha PSR-350 | Owner's Manual - Page 44
5) produces accompaniment based only on the root and fifth which can be used with both major and minor chords. • The chord fingerings listed are all in "root" position, but other inversions can be used - with the following exceptions: m7, m7b5, 6, m6, sus4, aug, dim7, - Yamaha PSR-350 | Owner's Manual - Page 45
"appears in the display. Current Split Point value 054 S-POINT The current Split Point is also shown in the keyboard section of the display. 2 Change the value. Use the numeric keypad or [+]/[-] buttons to set the desired value: 0 (C-2) - 127 (G8). Restoring the Default Split Point Value If - Yamaha PSR-350 | Owner's Manual - Page 46
type of the chord (major, minor, seventh, etc.). Press the key on the keyboard that corresponds to the desired chord type (as printed on the panel). Dict. • display. • You can also show the inversion of chord when using [+]/[-] button. Pressing this key selects the major seventh chord type (M7 - Yamaha PSR-350 | Owner's Manual - Page 47
(as indicated in the display) in the auto accompaniment section of the keyboard. The chord name flashes in the display (and a "congratulations" melody are made up of three notes and are the most basic and common chords in most music. In this triad, the lowest note is the "root." The root is the most - Yamaha PSR-350 | Owner's Manual - Page 48
use of intervals and chords is one of the most important elements in music. A wide variety of emotions and feelings can be created depending on the types of chords used being the distance of the note from the root. (See the keyboard diagram below.) For example, the minor 6th chord includes the 6th - Yamaha PSR-350 | Owner's Manual - Page 49
START on. See page 37 for details. 2 Select a ''Music Database.'' Use the numeric keypad to set the desired Music Database, or use the [+]/[-] buttons to increase or decrease the value. 002 Croco RK The PSR-350 has 208 panel setups in the Music Database and they are divided into eleven different - Yamaha PSR-350 | Owner's Manual - Page 50
When the ending is finished, the auto accompaniment automatically stops. You can also stop the accompaniment by using the [STOP] button. Data stored by the Music Database Each of the Music Database settings has been specially programmed to match the selected style and each features the best suited - Yamaha PSR-350 | Owner's Manual - Page 51
style-related settings: Accompaniment On/Off and Split Point Recording a Registration Memory Preset 1 Make all desired settings for the PSR-350. Virtually all of the PSR-350's settings can be saved to a Registration Mem- ory button. 2 Select the desired bank. Press the [BANK] button, then press - Yamaha PSR-350 | Owner's Manual - Page 52
Registration Memory Recalling a Registration Memory Preset 1 Select the appropriate Registration Memory bank. 1 BANK 2 Press the desired Registration Memory preset button ([1] or [2]). 1 REGIST1 52 - Yamaha PSR-350 | Owner's Manual - Page 53
Selecting and Playing Songs The PSR-350 features a total of 105 songs. These include 100 songs that showcase the rich and dynamic sounds of the instrument, and 80 of these songs can be used with the educational Lesson feature (page 63), a powerful tool that makes learning songs fun and easy. Three - Yamaha PSR-350 | Owner's Manual - Page 54
/STOP] button. As the song plays back, the measure num- ber and chords are shown in the display. • You can play along with the song using the currently selected voice, or even select a different voice for playing along. Simply call up the Voice mode while the song is playing back and - Yamaha PSR-350 | Owner's Manual - Page 55
Melody Voice Change The PSR-350 lets you play a melody on the keyboard along with each of the songs, either with the original melody voice or one of your own selection. The convenient Melody Voice Change feature takes this one step further - it lets you replace the original voice used for the melody - Yamaha PSR-350 | Owner's Manual - Page 56
tempo of a song returns to the default setting when selecting a different song. (The set tempo remains, however, when switching styles during playback.) • You can also use the convenient Tap Tempo function to change the tempo by "tapping" a new one in real time. (See page 37.) 56 - Yamaha PSR-350 | Owner's Manual - Page 57
display. Current Song Volume value 100 SONG VOL Indicates Song Volume is selected 2 Change the value. Use the numeric keypad to set the desired Song Volume value (000 - 127). You can also use the [+]/[-] buttons to increase or decrease the value. Hold- ing down either button continuously increases - Yamaha PSR-350 | Owner's Manual - Page 58
recording on the PSR-350 is similar to using a tape recorder; whatever you play on the keyboard is recorded in real time as you play it. Also, when you record subsequent parts to other tracks, you can hear the previously recorded parts as you record new ones. Recording a User Song Data that can - Yamaha PSR-350 | Owner's Manual - Page 59
the desired song: 201 - 205. If no song is manually selected, the PSR-350 automatically selects the first available empty song number. 202 User 2 • User song numbers can be selected in the same way as with the voices (see page 24). You can use the numeric keypad to directly enter the song number - Yamaha PSR-350 | Owner's Manual - Page 60
you can start recording simply by playing the keyboard (or by pressing the [START/STOP] button). rEC User 2 Indicates the current measure If you want track, the track number in the display flashes. 7 Listen to your new recording. To play back the song from the beginning, simply press the [START - Yamaha PSR-350 | Owner's Manual - Page 61
erases all recorded data on all tracks of a selected User song. Use this operation only when you're sure you want to erase a song and record a new one. To erase an individual track of a song while leaving the other tracks intact, use the Track Clear operation (page 62). 1 Select the desired - Yamaha PSR-350 | Owner's Manual - Page 62
completely erases all recorded data on a selected track of a selected User song, leaving the other tracks intact. Use this operation only when you're sure you want to erase a track and record a new one. To erase the data of an entire song, use the Song Clear operation (page 61). 1 Select the desired - Yamaha PSR-350 | Owner's Manual - Page 63
use way to learn how to read music and play the keyboard. There are a total of 80 Lesson songs (Songs 021 to 100), specially designed for use of the notes - any note can be used, as long as you play in rhythm. s Lesson 2 - Waiting In this lesson step, the PSR-350 waits for you to play the correct - Yamaha PSR-350 | Owner's Manual - Page 64
Lesson 4, press both [L] and [R] buttons simultaneously. Lr4 BothHand • When the Grade/Talking function (page 68) is on, the PSR-350 "announces" the current Lesson step. • When a DJ song is selected, the left (L) and right (R) lessons are identical. 3 Start the Lesson. The Lesson and song playback - Yamaha PSR-350 | Owner's Manual - Page 65
display. In Lesson 1, simply play one note repeatedly in time with the music. Regarding chords and the use of the left hand, the PSR-350 actually has two different types of songs: 1) songs with normal left- left hand in the auto accompaniment section of the keyboard. Auto accompaniment section 65 - Yamaha PSR-350 | Owner's Manual - Page 66
Song Lesson Lesson 2 - Waiting In this lesson step, the PSR-350 waits for you to play the correct notes before continuing playback of the song. This lets you practice reading the music at your own pace. The notes to be played are shown in the display, one after another, as you play them correctly - Yamaha PSR-350 | Owner's Manual - Page 67
3 Play the appropriate part with the song. After the lead-in, the song starts automatically, and the appropriate notes appear in the display. In Lesson 3, listen carefully to the un-muted part, and play the muted part yourself. Lesson 4 - Both Hands Lesson 4 is a "Minus One" practice essentially the - Yamaha PSR-350 | Owner's Manual - Page 68
default setting. Current Grade/Talking function setting on GRADE/TK Indicates Grade/ Talking function is selected 2 Set Grade/Talking to on or off as desired. Use the [+]/[-] buttons to set Grade/Talking to on or off. on GRADE/TK Grade/Talking off Grade/Talking on 68 - Yamaha PSR-350 | Owner's Manual - Page 69
User Songs Style File Extension .350 .STY Save O - Load O O s Using Commercially Available Music Data (sold separately) The PSR-350 is compatible with music disks (floppy disks) that bear the following marks: You can playback song files collected on these disks using the voices defined in the GM - Yamaha PSR-350 | Owner's Manual - Page 70
PSR-350 is turned on, the LED below the floppy disk slot will be lit indicating that the Disk Drive is ready to use Yamaha recommends that you use a commercially-available dry-type head cleaning disk to clean the head about once a month. Ask your Yamaha is always on when the power is on, regardless of - Yamaha PSR-350 | Owner's Manual - Page 71
commercially available GM (General MIDI), Yamaha DOC (Disk Orchestra Collection), or Clavinova Disklavier Piano Soft disks. It also allows you to play back Standard MIDI File (SMF) format 0 data. 1 Insert the disk into the disk drive. Once the disk is inserted, the PSR-350 will automatically switch - Yamaha PSR-350 | Owner's Manual - Page 72
2. • The Octave setting can only be changed when the Song is stopped. Save You can save User songs (song #201 - #205) to floppy disks. 1 Insert a formatted floppy disk. 2 Press the [SAVE] button. S-- UF_00nnn Indicates new file name 72 • If the [SAVE] button is pressed when there is no floppy disk - Yamaha PSR-350 | Owner's Manual - Page 73
file, use the [+]/ [-] buttons to select the file you want to overwrite. S-U Filename 3 If necessary change the file name. The PSR-350 automatically creates keyboard. • Even if you chose a file where data is already saved because you want to overwrite the data, renaming the file will cause the new - Yamaha PSR-350 | Owner's Manual - Page 74
unneeded files on the disk (page 76), or replace the disk with a new one and repeat the save operation. • If a write error occurs during a IN USE lamp is lit), never eject the floppy disk or turn the power off. Saving files in SMF Format 0 The PSR-350 can also save song data in SMF (Standard MIDI File) - Yamaha PSR-350 | Owner's Manual - Page 75
Disk Operations Load Once you've saved your User data onto a floppy disk, you can reload that data back to the PSR-350. You can also load style data from the included disk or commercially available Yamaha Style File disks. 1 Insert the floppy disk into the disk drive. 2 Press the [LOAD] button. Press - Yamaha PSR-350 | Owner's Manual - Page 76
were created on the PSR-350 and were saved as files (User song, etc.) can be deleted. When there are no files on disk that the PSR-350 can delete, the FORMAT the file is being deleted (the DISK IN USE lamp is lit), never eject the floppy disk or turn the power off. When the operation is completed, the - Yamaha PSR-350 | Owner's Manual - Page 77
. Eject the disk, move the protect tab to the OFF position, and reinsert it in the drive. • If a disk that cannot be read by the PSR-350 is inserted into the disk drive, it will be treated the same as an unformatted floppy disk. Take care not to erase important data by - Yamaha PSR-350 | Owner's Manual - Page 78
PSR-350 can delete, the FORMAT display appears instead of DELETE, when the [UTILITY] button is pressed. In this situation, step #2 is unnecessary. L-U Filename This case is user formatting is in progress (the DISK IN USE lamp is lit) , never eject the disk or turn the power off. • If data is already - Yamaha PSR-350 | Owner's Manual - Page 79
an addition to the MIDI standard which ensures that any GM-compatible music data can be accurately played by any GM-compatible tone generator, regardless of manufacturer. The GM mark is affixed to all software and hardware products that support GM System Level 1. The PSR-350 supports GM System Level - Yamaha PSR-350 | Owner's Manual - Page 80
PSR-350 are located on the rear panel. MIDI IN MIDI OUT Receives MIDI data from another MIDI device. Transmits the PSR-350's keyboard information as MIDI data to another MIDI device. • Special MIDI cables (sold separately) must be used for connecting to MIDI devices. They can be bought at music - Yamaha PSR-350 | Owner's Manual - Page 81
a wide variety of music software. When using a MIDI interface device installed in the personal computer, connect the MIDI terminals of the personal computer and the PSR-350. Use only special MIDI cables when connecting MIDI devices. q Connect the MIDI terminals of the PSR-350 to the MIDI termi- nals - Yamaha PSR-350 | Owner's Manual - Page 82
Functions Local Control This function lets you enable or disable keyboard control over the PSR-350's voices. This would come in handy, for example, when recording notes to MIDI sequencer. If you are using the sequencer to play back the voices of the PSR-350, you would want to set this to "off" - in - Yamaha PSR-350 | Owner's Manual - Page 83
MIDI Functions Using Initial Setup Send with a Sequencer The most common use for the Initial Setup Send function is in recording a song on a sequencer that is intended for playback with the PSR-350. Essentially, this takes a "snapshot" of the PSR-350 settings and sends that data to the sequencer. By - Yamaha PSR-350 | Owner's Manual - Page 84
MIDI PSR350 automatically returns to the previous panel condition. External Clock This determines whether the style and song playback functions are controlled by the PortaTone's internal clock (off) or by MIDI clock data from an external sequencer or computer 32 to 280. MIDI LSB receive cancel. Set - Yamaha PSR-350 | Owner's Manual - Page 85
Troubleshooting Problem Possible Cause and Solution When the PSR-350 is turned on or off, a popping This is normal and indicates that the PSR-350 is receiving electrical sound is temporarily produced. power. When using a mobile phone, noise is produced. Using a mobile phone in close proximity - Yamaha PSR-350 | Owner's Manual - Page 86
Except for the data listed below, all PSR-350 panel settings are reset to their initial settings whenever the power is turned on. The data listed below are backed up - i.e. retained in memory - as long as an AC adaptor is connected or a set of batteries is installed. • User Song Data • Song Volume - Yamaha PSR-350 | Owner's Manual - Page 87
of available notes for playing on the keyboard is correspondingly reduced. The same applies to the Split Voice and Song functions. • The Voice List includes MIDI program change numbers for each voice. Use these program change numbers when playing the PSR-350 via MIDI from an external device. • Some - Yamaha PSR-350 | Owner's Manual - Page 88
MIDI Program Voice Name Change# PIANO 000 000 000 Grand Piano 000 001 000 Grand Piano KSP 000 018 000 Mellow Grand Piano 000 040 000 Piano Strings 000 041 000 Dream 000 000 001 Bright Piano 000 001 001 Bright Piano 009 Glockenspiel 000 000 010 Music Box 000 064 010 Orgel - Yamaha PSR-350 | Owner's Manual - Page 89
Chorus Guitar 028 Muted Guitar Voice # 241 Bank Select MSB LSB 000 040 MIDI Program Voice Name Change# 028 Funk Guitar 1 242 000 041 028 Muted 000 040 030 Feedback Guitar 249 000 041 030 Feedback Guitar 2 250 000 000 031 Guitar Harmonics 251 000 065 031 Guitar Feedback 252 - Yamaha PSR-350 | Owner's Manual - Page 90
000 058 Tuba 348 000 016 058 Tuba 2 349 000 000 059 Muted Trumpet 350 000 000 060 French Horn 351 000 006 060 French Horn Solo 352 000 406 407 408 409 410 411 412 413 414 415 Bank Select MSB LSB MIDI Program Voice Name Change# 000 042 061 Mellow Brass 000 000 062 Synth - Yamaha PSR-350 | Owner's Manual - Page 91
000 065 087 Soft Whirl SYNTH PAD 000 000 088 New Age Pad 000 064 088 Fantasy 000 000 089 Warm 000 096 000 097 000 000 000 000 MIDI Program Voice Name Change# 098 Clear Bells 098 Echo Pan 102 Echo Bells 102 Big Pan 102 Synth Piano 102 Creation 102 Star Dust 102 Resonant & Panning - Yamaha PSR-350 | Owner's Manual - Page 92
Machine Gun 113 Laser Gun 114 Explosion 115 Firework q DJ Voice List Voice # 609 610 611 612 613 614 MIDI Program Voice Name Change# DJ 118 DJ Game Set1 119 DJ Game Set2 120 DJ Game Set3 121 DJ Game Set4 122 DJ Game Set5 123 DJ Game Set6 124 DJ Game Set7 125 DJ Game Set8 126 DJ Game Set9 127 DJ - Yamaha PSR-350 | Owner's Manual - Page 93
SawLead G2 SawLead A2 SawLead C3 SawLead D3 BLJ Trill Go!! 613 614 0/123/122 0/123/123 DJ Set5 DJ Set6 Kick Piano F Clap Piano G Ohh 2 Och. Hit Huea Clap BLJ Trill BLJ Trill Go!! Go!! 615 0/123/124 DJ Set7 Signal Omen-FX FMTB2 FMTB1 BLJ Trill Go!! 616 617 0/123/125 0/123/126 - Yamaha PSR-350 | Owner's Manual - Page 94
8Beat Pop 1 British Pop 8Beat Soft 16BEAT 16Beat 1 16Beat 2 16Beat 3 Soft Fusion Hip Hop Pop Cool Dance 16Beat Funk Funky Pop 16Beat 4 BALLAD Piano Ballad U.S. Ballad Slow Rock Modern 6/8 Guitar Ballad Organ Ballad Epic Ballad 16Beat Ballad Rock Ballad Slow Ballad Pop Ballad ROCK Rock 1 Hard Rock - Yamaha PSR-350 | Owner's Manual - Page 95
Music Database List MDB No. 001 002 003 004 005 006 007 008 009 010 011 012 TitanicH WatchGrl WaterSfl WhiterSh YestDGtr SWING & JAZZ DayOfSax HoneyTst LostHrt MistyGrg HighMoon MoonLit New York PanthrSw PatrolBr PatrolSx PetiteCl RagtimeB RedRose SaintMch SatinWd SaxMood ShearJz Showbiz SplnkyTb - Yamaha PSR-350 | Owner's Manual - Page 96
as "Standard Kit 1". • Each percussion voice uses one note. • The MIDI Note # and Note are actually one octave E4 F4 F#4 G4 G#4 A4 A#4 B4 C5 C#5 D5 D#5 E5 F5 F#5 G5 G#5 A5 A#5 B5 C6 Voice No. MSB/LSB/PC Keyboard MIDI 25 C# 0 13 C# 26 D 0 14 D 27 D# 0 15 D# 28 E 0 16 E 29 F 0 17 F 30 F# - Yamaha PSR-350 | Owner's Manual - Page 97
G3 G#3 A3 A#3 B3 C4 C#4 D4 D#4 E4 F4 F#4 G4 G#4 A4 A#4 B4 C5 C#5 D5 D#5 E5 F5 F#5 G5 G#5 A5 A#5 B5 C6 Voice No. MSB/LSB/PC Keyboard MIDI 25 C# 0 13 C# 26 D 0 14 D 27 D# 0 15 D# 28 E 0 16 E 29 F 0 17 F 30 F# 0 18 F# 31 G 0 19 G 32 G# 0 20 G# 33 A 0 21 A 34 A# 0 22 A# 35 B 0 23 B 36 - Yamaha PSR-350 | Owner's Manual - Page 98
Implementation Chart YAMAHA [ Portable Keyboard ] Model PSR-350 MIDI Implementation Chart Date:26-JAN-2001 Version : 1.0 Function... Transmitted Recognized Remarks Basic Default Channel Changed 1 - 16 1 - 16 1 - 16 *1 1 - 16 *1 Mode Default Messages Altered 3 x Note 0 - 127 - Yamaha PSR-350 | Owner's Manual - Page 99
from the PSR-350 itself. However, they may be transmitted when playing the accompaniment, song or using the Harmony effect. *3 Exclusive System Exclusive). • The values of "mm" is used for MIDI Master Tuning. (Values for "ll" are ignored.) F0H, 43H, 1nH, 27H, 30H, - Yamaha PSR-350 | Owner's Manual - Page 100
number indicated in the display.. * By using an external sequencer, which is capable of editing and transmitting the system exclusive messages and parameter changes, you can select the Reverb, Chorus and DSP effect types which are not accessible from the PSR-350 panel itself. When one of the effects - Yamaha PSR-350 | Owner's Manual - Page 101
Accessories • Music Stand • Data Disk • Owner's Manual • Song Book Optional Accessories • Headphones : HPE-150 • AC power adaptor : PA-5C • Footswitch : FC4, FC5 • Keyboard stand : L-6 * Specifications and descriptions in this owner's manual are for information purposes only. Yamaha Corp - Yamaha PSR-350 | Owner's Manual - Page 102
79 MIDI channels 80 MIDI Implementation Chart .......... 98 MIDI LSB Receive cancel 84 MIDI terminals 80 Multi Fingering 43 MUSIC DATABASE 49 Music Stand 19 N numeric keypad 24 O Octave 72 One Touch Setting 27 Overall buttons 18 P PHONES/OUTPUT jack 7 Portable Grand 20 Q Quick Guide 10 - Yamaha PSR-350 | Owner's Manual - Page 103
. This warranty is applicable to all models included in the following series of products: PSR SERIES OF PORTATONE ELECTRONIC KEYBOARDS If during the first 90 days that immediately follows the purchase date, your new Yamaha product covered by this warranty is found to have a defect in material and/or - Yamaha PSR-350 | Owner's Manual - Page 104
, Auckland, New Zealand Tel: 9-634-0099 COUNTRIES AND TRUST TERRITORIES IN PACIFIC OCEAN Yamaha Corporation, Asia-Pacific Music Marketing Group Nakazawa-cho 10-1, Hamamatsu, Japan 430-8650 Tel: 053-460-2312 [PK] 22 HEAD OFFICE Yamaha Corporation, Pro Audio & Digital Musical Instrument Division - Yamaha PSR-350 | Owner's Manual - Page 105
-
 1
1 -
 2
2 -
 3
3 -
 4
4 -
 5
5 -
 6
6 -
 7
7 -
8
-
9
-
10
-
11
-
12
-
13
-
14
-
15
-
16
-
17
-
18
-
19
-
20
-
21
-
22
-
23
-
24
-
25
-
26
-
27
-
28
-
29
-
30
-
31
-
32
-
33
-
34
-
35
-
36
-
37
-
38
-
39
-
40
-
41
-
42
-
43
-
44
-
45
-
46
-
47
-
48
-
49
-
50
-
51
-
52
-
53
-
54
-
55
-
56
-
57
-
58
-
59
-
60
-
61
-
62
-
63
-
64
-
65
-
66
-
67
-
68
-
69
-
70
-
71
-
72
-
73
-
74
-
75
-
76
-
77
-
78
-
79
-
80
-
81
-
82
-
83
-
84
-
85
-
86
-
87
-
88
-
89
-
90
-
91
-
92
-
93
-
94
-
95
-
96
-
97
-
98
-
99
-
100
-
101
-
102
-
103
-
104
-
105
 |
 |