Yamaha PSR-350 Owner's Manual - Page 19
Accompaniment On indicator, Sync Stop indicator
 |
View all Yamaha PSR-350 manuals
Add to My Manuals
Save this manual to your list of manuals |
Page 19 highlights
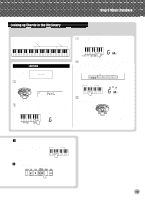
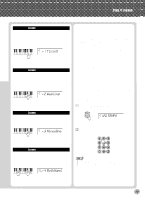
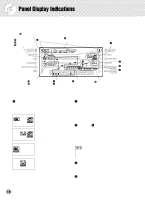
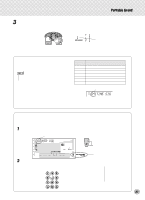
Panel Display Indications u Chord When a song (with chords) is being played back, this indicates the current chord root and type. It also indicates chords played in the ACMP section of the keyboard when the Style mode and auto accompaniment are on. i Song/Voice/Style name and number, Tempo This portion of the display indicates the name and number of the currently selected song, voice, or style. It also displays the name and current value or setting of the Overall functions and the Function parameters, as well as other important operation messages. When the tempo setting is active, the value is shown. o Song track indicators In song recording and playback, these indicate the status of the tracks. (See page 59.) !2 Dual indicator This appears when the Dual function is turned on. (See page 25.) !3 Sync Stop indicator This appears when the Sync Stop function is turned on. (See page 40.) !4 Accompaniment On indicator This appears when the auto accompaniment has been turned on. (See page 36.) !5 Octave indicator When a disk song is playing and the note data exceeds the range limit of C1 - C6, an "OVER" indication flashes and Q or W appears in the display. When a disk song is playing and the octave setting is raised or lowered, one of +2, +1, -1 and -2 indications appears in the display. !0 Touch indicator This appears when the Touch function is turned on. (See page 29.) !6 Battery Level indicator This appears when the battery power is too low to ensure proper operation. (See page 8.) !1 Harmony indicator This appears when the Harmony effect is turned on. (See page 32.) Music Stand Insert the bottom edge of the included music stand into the slot located at the top rear of the PSR-350 control panel. 19
-
 1
1 -
2
-
3
-
4
-
5
-
6
-
7
-
8
-
9
-
10
-
11
-
12
-
13
-
 14
14 -
 15
15 -
 16
16 -
 17
17 -
 18
18 -
 19
19 -
 20
20 -
 21
21 -
 22
22 -
 23
23 -
 24
24 -
25
-
26
-
27
-
28
-
29
-
30
-
31
-
32
-
33
-
34
-
35
-
36
-
37
-
38
-
39
-
40
-
41
-
42
-
43
-
44
-
45
-
46
-
47
-
48
-
49
-
50
-
51
-
52
-
53
-
54
-
55
-
56
-
57
-
58
-
59
-
60
-
61
-
62
-
63
-
64
-
65
-
66
-
67
-
68
-
69
-
70
-
71
-
72
-
73
-
74
-
75
-
76
-
77
-
78
-
79
-
80
-
81
-
82
-
83
-
84
-
85
-
86
-
87
-
88
-
89
-
90
-
91
-
92
-
93
-
94
-
95
-
96
-
97
-
98
-
99
-
100
-
101
-
102
-
103
-
104
-
105
 |
 |
