eMachines M5116 eMachines 5000 Series Notebook User's Guide - Page 58
The memory module is keyed so that it can be inserted
 |
View all eMachines M5116 manuals
Add to My Manuals
Save this manual to your list of manuals |
Page 58 highlights
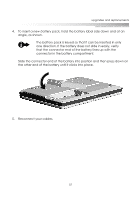
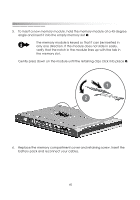
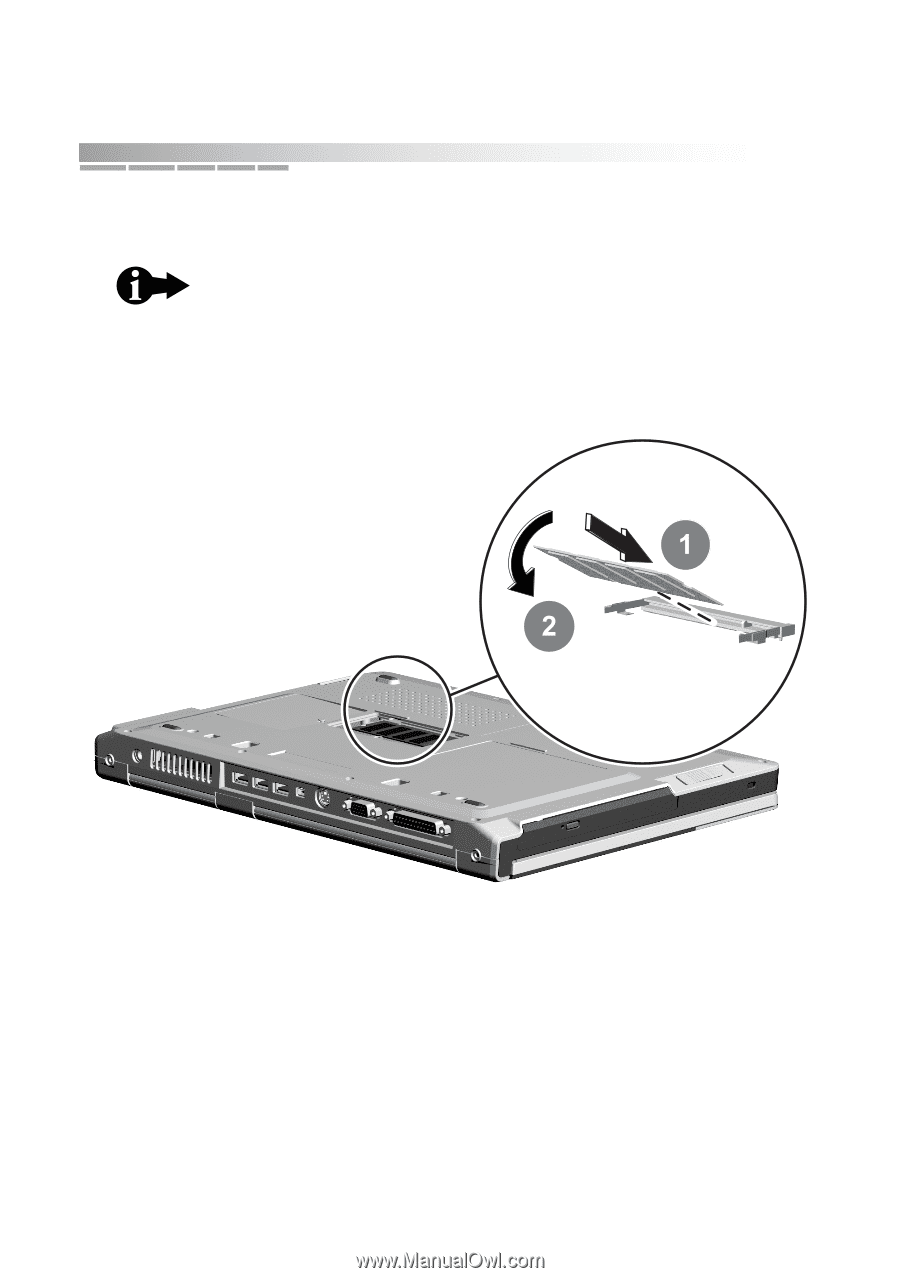
getting started 5. To insert a new memory module, hold the memory module at a 45-degree angle and insert it into the empty memory slot 1. The memory module is keyed so that it can be inserted in only one direction. If the module does not slide in easily, verify that the notch in the module lines up with the tab in the memory slot. Gently press down on the module until the retaining clips click into place 2. 6. Replace the memory compartment cover and retaining screw. Insert the battery pack and reconnect your cables. 60
-
 1
1 -
2
-
3
-
4
-
5
-
6
-
7
-
8
-
9
-
10
-
11
-
12
-
13
-
14
-
15
-
16
-
17
-
18
-
19
-
20
-
21
-
22
-
23
-
24
-
25
-
26
-
27
-
28
-
29
-
30
-
31
-
32
-
33
-
34
-
35
-
36
-
37
-
38
-
39
-
40
-
41
-
42
-
43
-
44
-
45
-
46
-
47
-
48
-
49
-
50
-
51
-
52
-
 53
53 -
 54
54 -
 55
55 -
 56
56 -
 57
57 -
 58
58 -
 59
59 -
 60
60 -
 61
61 -
 62
62 -
 63
63 -
64
-
65
-
66
-
67
-
68
-
69
-
70
-
71
-
72
-
73
-
74
-
75
-
76
-
77
-
78
 |
 |
getting started
60
5.
To insert a new memory module
, hold the memory module at a 45-degree
angle and insert it into the empty memory slot
1
.
Gently press down on the module until the retaining clips click into place
2
.
6.
Replace the memory compartment cover and retaining screw. Insert the
battery pack and reconnect your cables.
The memory module is keyed so that it can be inserted in
only one direction. If the module does not slide in easily,
verify that the notch in the module lines up with the tab in
the memory slot.