2008 BMW 1 Series Owner's Manual - Page 78
2008 BMW 1 Series Manual

Page 78 highlights
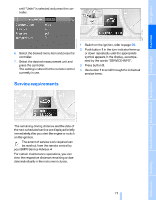
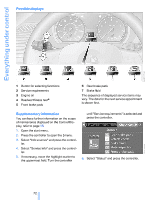
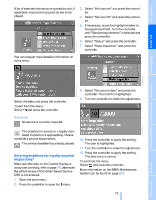
Everything under control 8. Press the controller to apply the setting. The next setting is highlighted. 9. Make the remaining adjustments. After the last adjustment, the date is stored. Setting the date format 1. Open the start menu. 2. Press the controller to open the menu. 3. Turn the controller until "Settings" is selected and press the controller. 4. Select "Time / Date" and press the controller. 5. Select "Date" and press the controller. 6. Select "Date format" and press the controller. 7. Select the desired format and press the controller. indicates that Check Control messages have been stored. You can view the Check Control messages whenever it is convenient for you. Explanatory text messages Check Control The concept The Check Control monitors vehicle functions and alerts you to any malfunctions in the systems monitored. Such a Check Control message includes indicator and warning lamps in the instrument cluster and, in some circumstances, a signal as well as text messages at the bottom of the Control Display. Text messages at the lower edge of the Control Display explain the meaning of the displayed indicator and warning lamps. Indicator and warning lamps For most Check Control messages, you can view more information later, e.g. regarding the cause of a malfunction and how to respond, refer to the information provided below. Indicator and warning lamps can light up in a variety of combinations and colors. In urgent cases, this information will be shown as soon as the corresponding lamp comes on. To exit the displayed information: Select the arrow and press the controller. 76 Online Edition for Part no. 01 41 0 014 691 - © 11/07 BMW AG
-
 1
1 -
2
-
3
-
4
-
5
-
6
-
7
-
8
-
9
-
10
-
11
-
12
-
13
-
14
-
15
-
16
-
17
-
18
-
19
-
20
-
21
-
22
-
23
-
24
-
25
-
26
-
27
-
28
-
29
-
30
-
31
-
32
-
33
-
34
-
35
-
36
-
37
-
38
-
39
-
40
-
41
-
42
-
43
-
44
-
45
-
46
-
47
-
48
-
49
-
50
-
51
-
52
-
53
-
54
-
55
-
56
-
57
-
58
-
59
-
60
-
61
-
62
-
63
-
64
-
65
-
66
-
67
-
68
-
69
-
70
-
71
-
72
-
 73
73 -
 74
74 -
 75
75 -
 76
76 -
 77
77 -
 78
78 -
 79
79 -
 80
80 -
 81
81 -
 82
82 -
 83
83 -
84
-
85
-
86
-
87
-
88
-
89
-
90
-
91
-
92
-
93
-
94
-
95
-
96
-
97
-
98
-
99
-
100
-
101
-
102
-
103
-
104
-
105
-
106
-
107
-
108
-
109
-
110
-
111
-
112
-
113
-
114
-
115
-
116
-
117
-
118
-
119
-
120
-
121
-
122
-
123
-
124
-
125
-
126
-
127
-
128
-
129
-
130
-
131
-
132
-
133
-
134
-
135
-
136
-
137
-
138
-
139
-
140
-
141
-
142
-
143
-
144
-
145
-
146
-
147
-
148
-
149
-
150
-
151
-
152
-
153
-
154
-
155
-
156
-
157
-
158
-
159
-
160
-
161
-
162
-
163
-
164
-
165
-
166
-
167
-
168
-
169
-
170
-
171
-
172
-
173
-
174
-
175
-
176
-
177
-
178
-
179
-
180
-
181
-
182
-
183
-
184
-
185
-
186
-
187
-
188
-
189
-
190
-
191
-
192
-
193
-
194
-
195
-
196
-
197
-
198
-
199
-
200
-
201
-
202
-
203
-
204
-
205
-
206
-
207
-
208
-
209
-
210
-
211
-
212
-
213
-
214
-
215
-
216
-
217
-
218
-
219
-
220
-
221
-
222
-
223
-
224
-
225
-
226
-
227
-
228
-
229
-
230
-
231
-
232
-
233
-
234
-
235
-
236
-
237
-
238
-
239
-
240
-
241
-
242
-
243
-
244
-
245
-
246
-
247
-
248
-
249
-
250
-
251
-
252
-
253
-
254
-
255
-
256
-
257
-
258
-
259
-
260
 |
 |
