3Com 3CRWE51196 User Guide - Page 16
Using the Rubber Feet, Before you Install your Gateway, Powering Up the Gateway - ip address
 |
View all 3Com 3CRWE51196 manuals
Add to My Manuals
Save this manual to your list of manuals |
Page 16 highlights
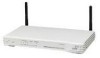
16 CHAPTER 2: HARDWARE INSTALLATION I Air flow around the unit and through the vents in the side of the case is not restricted. 3Com recommends you provide a minimum of 25 mm (1 in.) clearance. Using the Rubber Feet Use the four self-adhesive rubber feet to prevent your Gateway from moving around on your desk or when stacking with other flat top OfficeConnect units. Only stick the feet to the marked areas at each corner of the underside of your Gateway. Before you Install your Gateway Before you install and configure your Gateway, you need the following additional information. If you do not have this information, contact your Internet Service Provider. Space is provided below for you to record this information. If you have a DSL connection and your ISP allocates IP information dynamically over PPPoE, you need a User Name and Password: PPPoE User Name PPPoE Password PPPoE Service Name You only need a PPPoE Service Name if your ISP requires one. Do not enter anything if your ISP does not require a service name If your ISP allocates fixed or static IP information, you need the following information: IP Address Subnet Mask Default Gateway address DNS address If your ISP allocates IP information dynamically over a protocol other than PPPoE, you do not need any further information. This configuration is typical of cable connections. Powering Up the Gateway To power up the Gateway: 1 Plug the power adapter into the power adapter socket located on the back panel of the Gateway (refer to "Power Adapter socket" on page 13). 2 Plug the power adapter into a standard electrical wall socket. Connecting the Wireless Cable/DSL Gateway The first step for installing your Wireless Cable/DSL Gateway is to physically connect it to a cable or DSL modem in order to be able to access the Internet. To use your Wireless Cable/DSL Gateway to connect to the Internet through an external cable or DSL modem (Figure 5):
-
 1
1 -
2
-
3
-
4
-
5
-
6
-
7
-
8
-
9
-
10
-
 11
11 -
 12
12 -
 13
13 -
 14
14 -
 15
15 -
 16
16 -
 17
17 -
 18
18 -
 19
19 -
 20
20 -
 21
21 -
22
-
23
-
24
-
25
-
26
-
27
-
28
-
29
-
30
-
31
-
32
-
33
-
34
-
35
-
36
-
37
-
38
-
39
-
40
-
41
-
42
-
43
-
44
-
45
-
46
-
47
-
48
-
49
-
50
-
51
-
52
-
53
-
54
-
55
-
56
-
57
-
58
-
59
-
60
-
61
-
62
-
63
-
64
-
65
-
66
-
67
-
68
-
69
-
70
-
71
-
72
-
73
-
74
-
75
-
76
-
77
-
78
-
79
-
80
-
81
-
82
-
83
-
84
-
85
-
86
-
87
-
88
 |
 |
