3Com 3CRWE51196 User Guide - Page 17
Wireless Cable/DSL, need to set up your computers so that they can make use of the Gateway
 |
View all 3Com 3CRWE51196 manuals
Add to My Manuals
Save this manual to your list of manuals |
Page 17 highlights
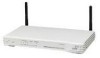
Connecting the Wireless Cable/DSL Gateway 17 Figure 5 Connecting the Wireless Cable/DSL Gateway 1 Insert one end of the supplied Ethernet (RJ-45 Category 5) cable into the Cable/DSL port on the rear panel of the Wireless Cable/DSL Gateway. 2 Insert the other end of the cable into the RJ-45 port on your cable or DSL modem. Check that the Cable/DSL status LED lights on the Gateway. 3 Connect the cable or DSL modem to the Internet. 4 Connect your computer to one of the four LAN ports on the Gateway using a twisted pair cable. Check that the corresponding LAN status LED on the Gateway lights. You have now completed the hardware installation of your Gateway. Next you need to set up your computers so that they can make use of the Gateway to communicate with the Internet. 3Com recommends that you perform the initial Gateway configuration from a computer that is directly connected to one of the LAN ports. You may alternatively configure the Gateway from a wireless computer, but note that you may lose contact with the Gateway if you change the wireless configuration. To communicate with the Gateway, your wireless NIC should be set as follows: I WEP encryption - none I ESSID - 101 I Channel - 11
-
 1
1 -
2
-
3
-
4
-
5
-
6
-
7
-
8
-
9
-
10
-
11
-
 12
12 -
 13
13 -
 14
14 -
 15
15 -
 16
16 -
 17
17 -
 18
18 -
 19
19 -
 20
20 -
 21
21 -
 22
22 -
23
-
24
-
25
-
26
-
27
-
28
-
29
-
30
-
31
-
32
-
33
-
34
-
35
-
36
-
37
-
38
-
39
-
40
-
41
-
42
-
43
-
44
-
45
-
46
-
47
-
48
-
49
-
50
-
51
-
52
-
53
-
54
-
55
-
56
-
57
-
58
-
59
-
60
-
61
-
62
-
63
-
64
-
65
-
66
-
67
-
68
-
69
-
70
-
71
-
72
-
73
-
74
-
75
-
76
-
77
-
78
-
79
-
80
-
81
-
82
-
83
-
84
-
85
-
86
-
87
-
88
 |
 |
