AIWA CX-NA30 Operating Instructions - Page 18
Setting, The Clock, The Timer
 |
View all AIWA CX-NA30 manuals
Add to My Manuals
Save this manual to your list of manuals |
Page 18 highlights
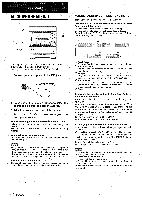
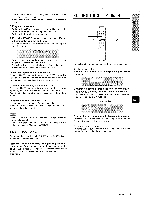
SETTING THE CLOCK SETTING THE TIMER 1 1 Press the CLOCK button while pressing the SHIFT button on the remote control, and ~ress the 11 SET button within 4 seconds. .2 Press the - DOWN or * UP button to designate the hour, and press the 11 SET button. The hour stops flashing and the minute starts flashing. :3 Press the - DOWN or > UP button to designate the minute, and press the II SET button. The minute stops flashing on the display and the clock starts from 00 seconds, To display the current time Press Il?e CLOCK button while pressing the SHIFT button on the remote control. The time is displayed for 4 seconds. Howew:!r, the time cannot be displayed during recording. To s'witch to the 24-hour standard Press ille CLOCK button while pressing the SHIFT button on the remote control and then press the s button within 4 seconds. Repeat the same procedure to restore the 12-hour standard. If the clock display flashes This is caused by a power interruption. The current time needs to be reset. If power is interrupted for more than approximately 24 hours, all settings stored in memory after purchase need to be reset. 1 1,2 2,4 3 6 u The unit can be turned on at a specified time every day with the built-in timer, Preparation Make sure the clock is set correctly. Use the remote control. 1 Press the TIMER button while pressing the SHIFT button once to display 0, and press the II !3ET button within 4 seconds. @ is displayed, and the hour flashes. m If you do not press the 11SET button within 4 seconds, another operation may start. 2 Designate the hour of the timer-on time by pressing the K< DOWN or M UP button, and the 11 SET button. Repeat to designate the minute of the timer-on time. After you designate the timer-on time, one of the source name flashes on the display for 4 seconds. 3 Within 4 seconds, press the FUNCTION button repeatedly to select a source. The selected source name flashes for 4 seconds. q If this step is not completed within 4 seconds, repeat from step 1. q If the TUNER button is pressed, the band cannot be selected in this step. 4 Within 4 seconds, select the duration for the timer-activated period with the M< DOWN or IW UP button. 17 ENGLISH
-
 1
1 -
2
-
3
-
4
-
5
-
6
-
7
-
8
-
9
-
10
-
11
-
12
-
 13
13 -
 14
14 -
 15
15 -
 16
16 -
 17
17 -
 18
18 -
 19
19 -
 20
20 -
 21
21 -
 22
22 -
 23
23 -
24
-
25
-
26
-
27
-
28
-
29
-
30
-
31
-
32
-
33
-
34
-
35
-
36
-
37
-
38
-
39
-
40
-
41
-
42
-
43
-
44
-
45
-
46
-
47
-
48
-
49
-
50
-
51
-
52
-
53
-
54
-
55
-
56
-
57
-
58
-
59
-
60
-
61
-
62
-
63
-
64
-
65
-
66
-
67
-
68
 |
 |
