Acer F7200 User Manual - Page 24
Setting an Access Password (Security Lock), Installation I, Advanced
 |
View all Acer F7200 manuals
Add to My Manuals
Save this manual to your list of manuals |
Page 24 highlights
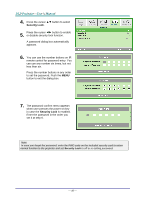
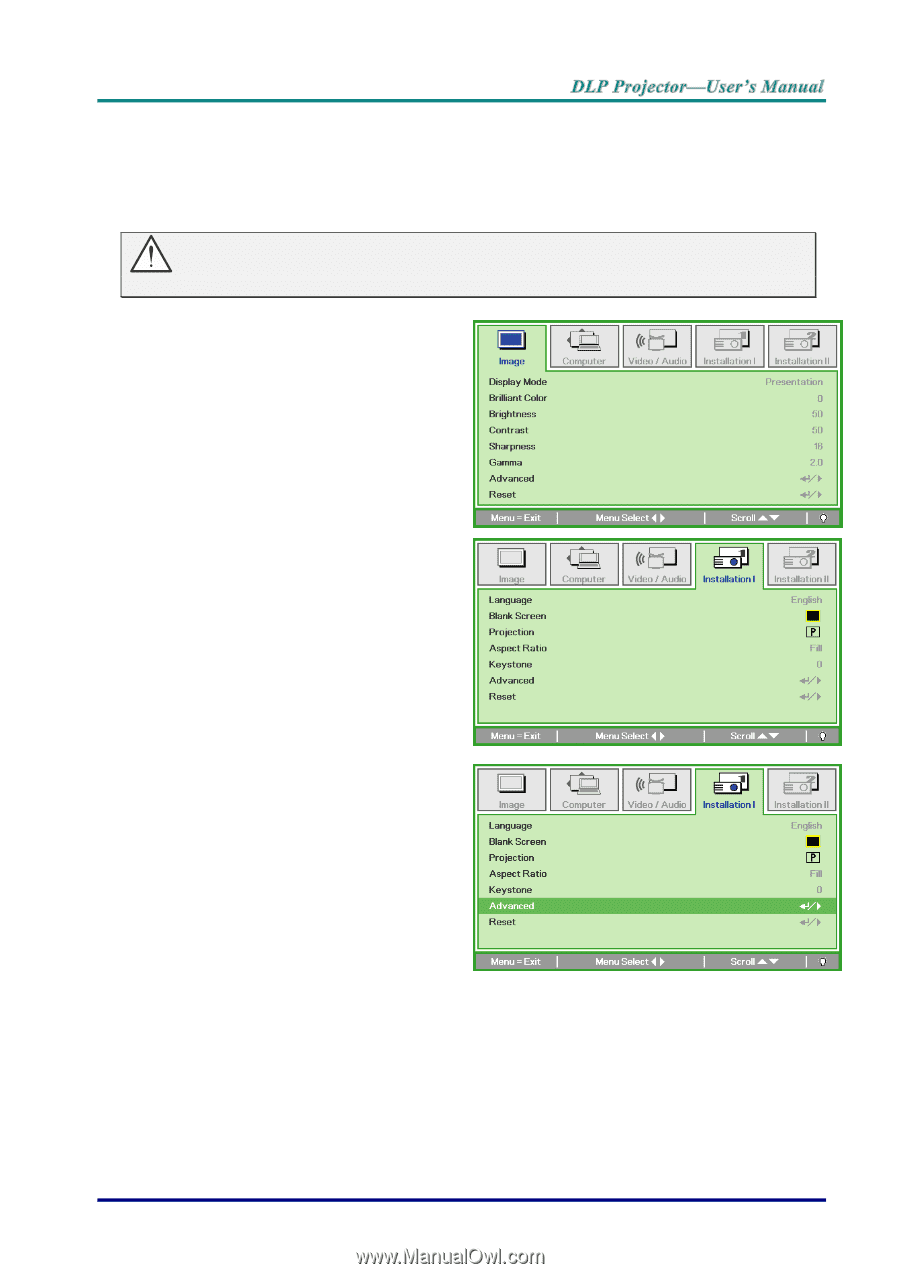
Setting an Access Password (Security Lock) You can use the four (arrow) buttons to set a password and prevent unauthorized use of the projector. When enabled, the password must be entered after you power on the projector. (See Navigating the OSD on page 21 and Setting the OSD Language on page 22 for help on using OSD menus.) Important: Keep the password / Security card in a safe place. 1. Press the MENU button to open the OSD menu. 2. Press the cursor ◄► button to move to the Installation I menu. 3. Press the cursor ▲▼ button to select Advanced. - 15 -
-
 1
1 -
2
-
3
-
4
-
5
-
6
-
7
-
8
-
9
-
10
-
11
-
12
-
13
-
14
-
15
-
16
-
17
-
18
-
 19
19 -
 20
20 -
 21
21 -
 22
22 -
 23
23 -
 24
24 -
 25
25 -
 26
26 -
 27
27 -
 28
28 -
 29
29 -
30
-
31
-
32
-
33
-
34
-
35
-
36
-
37
-
38
-
39
-
40
-
41
-
42
-
43
-
44
-
45
-
46
-
47
-
48
-
49
-
50
-
51
-
52
-
53
-
54
-
55
-
56
-
57
-
58
-
59
-
60
-
61
-
62
-
63
-
64
-
65
-
66
-
67
-
68
-
69
-
70
-
71
-
72
-
73
-
74
-
75
-
76
-
77
 |
 |
–
15
–
Setting an Access Password (Security Lock)
You can use the four (arrow) buttons to set a password and prevent unauthorized use of the
projector. When enabled, the password must be entered after you power on the projector. (See
Navigating the OSD
on page
21
and
Setting the OSD Language
on page
22
for help on using
OSD menus.)
Important:
Keep the password / Security card in a safe place.
1.
Press the
MENU
button to open the
OSD menu.
2.
Press the cursor ◄► button to move
to the
Installation I
menu.
3.
Press the cursor ▲▼ button to select
Advanced
.