Alpine CDE-HD148BT User Manual - Page 27
General Setting, Display Setting - radio
 |
View all Alpine CDE-HD148BT manuals
Add to My Manuals
Save this manual to your list of manuals |
Page 27 highlights
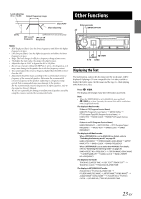
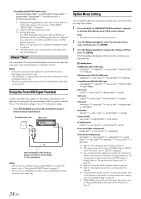
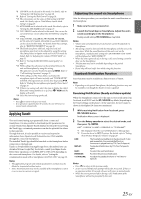
4 Turn the Rotary encoder to change the setting, and then press ENTER. (e.g. Select ON or OFF) 5 Press and hold AUDIOSETUP for at least 2 seconds to return to normal mode. Notes • Press t to return to the previous mode. • If no operation is performed for 60 seconds, the unit will return to normal mode automatically. General Setting GENERAL is selected on the setup main menu in step 2. Setting the Clock Display (CLOCK MODE) You can select the clock display type, 12-hour or 24-hour, depending on your preference. Setting item: CLOCK MODE Setting contents: 24H / 12H (Initial setting) Setting the AUX SETUP mode You can input the audio of an external device, (such as a Portable audio player) to the AUX connector of this unit. Setting item: AUX SETUP Setting contents: OFF / ON (Initial setting) OFF: When set to OFF, AUX source cannot be selected. ON: Set to ON when a portable device is connected. If VSOURCE is pressed and AUX is selected, the sound of the portable device is input to the unit. Setting the AUX NAME mode You can change the AUX NAME display in the SETUP mode. Setting item: AUX NAME Setting contents: AUXILIARY (Initial setting) / TV / DVD / PORTABLE / GAME Playing MP3/WMA/AAC Data (PLAY MODE) This unit can play back CDs containing both CD and MP3/WMA/AAC data (created in Enhanced CD (CD Extra) format). However, in some situations, playback of an enhanced CD may be difficult. In this case, you can choose to play back the CD data session only. When a disc contains both CD and MP3/WMA/AAC data, playback starts from the CD data portion of the disc. Setting item: PLAY MODE Setting contents: CD-DA / CDDA/MP3 (Initial setting) CD-DA: Only the CD data in Session 1 can be played back. CDDA/MP3: CD data, MP3/WMA/AAC files in mixed mode, and multi-session discs can be played back. Note • Perform this setting before inserting a disc. If a disc has already been inserted, remove it first. Sound (Beep) Guide Function This function will give audible feedback with varying tones depending upon the button pressed or a notification is received from a paired Smartphone, etc. Setting item: BEEP Setting contents: OFF / LEVEL1 ~ 7 Note • The initial setting is LEVEL4. Demonstration This unit has a demonstration feature for the display. Setting item: DEMO Setting contents: ON / OFF (Initial setting) Note • To quit Demo mode, set to OFF. Display Setting DISPLAY is selected on the setup main menu in step 2. Changing Lighting Color You can change the lighting color of the unit's buttons. Setting item: ILLUMINATI Setting contents: TYPE1 (Initial setting) / TYPE2 / TYPE3 / TYPE4 TYPE1: The color of all buttons is blue. TYPE2: The color of all buttons is green. TYPE3: The color of all buttons is amber. TYPE4: The color of all buttons is red. Dimmer Control Set the Dimmer control to AUTO to decrease the illumination brightness of the unit with the head lights of the vehicle ON. This mode is useful if you feel the unit's backlighting is too bright at night. Setting item: DIMMER Setting contents: MANUAL / AUTO (Initial setting) Scroll Setting (TEXTSCROLL) This CD player can scroll the disc and track names recorded on CD-TEXT discs, as well as text information of MP3 /WMA /AAC files, folder names, tags, HD Radio broadcasts and SiriusXM. Setting item: TEXTSCROLL Setting contents: AUTO / MANUAL (Initial setting) AUTO: CD text information, folder and file names, HD Radio and SiriusXM text are scrolled continuously. In addition, all tag information is automatically rotated in the display continuously, without pressing the k VIEW button. (except SiriusXM ) 27-EN
-
 1
1 -
2
-
3
-
4
-
5
-
6
-
7
-
8
-
9
-
10
-
11
-
12
-
13
-
14
-
15
-
16
-
17
-
18
-
19
-
20
-
21
-
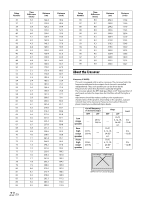 22
22 -
 23
23 -
 24
24 -
 25
25 -
 26
26 -
 27
27 -
 28
28 -
 29
29 -
 30
30 -
 31
31 -
 32
32 -
33
-
34
-
35
-
36
-
37
-
38
-
39
-
40
-
41
-
42
-
43
-
44
-
45
-
46
-
47
-
48
-
49
-
50
-
51
-
52
-
53
-
54
-
55
-
56
-
57
-
58
 |
 |
