Archos AV500 User Guide
Archos AV500 - Mobile Digital Video Recorder Manual
 |
UPC - 690590506794
View all Archos AV500 manuals
Add to My Manuals
Save this manual to your list of manuals |
Archos AV500 manual content summary:
- Archos AV500 | User Guide - Page 1
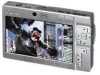
1 ARCHOS™ MOBILE VIDEO RECORDER AV 500 SERIES Video Player & Recorder / Music Player & Recorder / Photo Wallet & Viewer / USB 2.0 Hard Drive English Language User Manual User Manual for ARCHOS™ AV 500 series Version 2.5 Please visit our website to download the most recent manual and software for - Archos AV500 | User Guide - Page 2
from your AV 500 product. Please do register your product at our website www.archos.com to ensure that you get have access to our help line and to be informed of technical support and free software updates for your product. Wishing you the best Video, Music, and Photo experience, The ARCHOS™ TEAM - Archos AV500 | User Guide - Page 3
to the USB Host Port 19 SETTINGS 19.1 Sound Settings 19.2 Play Mode Settings 19.3 Clock Settings 19.4 Display Settings 19.5 Appearance settings 19.6 Power Settings 19.7 System Settings 19.8 TV control 20 Updating the AV 500 Firmware Operating System (OS) 21 TV docking pod Description* 21.1 Remote - Archos AV500 | User Guide - Page 4
the AV 500 to the TV docking pod 22.6 Connection (5): the S-Video In 22.7 Connection (6): the Infrared Emitter 23 Replacing the battery 23.1 "Thin" version 22.2 Standard version 24 Technical Support 25 Troubleshooting 25.1 USB Connection issues 25.2 Charging and Power issues 25.3 AV 500 locks - Archos AV500 | User Guide - Page 5
the supplied Archos power charger/adapter) f Multi-connect jack* - for headphones, TV docking pod, FM Remote and AV in/out connections * The AV 500 is sold with different options. It is therefore possible that you do not have a TV docking pod, FM remote or 'traveler kit' multi-connect adapter. These - Archos AV500 | User Guide - Page 6
the included ARCHOS™ charger/adapter. • You can charge the internal battery of the AV 500 by plugging the included adapter/charger directly into the device, or you can charge it by plugging the adapter/charger into the (optional) TV docking pod and connecting your AV 500 to the Pod. • Before using - Archos AV500 | User Guide - Page 7
by a child. • Do not open up the AV 500. There are no user serviceable parts inside. Opening will void your warranty. 2.7 Hardware Reset In the event that your AV 500 freezes operation (due to electrostatic phenomena for example), you can reset the AV 500 by holding down on the STOP/ESC button x for - Archos AV500 | User Guide - Page 8
to your personal tastes, the following screen format options are available. 15 16 Auto Format Maximized Image Full Picture Format Default mode. Adjusts the video size to best adapt to the built-in screen or television. Enlarge the image to fill the screen (LCD or TV). Sides may get slightly cut in - Archos AV500 | User Guide - Page 9
352x288@30f/s and 800 kb/s ; supports WM DRM. 17 18 You can also use the software MPEG-4 Translator included on the AV 500 hard drive to re-encode your video files into the proper MPEG-4 SP format that the AV 500 can play. See the chapter Video - creating MPEG-4 video files with your computer for more - Archos AV500 | User Guide - Page 10
optional) TV docking pod or AV cable properly connected to a VCR, cable box, or satellite receiver, making a recording is simple. 5.1 Video recording connections See the relevant chapter for instructions on connecting the TV docking pod to your television system. To connect you AV 500 to your TV (or - Archos AV500 | User Guide - Page 11
it to Auto, and the AV 500 will scan the (optional) TV docking pod's two inputs to see which one is receiving video (AV In or S-Video). Auto, 4:3, 5:3, 16:9, 2.35. This is the aspect ratio of the screen that the AV 500 will record. You can set this manually, but in most cases you can just leave it - Archos AV500 | User Guide - Page 12
is, if you are listening to music, watching a video, or looking at photos on your AV 500, it will not interrupt you in order to go make the scheduled recording. • If you have connected and will be using the IR Emitter system (see the TV docking pod chapter as well as the chapter Setting the Infrared - Archos AV500 | User Guide - Page 13
particularly useful when you have the TV docking pod and you have set up the Infrared connector. Otherwise, the AV 500 will be unable to change channels on your tuner. It will record the currently selected channel. Furthermore, the AV 500 needs to be powered by a charger in order to go into standby - Archos AV500 | User Guide - Page 14
do not plan on making scheduled recordings, then you do not need to install the IR emitter or set the infrared emitter code. Before beginning this procedure of setting the emitter code, your AV 500 must be connected to the TV docking pod, the pod powered with the charger/adapter, and the IR emitter - Archos AV500 | User Guide - Page 15
channel select button (highlight test channel select and press ENTER), the AV 500 will send a signal through the pod to the infrared emitter and change the channel on your tuner (VCR, cable box, or satellite receiver). If the Number of digits parameter is set to three, it will try to select channel - Archos AV500 | User Guide - Page 16
8 VIDEO - Editing Video Files Video files recorded by the AV 500 can be modified by deleting the sections you do not wish included. The editing you can do is either cropping or cutting of particular segments of the video file. You will mark a segment of your video file, and then you will tell the AV 500 - Archos AV500 | User Guide - Page 17
do this; 1) Use the Synchronize button in Windows Media® Player 10 or 2) Use the PC tools which are available on the AV 500's hard drive. The first method is very simple and merely requires that you synchronize a video file in your Media Player library to your AV 500. You do not have much control in - Archos AV500 | User Guide - Page 18
stereo MP3 or WAV. In actuality, in all cases, a resolution beyond 640x480 does not add any advantage. MPEG-4 codec (Compression/Decompression) In order for MPEG4-Translator to compress the video in a file of the format MPEG-4 SP that the AV 500 can read, it requires an MPEG-4 codec to be installed - Archos AV500 | User Guide - Page 19
video in this case, that you will get. However, this will also take up more space on your hard drive. A setting of 900 kbps will give you a nice looking image for viewing on a television. For near DVD quality, you can set it up to 1200 kbps. 37 If the AV 500 device is not listed, select "ARCHOS - Archos AV500 | User Guide - Page 20
. The AV 500 will display the "locked" icon in the top left corner of the screen. Press the Select button again to unlock the buttons. You can still use the UP and DOWN buttons to change the volume. 10.2 Play Screen Icons Status Stopped Blinks while Playing a track Current track is paused Recording - Archos AV500 | User Guide - Page 21
: WAV file format or untagged WMA or MP3 files) then the ARCLibrary will put them under the category (Unknown). Audio files created with the AV 500 from analog sources are indexed as Artist = (ARCHOS) and Album = (Audio Recordings). You can reach the PlayMode settings screen from the Setup action icon - Archos AV500 | User Guide - Page 22
pod audio outputs (red and white plugs of the cable connected to AV Out) to your stereo system inputs. You can also use the AV cable and plug it in directly. Playing through a Stereo system with an AV Cable 10.5 Setting a Bookmark If you are listening to a song, or perhaps a long recording AV 500 - Archos AV500 | User Guide - Page 23
to ARCHOS™ AV 500 on connecting to PC Can synchronize subscription music ('to go' services) to your AV 500 Carefree USB disconnection (no special green arrow unmount procedure) Will convert video files** to play on your AV 500 if not in correct format Supports protected Internet video downloads - Archos AV500 | User Guide - Page 24
format which the AV 500 can read. There are many music ripping programs on the market, but ARCHOS™ recommends that you use Windows Media® Player to do it. In fact, when you place a music CD in your computer, Windows® will ask you if you would like to rip it. Depending on the power AV 500 hard drive. - Archos AV500 | User Guide - Page 25
very little space on your hard drive and if well named, give you easy access to your favorite songs. panel on the left is the location the AV 500 will be saving your Playlist to. Save action icon Playlist Editor. A new window will open with two panels, the hard drive contents on the left, and the - Archos AV500 | User Guide - Page 26
(optional) TV docking pod, then you will have to plug the Red and White connectors of the AV In cable to the output of your Hifi or other audio device that you are recording from. 51 52 If you are using the (optional) multi-connect adapter (can be purchased from www.archos.com) and an AV cable, you - Archos AV500 | User Guide - Page 27
by clicking the Pause action icon (or Enter button) and then stop the recording by clicking on the STOP button. You can record from any line-level audio source to the AV 500. Be careful that the source audio is supplying a line level and not an amplified signal (turning down the volume on the - Archos AV500 | User Guide - Page 28
Recording Saved? The default location for audio recordings is the folder called Music. This can be changed though. For example, you click on the Music icon in the main menu and then you choose Browse Hard Drive files which have been created with the AV 500 recording function will show Edit in the file - Archos AV500 | User Guide - Page 29
of placing the music into the Music folder first. 57 58 15 PHOTO - Viewing Photos The AV 500 series support the viewing of JPEG (.jpg) and Bitmap (.bmp) image formats. Progressive JPEG images are not supported. The AV 500 will resize the image to fit on the built-in screen or on a television - Archos AV500 | User Guide - Page 30
to copy photos to your AV 500 1) Connect your Mass Storage Class camera to USB Host port (via USB host adapter cable). 2) Use a stand alone USB card reader with the USB host adapter cable. 3) Copy photos to your computer and then copy (or Sync with Windows Media® Player 10) to the AV 500 (via USB - Archos AV500 | User Guide - Page 31
Photos from camera are shown on the left, and your AV 500 hard drive on the right. By using the Select right pane action icon, move to the right pane and choose the destination folder. Now return to the left pane and choose the Copy all files action icon. Your files will be copied to your AV 500 - Archos AV500 | User Guide - Page 32
Show file information such as song length, video length, photo size, number of kilobytes used of hard drive space, date file was made, etc. Create a new folder inside the current folder. Delete the file permanently from the AV 500. (Before it is deleted, the AV 500 will ask "Delete file: xxxxx ?". Use - Archos AV500 | User Guide - Page 33
). The double browser can be used in: Photo View Music View Browser View The left panel is the connected USB device (ex: digital camera or hard drive) and the right panel the AV 500 hard drive contents. The left browser is the AV 500 hard drive contents and right browser the music Playlist. Two - Archos AV500 | User Guide - Page 34
and change it to 'Hard Drive'. 17.2 Connecting the AV 500 Connection order: See the sections below for your particular computer's operating system. 1) Connect the power adapter to the AV 500. 2) With your computer running, plug the USB cable into your computer. 3) With the AV 500 off, plug in the - Archos AV500 | User Guide - Page 35
the computer before disconnecting the USB cable to avoid loss of data or freezing the computer and/or the AV 500. Hard Drive Mode & Windows® To safely disconnect the AV 500 hard drive, click on the system tray remove icon (green arrow as shown below) and follow the instructions. Wait until you get - Archos AV500 | User Guide - Page 36
many digital cameras and external hard drives in order to transfer pictures or data to/from your AV 500. Check your manufacturer's information to find out whether your device is an MSC device. Non Mass Storage Class devices such as printers, Ethernet adapters, mice, keyboards, etc. are not supported - Archos AV500 | User Guide - Page 37
STOP/ESC x when finished. You will return to the Setup screen. • Click on STOP/ESC x again and you Parameter Volume Bass Treble Balance Bass Boost Reset button Description 0 - 99 10 levels. 19.2 Play Mode Settings If you would like the AV 500 to play through an entire folder of songs, play - Archos AV500 | User Guide - Page 38
The AV 500 has TV format 4:3 or 16:9 - the ratio at which images are displayed on your television set. Video Output Internal LCD or External TV battery autonomy. When accessing the Display settings while playing a video you have an additional display option: Video OSD Time for which the video - Archos AV500 | User Guide - Page 39
TV docking pod), the AV 500 will not completely shut off. It will go into Standby mode. This way, it can wake up to make a scheduled video recording. A typical use of these settings is to set the power off, screen off, and hard disk to low values when used in battery mode. When the power adapter - Archos AV500 | User Guide - Page 40
ARCLibrary must be updated manually. Automatic: ARCLibrary is automatically updated when the USB cable is disconnected from your device. This button lets you update the ARCLibrary if you have set the parameter above to ON. Windows Device (default), Hard drive. When set to , your AV 500 will use the - Archos AV500 | User Guide - Page 41
a standard s-video cable (not included) for your video input) d Adapter connection - connect the included power adapter here e Infrared Emitter jack - plug in the included infrared emitter if you want the AV 500 to control a VCR, cable box, or sat. receiver. * Concerns users with TV docking pod only - Archos AV500 | User Guide - Page 42
your VCR, cable box, or satellite receiver. Action icon select and execute buttons Displays Action icon help, if activated (Setup screen > Display) Increase / Decrease Volume Mute sound 83 84 22 Connecting the TV docking pod to your Television System* The AV 500 connected to the TV docking pod - Archos AV500 | User Guide - Page 43
may need to use the included OUT labeled scart adapter). Power the TV docking pod with the included ARCHOS™ adapter/charger. 85 86 TEST IT: Verify that you made the correct connections. • Turn on your television • Turn on your video device (vcr, cable box, or satellite receiver) • You should be able - Archos AV500 | User Guide - Page 44
and your video recorder, cable box or other video device has an S-video output, you can connect a standard S-video cable from it to your TV docking pod. This will carry only the video signal to the pod and your AV 500, not the audio. The video pass thru feature is not supported for S-Video input. DO - Archos AV500 | User Guide - Page 45
a second battery for cases when you know that you will be unable to recharge your AV 500 before the supplied battery runs out. Refer to the chapter Settings - Power Settings for information about getting the most use from the battery. Before removing the battery, disconnect the charger/adapter and - Archos AV500 | User Guide - Page 46
on how the device is being used. 2) Look at the Troubleshooting section at the back of this manual. In this section, we have included answers to some commonly asked questions. 3) Look at our Support section on the website (www.archos.com). Here, you will find Frequently Asked Questions (FAQ) for - Archos AV500 | User Guide - Page 47
issues Problem: I cannot get my AV 500 to be recognized by the computer or it asks for a driver. Solutions: • If you are running an operating system other than Windows® XP (Service Pack 1 minimum) with Windows Media® Player 10 or higher, the USB Port setting should be set to 'Hard Drive'. Go - Archos AV500 | User Guide - Page 48
explained in the chapter Connecting/disconnecting the AV 500 to/from your PC. • Make sure external AC adapter is powering the AV 500. • Right click on the AV 500 hard drive in Windows® Explorer and select Properties. • Select the Tools option and run the Error checking program. • Make sure you check - Archos AV500 | User Guide - Page 49
fications ARCHOS™ VIDEO AV 500 series Storage Capacity Display Video recording Video playback Audio recording Audio Playback Photo viewer AV Connections Television output Computer Interface Playback Autonomy* (standard/extra size) Scalability Power source See packaging for internal hard drive size - Archos AV500 | User Guide - Page 50
not read Divx® 3.11 & 6.0 files. MPEG-4: ISO standard by Moving Picture Experts Group ; AVI: audio/video file container by Microsoft. MPEG-4 SP with B-frames AVI up to 704x480@30f/s NTSC or 720x576@25f/s PAL. (3) Microsoft WMV9 SP up to 352x288@30f/s and 800 KBit/s ; supports WM DRM. (4) Only cameras - Archos AV500 | User Guide - Page 51
Discharge Note: During electrostatic discharge, the product may be malfunctioning. Reset to return normal operation. The AV 500 reset is actuated by pressing and holding the STOP/ESC button for 15 seconds. The unit will power off. Restart normally. Avoiding Hearing Damage This product respects the - Archos AV500 | User Guide - Page 52
- Recording Music - Audio Editing Available disc space SETTINGS - System Settings Background image (Wallpaper) SETTINGS - Appearance Settings Battery autonomy and consumption Connecting/Disconnecting the AV 500 to/from your PC SETTINGS - Power Settings Battery replacement Bookmarks VIDEO - Playing - Archos AV500 | User Guide - Page 53
is the Recording Saved? BROWSER - Navigating the directorey structure Files: Moving or copying files MUSIC - Transferring CD collection to the AV MUSIC - Using iTunes™ with your AV 500 PHOTO - Transferring photos to your AV 500 BROWSER - Using the Browser Connect Devices to the USB Host Port Files - Archos AV500 | User Guide - Page 54
onto your AV 500 Programmed recordings VIDEO - Manually Setting the Scheduler 108 VIDEO - Automated Yahoo!® TV Recording Scheduler VIDEO - Setting the Infrared Emitter Code Protected files VIDEO - Playing Video Files from the Internet VIDEO - Copy Protection MUSIC - Comparison of Windows Media Player - Archos AV500 | User Guide - Page 55
PC Software - Virtual Dub™ VIDEO - Using MPEG-4 Translator Virtual keyboard BROWSER - Using the Browser - Using the Virtual Keyboard Windows Media Player MUSIC - Synchronizing Music from Windows Media® Player to the AV 500 Yahoo!® Scheduler VIDEO - Automated Yahoo!® TV Recording Scheduler Zoom PHOTO
-
 1
1 -
 2
2 -
 3
3 -
 4
4 -
 5
5 -
 6
6 -
 7
7 -
8
-
9
-
10
-
11
-
12
-
13
-
14
-
15
-
16
-
17
-
18
-
19
-
20
-
21
-
22
-
23
-
24
-
25
-
26
-
27
-
28
-
29
-
30
-
31
-
32
-
33
-
34
-
35
-
36
-
37
-
38
-
39
-
40
-
41
-
42
-
43
-
44
-
45
-
46
-
47
-
48
-
49
-
50
-
51
-
52
-
53
-
54
-
55
 |
 |
1
ARCHOS
ARCHOS
™
MOBILE VIDEO RECORDER
MOBILE VIDEO RECORDER
AV 500 SERIES
AV 500 SERIES
Video Player & Recorder / Music Player & Recorder / Photo Wallet & Viewer / USB 2.0 Hard Drive
English Language User Manual
User Manual for ARCHOS
™
AV 500 series
Version 2.5
Please visit our website to download the most recent manual and software for this product
2
2
Dear Customer,
ARCHOS
™
thanks you for your choice of this exciting AV 500 product. The AV 500 is designed to be the companion
to your home entertainment system. You can connect the AV500 to your TV system to record your television
shows as well as connect it to your PC to transfer over your favorite photos, videos, and music. By connecting
to a computer, you get the advantage of being able to download legal music and video content from the Internet.
Since it is a PlaysForSure
™
device, you have a wide choice of music and video content available on the Internet.
For more information about the PlaysForSure
™
program, see
www.playsforsure.com
.
This manual will explain, in detail, the functionality of your device. We have packed this product with many
functions and capabilities. The better you know how to use it, the more enjoyment you will get from it. Remember,
with the AV 500, you can…
• Play MPEG-4 SP & WMV video
fi
les* on the built-in screen, a television or video projector
• Record and edit MPEG-4 video
fi
les from a television or other video device
• Listen to MP3, WMA, or WAV music
fi
les* or PlaysForSure
™
downloaded music
fi
les
• Record music
fi
les into digital format directly from your home stereo without a computer
• Synchronize your Windows
®
Media Player music and video library to your AV 500
• View JPEG and BMP digital photos and create slide shows
• Copy Pictures directly from your digital camera via the built in host USB port
• Store .DOC, .PDF, or any type of data
fi
le – it’s a portable hard drive too!